


通道可以形象地比喻爲銀行出納窗口使用的氣動導管。您的薪水支票就是您要傳送的信息,載體(Carrier)就好比一個緩衝區。您先填充緩衝區(將您的支票放到載體上),接着將緩衝“寫”到通道中(將載體丟進導管中),然後信息負載就被傳遞到通道另一側的 I/O 服務(銀行出納員)。該過程的迴應是:出納員填充緩衝區(將您的收據放到載體上),接着開始一個反方向的通道傳輸(將載體丟回到導管中)。載體就到了通道的您這一側(一個填滿了的緩衝區正等待您的查驗),然後您就會 flip緩衝區(打開蓋子)並將它清空(移除您的收據)。現在您可以開車走了,下一個對象(銀行客戶)將使用同樣的載體(Buffer)和導管(Channel)對象來重複上述過程。
從 Channel 接口引申出的其他接口都是面向字節的子接口,包括 Writable ByteChannel和ReadableByteChannel,並且通道只能在字節緩衝區上操作,操作系統都是以字節的形式實現底層I/O接口的。
打開通道
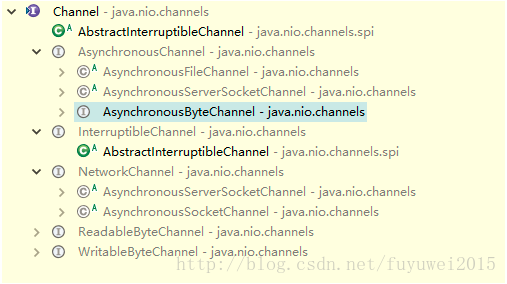
I/O可以分爲廣義的兩大類別:File I/O 和 Stream I/O。那麼相應地有兩種類型的通道也就不足爲怪了,它們是文件(file)通道和套接字(socket)通道,如下圖所示
通道可以以多種方式創建。Socket通道有可以直接創建新socket通道的工廠方法。但是一個FileChannel 對象卻只能通過在一個打開的 RandomAccessFile、FileInputStream 或 FileOutputStream對象上調用 getChannel( )方法來獲取。您不能直接創建一個 FileChannel 對象。
三種打開通道方式代碼如下:
/**
     * 演示打開通道的三種方式
     * fuyuwei
     * 2017年6月22日 下午9:38:00
     */
    public void openSocket(){
        try {
            // 1、打開一個套接字通道
            SocketChannel sc = SocketChannel.open();
            // 根據主機名和端口號創建套接字地址
            InetSocketAddress socketAddress = new InetSocketAddress("192.168.1.102",8080);
            // 連接套接字
            sc.connect(socketAddress);

            // 2、打開一個server-socket通道
            ServerSocketChannel ssc = ServerSocketChannel.open();
            ssc.socket().bind(new InetSocketAddress(8080));

            // 3、打開一個datagram通道
            DatagramChannel dc = DatagramChannel.open();
            RandomAccessFile raf = new RandomAccessFile("/usr/local/swk/dump.txt", "r");
            FileChannel fc = raf.getChannel();

        } catch (IOException e) {
            e.printStackTrace();
        }

    }
使用通道
通道將數據傳輸給 ByteBuffer 對象或者從 ByteBuffer 對象獲取數據進行傳輸
通道可以是單向( unidirectional)或者雙向的( bidirectional)。一個 channel 類可能實現定義read( )方法的 ReadableByteChannel 接口,而另一個 channel 類也許實現 WritableByteChannel 接口以提供 write( )方法。實現這兩種接口其中之一的類都是單向的,只能在一個方向上傳輸數據。如果一個類同時實現這兩個接口,那麼它是雙向的,可以雙向傳輸數據。
我們知道,一個文件可以在不同的時候以不同的權限打開。從 FileInputStream 對象的getChannel( )方法獲取的 FileChannel 對象是隻讀的,不過從接口聲明的角度來看卻是雙向的,因爲FileChannel 實現 ByteChannel 接口。在這樣一個通道上調用 write( )方法將拋出未經檢查的NonWritableChannelException 異常,因爲 FileInputStream 對象總是以 read-only 的權限打開文件。
通道會連接一個特定 I/O 服務且通道實例( channel instance)的性能受它所連接的 I/O 服務的特徵限制,記住這很重要。一個連接到只讀文件的 Channel 實例不能進行寫操作,即使該實例所屬的類可能有 write( )方法。
ByteChannel 的 read( ) 和 write( )方法使用 ByteBuffer 對象作爲參數。兩種方法均返回已傳輸的字節數,可能比緩衝區的字節數少甚至可能爲零。緩衝區的位置也會發生與已傳輸字節相同數量的前移。如果只進行了部分傳輸,緩衝區可以被重新提交給通道並從上次中斷的地方繼續傳輸。該過程重複進行直到緩衝區的 hasRemaining( )方法返回 false 值。如下代碼我們演示如何從一個通道複製數據到另一個通道。
public void copyChannel(){
        ReadableByteChannel source = Channels.newChannel(System.in);
        WritableByteChannel dest = Channels.newChannel(System.out);
        channelCopy1(source,dest);
        try {
            source.close();
            dest.close();
        } catch (IOException e) {
            e.printStackTrace();
        }

    }

    private void channelCopy1(ReadableByteChannel src,
            WritableByteChannel dest) {
        // 分配一個新的直接字節緩衝區
        ByteBuffer buffer = ByteBuffer.allocateDirect(16*1024);
        try {
            while(src.read(buffer) != -1){
                // 讀轉變成寫模式
                buffer.flip();
                dest.write(buffer);
                buffer.compact();
            }
            // 確保緩衝區完全排幹
            while (buffer.hasRemaining( )) {
                dest.write (buffer);
            }
        } catch (IOException e) {
            e.printStackTrace();
        }
    }

    public void channelCopy2(ReadableByteChannel src,
            WritableByteChannel dest) {
        ByteBuffer buffer = ByteBuffer.allocateDirect (16 * 1024);
        try {
            while (src.read(buffer) != -1) {
                // Prepare the buffer to be drained
                buffer.flip();
                // Make sure that the buffer was fully drained
                while (buffer.hasRemaining()) {
                    dest.write(buffer);
                }
                // Make the buffer empty, ready for filling
                buffer.clear();
            }
        } catch (IOException e) {
            e.printStackTrace();
        }
    }
通道可以以阻塞( blocking)或非阻塞( nonblocking)模式運行。非阻塞模式的通道永遠不會讓調用的線程休眠。請求的操作要麼立即完成,要麼返回一個結果表明未進行任何操作。只有面向流的( stream-oriented)的通道,如 sockets 和 pipes 才能使用非阻塞模式。
關閉通道
與緩衝區不同,通道不能被重複使用。一個打開的通道即代表與一個特定 I/O 服務的特定連接並封裝該連接的狀態。當通道關閉時,那個連接會丟失,然後通道將不再連接任何東西。
調用通道的close( )方法時,可能會導致在通道關閉底層I/O服務的過程中線程暫時阻塞 7,哪怕該通道處於非阻塞模式。通道關閉時的阻塞行爲(如果有的話)是高度取決於操作系統或者文件系統的。在一個通道上多次調用close( )方法是沒有壞處的,但是如果第一個線程在close( )方法中阻塞,那麼在它完成關閉通道之前,任何其他調用close( )方法都會阻塞。後續在該已關閉的通道上調用close( )不會產生任何操作,只會立即返回。
可以通過 isOpen( )方法來測試通道的開放狀態。如果返回 true 值,那麼該通道可以使用。如果返回 false 值,那麼該通道已關閉,不能再被使用。嘗試進行任何需要通道處於開放狀態作爲前提的操作,如讀、寫等都會導致 ClosedChannelException 異常。
如果一個通道實現 InterruptibleChannel 接口它的行爲以下述語義爲準:如果一個線程在一個通道上被阻塞並且同時被中斷,那麼該通道將被關閉,該被阻塞線程也會產生一個 ClosedByInterruptException 異常。此外,假如一個線程的 interrupt status 被設置並且該線程試圖訪問一個通道,那麼這個通道將立即被關閉,同時將拋出相同的 ClosedByInterruptException 異常。線程的 interrupt status 在線程的interrupt( )方法被調用時會被設置。我們可以使用 isInterrupted( )來測試某個線程當前的 interruptstatus。當前線程的 interrupt status 可以通過調用靜態的 Thread.interrupted( )方法清除。
Scatter/Gather(分散/收集)
scatter:對於 read 操作而言,從通道讀取的數據會按順序被散佈(稱爲 scatter)到多個緩衝區,將每個緩衝區填滿直至通道中的數63據或者緩衝區的最大空間被消耗完。
gather:對於一個 write 操作而言,數據是從幾個緩衝區按順序抽取(稱爲 gather)並沿着通道發送的。緩衝區本身並不需要具備這種 gather 的能力(通常它們也沒有此能力)。該 gather 過程的效果就好比全部緩衝區的內容被連結起來,並在發送數據前存放到一個大的緩衝區中。
scatter / gather經常用於需要將傳輸的數據分開處理的場合,例如傳輸一個由消息頭和消息體組成的消息,你可能會將消息體和消息頭分散到不同的buffer中,這樣你可以方便的處理消息頭和消息體。
gather代碼例如:
ByteBuffer header = ByteBuffer.allocateDirect (10);
ByteBuffer body = ByteBuffer.allocateDirect (80);
ByteBuffer [] buffers = { header, body };
int bytesRead = channel.read (buffers);
scatter代碼例如:
ByteBuffer header = ByteBuffer.allocate(128);
ByteBuffer body = ByteBuffer.allocate(1024);
//write data into buffers
ByteBuffer[] bufferArray = {header, body};
channel.write(bufferArray);
使用得當的話, Scatter/Gather 會是一個極其強大的工具。它允許您委託操作系統來完成辛苦活:將讀取到的數據分開存放到多個存儲桶( bucket)或者將不同的數據區塊合併成一個整體。這是一個巨大的成就,因爲操作系統已經被高度優化來完成此類工作了。它節省了您來回移動數據的工作,也就避免了緩衝區拷貝和減少了您需要編寫、調試的代碼數量。既然您基本上通過提供數據容器引用來組合數據,那麼按照不同的組合構建多個緩衝區陣列引用,各種數據區塊就可以以不同的方式來組合了
文件通道
FileChannel 類可以實現常用的 read, write 以及 scatter/gather 操作,同時它也提供了很多專用於文件的新方法。
FileChannel對象不能直接創建。一個FileChannel實例只能通過在一個打開的file對象( RandomAccessFile、 FileInputStream或 FileOutputStream)上調用getChannel( )方法獲取。調用getChannel( )方法會返回一個連接到相同文件的FileChannel對象且該FileChannel對象具有與file對象相同的訪問權限,然後您就可以使用該通道對象來利用強大的FileChannel API了
看個例子,如下:
public static void main(String[] argv) throws Exception {
        RandomAccessFile raf = new RandomAccessFile("/usr/local/swk/dump.txt","rw");
        FileChannel fc = raf.getChannel();
        ByteBuffer bf = ByteBuffer.allocate(4);
        int byteReads = fc.read(bf);
        while(byteReads !=-1){
            // 轉爲讀模式
            bf.flip();
            while(bf.hasRemaining()){
                System.out.println(bf.getChar());
            }
            bf.clear();
            byteReads = fc.read(bf);
        }
        raf.close();
    }
FileChannel 對象是線程安全( thread-safe)的。如果有一個線程已經在執行會影響通道位置或文件大小的操作,那麼其他嘗試進行此類操作之一的線程必須等待。
文件鎖定
如果一個線程在某個文件上獲得了一個獨佔鎖,然後第二個線程利用一個單獨打開的通道來請求該文件的獨佔鎖,那麼第二個線程的請求會被批准。但如果這兩個線程運行在不同的 Java 虛擬機上,那麼第二個線程會阻塞,因爲鎖最終是由操作系統或文件系統來判優的並且幾乎總是在進程級而非線程級上判優。鎖都是與一個文件關聯的,而不是與單個的文件句柄或通道關聯。
一個 FileLock 對象創建之後即有效,直到它的 release( )方法被調用或它所關聯的通道被關閉或Java 虛擬機關閉時纔會失效,可以通過調用 isShared( )方法來測試一個鎖以判斷它是共享的還是獨佔的。
我們來看一個writer和兩個或更多的 readers 開始,我們來看下不同類型的鎖是如何交互的代碼實例
public class LockTest {

    private static final int SIZEOF_INT = 4;
    private static final int INDEX_START = 0;
    private static final int INDEX_COUNT = 10;
    private static final int INDEX_SIZE = INDEX_COUNT * SIZEOF_INT;
    private ByteBuffer buffer = ByteBuffer.allocate (INDEX_SIZE);
    private IntBuffer indexBuffer = buffer.asIntBuffer( );
    private Random rand = new Random( );
    public static void main(String[] args) throws Exception{
        boolean writer = false;
        String fileName;
        if (args.length != 2) {
            System.out.println ("Usage: [ -r | -w ] filename");
            return;
        }
        writer = args[0].equals("-w");
        fileName = args[1];
        @SuppressWarnings("resource")
        RandomAccessFile raf = new RandomAccessFile (fileName,
                (writer) ? "rw" : "r");
        FileChannel fc = raf.getChannel();
        LockTest lockTest = new LockTest();
        if (writer) {
            lockTest.doUpdates (fc);
        } else {
            lockTest.doQueries (fc);
        }
    }

    private void doQueries(FileChannel fc) throws Exception {

        while (true) {
            println("trying for shared lock...");
            FileLock lock = fc.lock(INDEX_START, INDEX_SIZE, true);
            int reps = rand.nextInt(60) + 20;
            for (int i = 0; i < reps; i++) {
                int n = rand.nextInt(INDEX_COUNT);
                int position = INDEX_START + (n * SIZEOF_INT);
                buffer.clear();
                fc.read(buffer, position);
                int value = indexBuffer.get(n);
                System.out.println("Index entry " + n + "=" + value);
                // Pretend to be doing some work
                Thread.sleep(100);
            }
            lock.release();
            println("<sleeping>");
            Thread.sleep(rand.nextInt(3000) + 500);
        }

    }

    private void doUpdates(FileChannel fc) throws Exception {
        while (true) {
            println("trying for exclusive lock...");
            FileLock lock = fc.lock(INDEX_START, INDEX_SIZE, false);
            updateIndex(fc);
            lock.release();
            System.out.println("<sleeping>");
            Thread.sleep(rand.nextInt(2000) + 500);
        }
    }

    private int idxval = 1;

    private void updateIndex(FileChannel fc) throws Exception {
        // "indexBuffer" is an int view of "buffer"
        indexBuffer.clear();
        for (int i = 0; i < INDEX_COUNT; i++) {
            idxval++;
            println("Updating index " + i + "=" + idxval);
            indexBuffer.put(idxval);
            // Pretend that this is really hard work
            Thread.sleep(500);
        }
        // leaves position and limit correct for whole buffer
        buffer.clear();
        fc.write(buffer, INDEX_START);
    }

    private int lastLineLen = 0;

    // Specialized println that repaints the current line
    private void println(String msg) {
        System.out.print("\r ");
        System.out.print(msg);
        for (int i = msg.length(); i < lastLineLen; i++) {
            System.out.print(" ");
        }
        System.out.print("\r");
        System.out.flush();
        lastLineLen = msg.length();
    }

}
socket通道
全部 socket 通道類( DatagramChannel、 SocketChannel 和ServerSocketChannel)都是由位於 java.nio.channels.spi 包中的 AbstractSelectableChannel 引申而來。這意味着我們可以用一個 Selector 對象來執行 socket 通道的有條件的選擇( readiness selection)。全部 socket 通道類在被實例化時都會創建一個對等 socket 對象。這些是我們所熟悉的來自 java.net 的類( Socket、 ServerSocket和 DatagramSocket),它們已經被更新以識別通道。對等 socket 可以通過調用 socket( )方法從一個通道上獲取。
Socket 通道可以在非阻塞模式下運行,要把一個 socket 通道置於非阻塞模式,我們要依靠所有 socket 通道類的公有超級類:SelectableChannel。下面的方法就是關於通道的阻塞模式的:
public abstract class SelectableChannel extends AbstractChannel implements Channel
{
// This is a partial API listing
public abstract void configureBlocking (boolean block)
throws IOException;
public abstract boolean isBlocking( );
public abstract Object blockingLock( );
}
socketChannel
Socket 和 SocketChannel 類封裝點對點、有序的網絡連接,類似於我們所熟知並喜愛的 TCP/IP網絡連接。 SocketChannel 扮演客戶端發起同一個監聽服務器的連接。直到連接成功,它才能收到數據並且只會從連接到的地址接收。每個 SocketChannel 對象創建時都是同一個對等的 java.net.Socket 對象串聯的。靜態的 open( )方法可以創建一個新的 SocketChannel 對象,而在新創建的 SocketChannel 上調用 socket( )方法能返回它對等的 Socket 對象;在該 Socket 上調用 getChannel( )方法則能返回最初的那個 SocketChannel。
雖然每個 SocketChannel 對象都會創建一個對等的 Socket 對象,反過來卻不成立。直接創建的 Socket 對象不會關聯 SocketChannel 對象,它們的getChannel( )方法只返回 null
新創建的 SocketChannel 雖已打開卻是未連接的。在一個未連接的 SocketChannel 對象上嘗試一個 I/O 操作會導致 NotYetConnectedException 異常。我們可以通過在通道上直接調用 connect( )方法或在通道關聯的 Socket 對象上調用 connect( )來將該 socket 通道連接。一旦一個 socket 通道被連接,它將保持連接狀態直到被關閉。您可以通過調用布爾型的 isConnected( )方法來測試某個SocketChannel 當前是否已連接。
SocketChannel socketChannel =SocketChannel.open (new InetSocketAddress ("somehost", somePort));等價於
SocketChannel socketChannel = SocketChannel.open( );
socketChannel.connect (new InetSocketAddress ("somehost", somePort));
在 SocketChannel 上並沒有一種 connect( )方法可以讓您指定超時( timeout)值,當 connect( )方法在非阻塞模式下被調用時 SocketChannel 提供併發連接:它發起對請求地址的連接並且立即返回值。如果返回值是 true,說明連接立即建立了(這可能是本地環回連接);如果連接不能立即建立, connect( )方法會返回 false 且併發地繼續連接建立過程。
當通道處於中間的連接等待( connection-pending)狀態時,您只可以調用 finishConnect( )、isConnectPending( )或 isConnected( )方法。一旦連接建立過程成功完成, isConnected( )將返回 true值
InetSocketAddress addr = new InetSocketAddress (host, port);
SocketChannel sc = SocketChannel.open( );
sc.configureBlocking (false);
sc.connect (addr);
while ( ! sc.finishConnect( )) {
doSomethingElse( );
}
doSomethingWithChannel (sc);
sc.close( );
下面我們看一個管理異步連接的可用代碼實例(建立併發連接)
package com.swk.nio;

import java.net.InetSocketAddress;
import java.nio.channels.SocketChannel;

/**
 * 建立併發連接
 *
 * @author fuyuwei 2017年6月25日 上午00:29:12
 */
public class ConnectAsync {
    public static void main(String[] argv) throws Exception {
        String host = "localhost";
        int port = 80;
        if (argv.length == 2) {
            host = argv[0];
            port = Integer.parseInt(argv[1]);
        }
        InetSocketAddress addr = new InetSocketAddress(host, port);
        SocketChannel sc = SocketChannel.open();
        sc.configureBlocking(false);
        System.out.println("initiating connection");
        sc.connect(addr);
        while (!sc.finishConnect()) {
            doSomethingUseful();
        }
        System.out.println("connection established");
        // Do something with the connected socket
        // The SocketChannel is still nonblocking
        sc.close();
    }

    private static void doSomethingUseful() {
        System.out.println("doing something useless");
    }
}
如果嘗試異步連接失敗,那麼下次調用 finishConnect( )方法會產生一個適當的經檢查的異常以指出問題的性質。通道然後就會被關閉並將不能被連接或再次使用
connect( )和 finishConnect( )方法是互相同步的,並且只要其中一個操作正在進行,任何讀或寫的方法調用都會阻塞,即使是在非阻塞模式下。如果此情形下您有疑問或不能承受一個讀或寫操作在某個通道上阻塞,請用 isConnected( )方法測試一下連接狀態。
管道
java.nio.channels 包中含有一個名爲 Pipe(管道)的類。廣義上講,管道就是一個用來在兩個實體之間單向傳輸數據的導管。Pipe 類創建一對提供環回機制的 Channel 對象。這兩個通道的遠端是連接起來的,以便任何寫在 SinkChannel 對象上的數據都能出現在 SourceChannel 對象上。
Pipe 實例是通過調用不帶參數的 Pipe.open( )工廠方法來創建的。 Pipe 類定義了兩個嵌套的通道類來實現管路。這兩個類是 Pipe.SourceChannel(管道負責讀的一端)和Pipe.SinkChannel(管道負責寫的一端)。這兩個通道實例是在 Pipe 對象創建的同時被創建的,可以通過在 Pipe 對象上分別調用 source( )和 sink( )方法來取回。管道可以被用來僅在同一個 Java 虛擬機內部傳輸數據。雖然有更加有效率的方式來在線程之間傳輸數據,但是使用管道的好處在於封裝性。生產者線程和用戶線程都能被寫道通用的 ChannelAPI 中。根據給定的通道類型,相同的代碼可以被用來寫數據到一個文件、 socket 或管道。選擇器可以被用來檢查管道上的數據可用性,如同在 socket 通道上使用那樣地簡單。這樣就可以允許單個用戶線程使用一個 Selector 來從多個通道有效地收集數據,並可任意結合網絡連接或本地工作線程使用。因此,這些對於可伸縮性、冗餘度以及可複用性來說無疑都是意義重大的。
下面看個管道的代碼實例
package com.swk.nio;

import java.nio.ByteBuffer;
import java.nio.channels.Channels;
import java.nio.channels.Pipe;
import java.nio.channels.ReadableByteChannel;
import java.nio.channels.WritableByteChannel;
import java.util.Random;

/**
 * 工作線程對一個管道進行寫操作
 *
 * @author fuyuwei 2017年6月25日 上午12:41:52
 */
public class PipeTest {

    public static void main(String[] argv) throws Exception {
        // Wrap a channel around stdout
        WritableByteChannel out = Channels.newChannel(System.out);
        // Start worker and get read end of channel
        ReadableByteChannel workerChannel = startWorker(10);
        ByteBuffer buffer = ByteBuffer.allocate(100);
        while (workerChannel.read(buffer) >= 0) {
            buffer.flip();
            out.write(buffer);
            buffer.clear();
        }
    }

    // This method could return a SocketChannel or
    // FileChannel instance just as easily
    private static ReadableByteChannel startWorker(int reps) throws Exception {
        Pipe pipe = Pipe.open();
        Worker worker = new Worker(pipe.sink(), reps);
        worker.start();
        return (pipe.source());
    }

    // -----------------------------------------------------------------
    /**
     * A worker thread object which writes data down a channel. Note: this
     * object knows nothing about Pipe, uses only a generic WritableByteChannel.
     */
    private static class Worker extends Thread {
        WritableByteChannel channel;
        private int reps;

        Worker(WritableByteChannel channel, int reps) {
            this.channel = channel;
            this.reps = reps;
        }

        // Thread execution begins here
        public void run() {
            ByteBuffer buffer = ByteBuffer.allocate(100);
            try {
                for (int i = 0; i < this.reps; i++) {
                    doSomeWork(buffer);
                    // channel may not take it all at once
                    while (channel.write(buffer) > 0) {
                        // empty
                    }
                }
                this.channel.close();
            } catch (Exception e) {
                // easy way out; this is demo code
                e.printStackTrace();
            }
        }

        private String[] products = { "No good deed goes unpunished",
                "To be, or what?", "No matter where you go, there you are",
                "Just say \"Yo\"", "My karma ran over my dogma" };
        private Random rand = new Random();

        private void doSomeWork(ByteBuffer buffer) {
            int product = rand.nextInt(products.length);
            buffer.clear();
            buffer.put(products[product].getBytes());
            buffer.put("\r\n".getBytes());
            buffer.flip();
        }
    }
}