


一、簡介
iBase4J是一個分佈式系統架構,每個模塊都是一個單獨的系統,每個系統可以發佈多個service,不同的web間使用相同的redis緩存保證session相同、碼雲地址爲:https://gitee.com/iBase4J/iBase4J
目前項目下有8個子項目:iBase4J-Common、iBase4J-SYS-Facade、iBase4J-SYS-Service、iBase4J-SYS-Web、iBase4J-Biz-Facade、iBase4J-Biz-Service、iBase4J-Biz-Web、iBase4J-UI
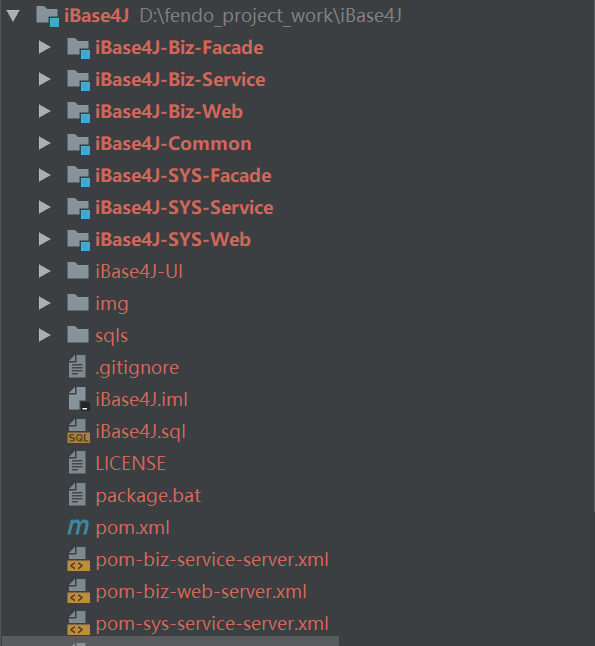
1、iBase4J-Common是通用配置和工具類,已打成jar包;
2、iBase4J-SYS-Facade是iBase4J-SYS-Service和iBase4J-SYS-Web交互需要的façade和model;iBase4J-SYS-Service是系統管理相關的數據庫操作服務;
3、iBase4J-SYS-Web是連接UI和iBase4J-SYS-Service的橋樑。
4、iBase4J-SYS-Web和iBase4J-SYS-Service之間通過dubbo或MQ交互。Web和Service可以創建多個,Web使用相同的spring-session命名空間並註冊到相同的redis服務實現session共享,Web通過使用不同的參數調用統一的provider.excute方法實現調用不同的service方法。
5、UI是前後端分離的,需要使用nginx反向代理。通過ajax異步請求獲取數據;
多系統 通過不同前綴 分發到不同web;
6、iBase4J-SYS-Service使用Druid連接數據庫,可以監控sql執行情況,訪問地址:service地址:service端口/druid;
使用AOP實現讀寫數據庫切換,使用Mybatis持久化框架,使用PageHelper輔助分頁,使用spring註解把數據緩存到redis;iBase4J-SYS-Web使用Spring MVC框架管理控制器;使用Shiro輔助管理權限,權限嚴格控制到給個URL請求。
調度管理,在這裏只有調度的聲明,可以刪除、修改、暫停、啓動、執行。調度的實現可以在別的任意模塊,只需用dubbo暴露服務即可。調度支持集羣模式。
7、UI目前計劃有3個版本,已開發的只有angularJS版
不同UI的菜單不同,所以請根據需要執行對應的SQL菜單;
8、iBase4J-Biz-Facade、iBase4J-Biz-Service、iBase4J-Biz-Web爲擴展業務功能項目。
9、SQL文件見項目中sqls目錄;
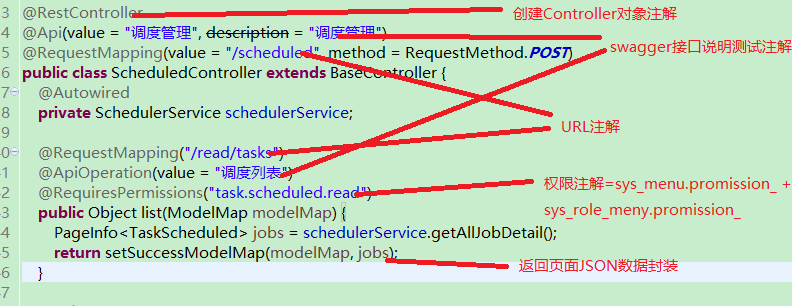
10、權限控制:
1)菜單權限:可以直接配置用戶菜單,也可以通過配置角色配用戶菜單;sys_user_role配置用戶角色,sys_role_menu配置角色菜單/權限;操作類權限(增刪改等)配置爲不顯示的菜單;
2)代碼中權限的控制,如圖
二、環境搭建
2.1、基本工具
有一鍵啓動腳本,下載地址爲:http://download.csdn.net/download/u011781521/10198544
解壓之後如下

修改其中的nginx配置文件nginx.conf

內容如下:
- #user nobody;
- worker_processes 1;
- #error_log logs/error.log;
- #error_log logs/error.log notice;
- #error_log logs/error.log info;
- #pid logs/nginx.pid;
- events {
- worker_connections 1024;
- }
- http {
- include mime.types;
- default_type application/octet-stream;
- #log_format main '$remote_addr - $remote_user [$time_local] "$request" '
- # '$status $body_bytes_sent "$http_referer" '
- # '"$http_user_agent" "$http_x_forwarded_for"';
- #access_log logs/access.log main;
- sendfile on;
- #tcp_nopush on;
- #keepalive_timeout 0;
- keepalive_timeout 65;
- #gzip on;
- server {
- listen 80;
- server_name localhost;
- #charset koi8-r;
- #access_log logs/host.access.log main;
- # 靜態頁面目錄
- root D:\fendo_project_work\iBase4J\iBase4J-UI\iBase4J-UI-AngularJS;
- # 默認首頁
- index index.html;
- location / {
- # 用戶瀏覽器端的緩存設置
- location ~* \.(css|js|jpg|jpeg|gif|png|swf|htm|html|json|xml|svg|woff|ttf|eot|map|ico)$ {
- expires 1h;
- if (-f $request_filename) {
- break;
- }
- }
- # 動態頁面,交給tomcat處理
- if ( !-e $request_filename) {
- proxy_pass http://127.0.0.1:8088;
- }
- }
- #error_page 404 /404.html;
- # redirect server error pages to the static page /50x.html
- #
- error_page 500 502 503 504 /50x.html;
- location = /50x.html {
- root html;
- }
- # proxy the PHP scripts to Apache listening on 127.0.0.1:80
- #
- #location ~ \.php$ {
- # proxy_pass http://127.0.0.1;
- #}
- # pass the PHP scripts to FastCGI server listening on 127.0.0.1:9000
- #
- #location ~ \.php$ {
- # root html;
- # fastcgi_pass 127.0.0.1:9000;
- # fastcgi_index index.php;
- # fastcgi_param SCRIPT_FILENAME /scripts$fastcgi_script_name;
- # include fastcgi_params;
- #}
- # deny access to .htaccess files, if Apache's document root
- # concurs with nginx's one
- #
- #location ~ /\.ht {
- # deny all;
- #}
- }
- # another virtual host using mix of IP-, name-, and port-based configuration
- #
- #server {
- # listen 8000;
- # listen somename:8080;
- # server_name somename alias another.alias;
- # location / {
- # root html;
- # index index.html index.htm;
- # }
- #}
- # HTTPS server
- #
- #server {
- # listen 443 ssl;
- # server_name localhost;
- # ssl_certificate cert.pem;
- # ssl_certificate_key cert.key;
- # ssl_session_cache shared:SSL:1m;
- # ssl_session_timeout 5m;
- # ssl_ciphers HIGH:!aNULL:!MD5;
- # ssl_prefer_server_ciphers on;
- # location / {
- # root html;
- # index index.html index.htm;
- # }
- #}
- }
修改之後直接運行run.bat就行了。
2.2、初始化數據庫
在Navicat Premium下新建數據庫ibase4j

然後導入SQL腳本

導入成功之後,有如下一些表:

2.3、修改service層項目下的jdbc.properties
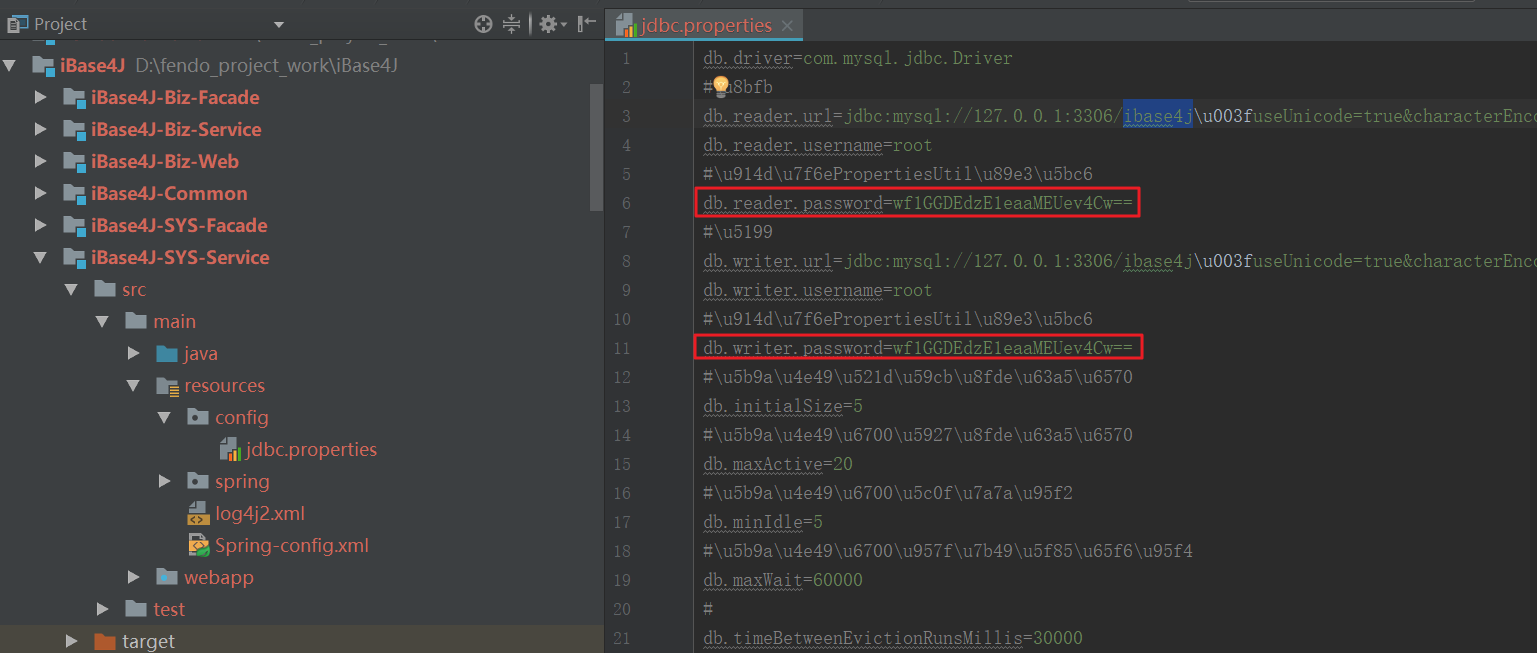
如果想修改連接密碼,可在PropertiesUtil類中的main方法中測試:
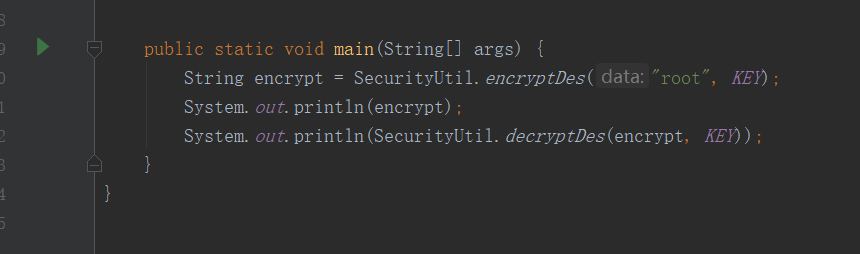
加密方法:
- SecurityUtil.encryptDes(“密碼”, ${db.key}.getBytes());
db.key 或 druid.key在jdbc.properties中配置;
三、運行項目
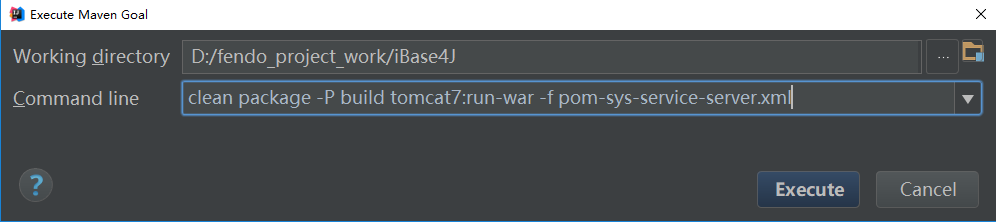
在IDEA的Maven視圖中選中iBase4j項目然後,執行以下命令:
1)運行命令啓動sys-service項目:
- clean package -P build tomcat7:run-war -f pom-sys-service-server.xml

2) 運行命令啓動web項目命令:
- clean package -P build tomcat7:run-war -f pom-sys-web-server.xml
3)maven打包命令:
- mvn clean package -f pom-sys-service-server.xml
- mvn clean package -f pom-sys-web-server.xml
4)然後訪問首頁:http://localhost/index.html 用戶名密碼:admin/111111
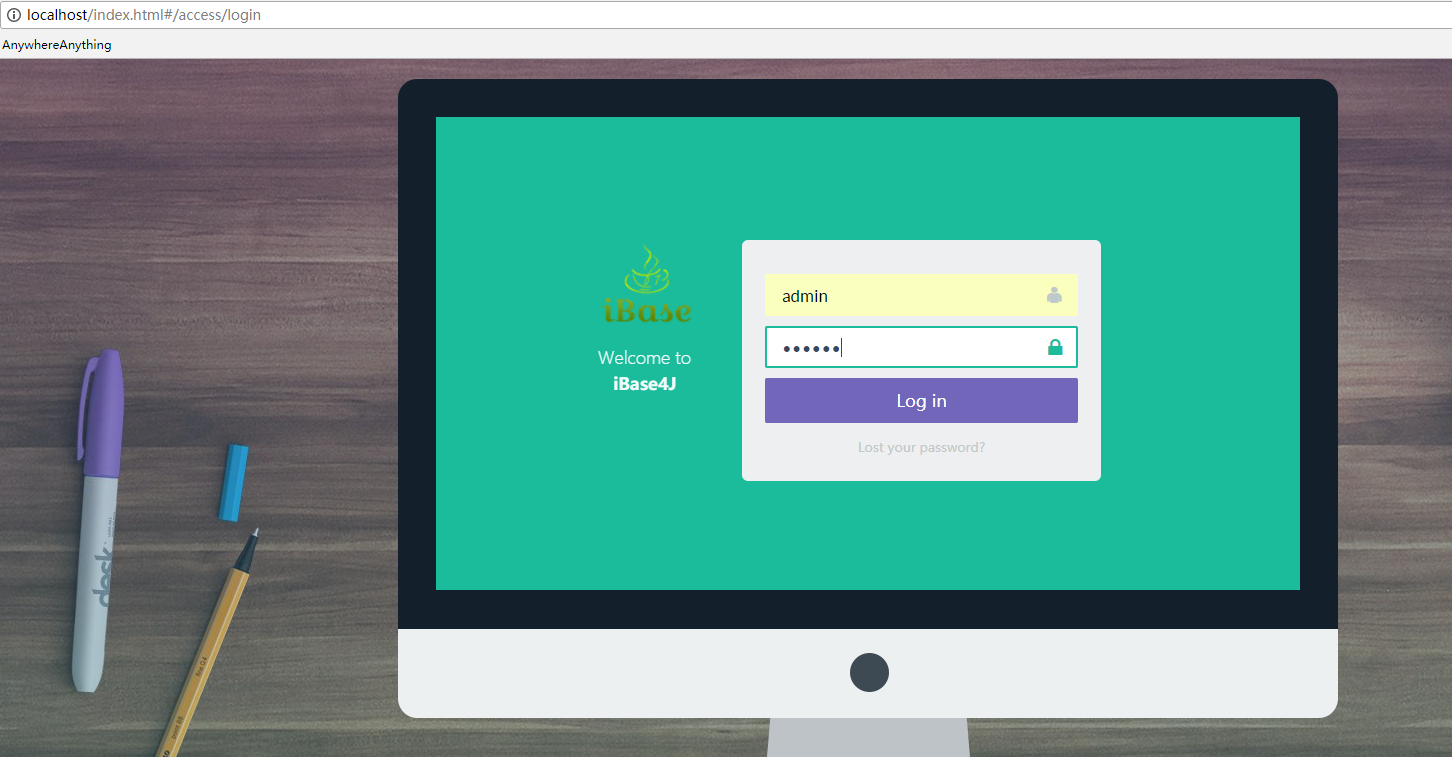
登錄成功如下:
5)訪問localhost:8088/swagger-ui.html查看Restful接口:

6)訪問durid查看SQL執行情況(用戶密碼:druid/druid):
sys-service: http://localhost:8085/druid
