


iOS9 3D Touch 標籤菜單 peek and pop force 壓力觸控 功能開發高級版教程
github地址: https://github.com/wyk125/3DTouchDemo.git 覺得不錯,記得Start哦,謝過!
前言
技術的本身並不是難點,而是怎樣優雅地把這些 技術平滑的融入到我們的app,我們的工作,我們的生活,纔是學習之本,學習之道。
在Mac電腦上爲iPhone或iPad錄屏的方法 需要的請get http://www.weste.net/2015/04-07/102560.html
app啓動過程 http://blog.csdn.net/u011363981/article/details/50589880
3D Touch的主要應用
3D Touch給用戶帶來的額外維度上的交互,這個設計之所以叫做3D Touch,其原理上是增加了一個壓力的感觸,通過區分輕按和重按來進行不同的用戶交互。官方文檔給出的應用介紹主要有兩塊:
第一部分的應用是我們可以通過3D手勢,在主屏幕上的應用Icon處,直接進入應用的響應功能模塊。這個功能就例如我們上面的日曆示例,會在Icon旁邊出現一個菜單,點擊菜單我們可以進入相應的功能單元。3D Touch功能,push消息功能加上iOS8推出的擴展today功能,這三個機制使iOS應用變得無比靈活方便,用戶可以不需付出尋找的時間成本來快速使用自己需要的功能。
第二部分是對app的一個優化,用戶可以通過3D Touch手勢在view上來預覽一些預加載信息,這樣的設計可以使app更加簡潔大方,交互性也更強。
在模擬器上學習和測試3D Touch(目前這個方法不一定行的通,可以試下,後續更新)
3D Touch是一個很新穎的設計,可是蘋果文檔說,只有xcode7以上才支持3D Touch開發的,模擬器並不支持這個壓力手勢,我們只能在真機上進行學習與測試,但是在IT的世界,從來都不缺拯救世界的人物,github上有人爲我們提供了這樣的一個插件,可以讓我們在模擬器上進行3D Touch的效果測試:
git地址:https://github.com/DeskConnect/SBShortcutMenuSimulator
附.SBShortcutMenuSimulator的安裝和使用
其實安裝和使用並不需要怎麼介紹,git主頁裏介紹的很清楚,這裏在記錄一遍,其中只有一點需要注意,如果你的電腦中裝有Xcode6和Xcode7兩個版本,那個Xcode的編譯路徑,需要做一下修改。
安裝:
在終端中一次運行如下指令:
|
1
2
3
|
git clone https://github.com/DeskConnect/SBShortcutMenuSimulator.gitcd SBShortcutMenuSimulatormake |
如果電腦中有多個Xcode版本,先做如下操作,如果只有Xcode7,則可以跳過
|
1
|
sudo xcode-select -switch /Applications/Xcode2.app/Contents/Developer/ |
注意:上面命令中,Xcode2.app是你電腦中Xcode的名字,這裏如要特別注意,如果名字中有空格,需要修改一下,把空格去掉,否則會影響命令的執行。
之後在SBShortcutMenuSimulator的目錄中執行如下操作:
|
1
2
|
xcrun simctl spawn booted launchctl debug system/com.apple.SpringBoard --environment DYLD_INSERT_LIBRARIES=$PWD/SBShortcutMenuSimulator.dylibxcrun simctl spawn booted launchctl stop com.apple.SpringBoard |
如果沒有報錯,我們可以通過向指定端口發送消息的方法來在模擬器上模擬3D Touch的效果:
|
1
|
echo 'com.apple.mobilecal' | nc 127.0.0.1 8000 |
其中,com.apple.mobilecal是應用的Bundle ID ,如果要測試我們的應用,將其改爲我們應用的BundleID即可,可以看到模擬器的效果如下:
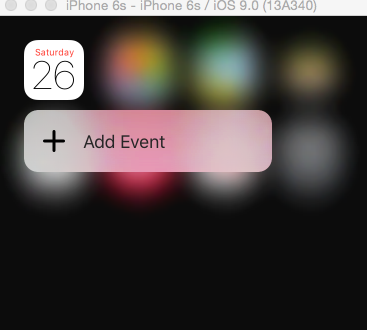
圖1
我試了幾次 卻顯示如下圖2所示,後面找到解決思路,或有更好的方法 ,我會第一時間分享。

圖 2
3D Touch的三大模塊
在我們的app中使用3D Touch功能,主要分爲以下三個模塊:
Home Screen Quick Actions
通過主屏幕的應用Icon,我們可以用3D Touch呼出一個菜單,進行快速定位應用功能模塊相關功能的開發。如圖3,圖4所示。


peek and pop
這個功能是一套全新的用戶交互機制,在使用3D Touch時,ViewController中會有如下三個交互階段:
(1)提示用戶這裏有3D Touch的交互,會使交互控件周圍模糊 如 圖5

圖 5
(2)繼續深按,會出現預覽視圖 ,圖 6

圖6
(3)通過視圖上的交互控件進行進一步交互 如 圖7

圖 7
這個模塊的設計可以在網址連接上進行網頁的預覽交互。
Force Properties
iOS9爲我們提供了一個新的交互參數:力度。我們可以檢測某一交互的力度值,來做相應的交互處理。例如,我們可以通過力度來控制快進的快慢,音量增加的快慢等。
3D Touch 的Home Screen Quick Action 使用與相關api詳解
iOS9爲我們提供了兩種屏幕標籤,分別是靜態標籤和動態標籤。兩點注意:
1、快捷標籤最多可以創建四個,包括靜態的和動態的。
2、每個標籤的題目和icon最多兩行,多出的會用...省略
靜態標籤
靜態標籤是我們在項目的配置plist文件中配置的標籤,在用戶安裝程序後就可以使用,並且排序會在動態標籤的前面。
我們先來看靜態標籤的配置:
必填項(下面兩個鍵值是必須設置的):
UIApplicationShortcutItemType 這個鍵值設置一個快捷通道類型的字符串
UIApplicationShortcutItemTitle 這個鍵值設置標籤的標題
選填項(下面這些鍵值不是必須設置的):
UIApplicationShortcutItemSubtitle 設置標籤的副標題
UIApplicationShortcutItemIconType 設置標籤Icon類型
UIApplicationShortcutItemIconFile 設置標籤的Icon文件
UIApplicationShortcutItemUserInfo 設置信息字典(用於傳值)
首先,找到項目的info.plist文件,右擊文件,再將鼠標放在 Open As 上,點擊 Source Code。
以XML格式打開 info.plist文件 ,插入以下 代碼 即可。或者你也可以直接在plist 文件中,直接鍵入key值再 設置。
靜態標籤的設置順序和顯示順序 是相反的,進棧出棧。
<array>
<span style="white-space:pre">	</span><dict>
            <key>UIApplicationShortcutItemIconType</key> <!--註釋行    -->
            <string>UIApplicationShortcutIconTypeDate</string>
            <key>UIApplicationShortcutItemIconFile</key> <!--自定義圖片文件 替代不理想的系統圖標   -->
            <string>tabbar_shoppingcart</string>    <!--圖片名稱 -->
   <span style="white-space:pre">	</span> <span style="white-space:pre">	</span><key>UIApplicationShortcutItemTitle</key>
    <span style="white-space:pre">		</span><string>購物車</string>
    <span style="white-space:pre">		</span><key>UIApplicationShortcutItemType</key>
    <span style="white-space:pre">		</span><string>YPYD.UITouchText.cart</string>
<span style="white-space:pre">	</span></dict>
<span style="white-space:pre">	</span><dict>
<span style="white-space:pre">		</span><key>UIApplicationShortcutItemIconType</key>    <!--  標籤的類型key   -->
<span style="white-space:pre">		</span><string>UIApplicationShortcutIconTypeSearch</string>  <!--  標籤的類型vale   -->
<span style="white-space:pre">		</span><key>UIApplicationShortcutItemTitle</key>    <!--  必寫標籤的標題key   -->
<span style="white-space:pre">		</span><string>搜索商品</string>                       <!--  必寫標籤的標題vale   -->
<span style="white-space:pre">		</span><key>UIApplicationShortcutItemType</key>  <!--必寫  標籤的唯一標識Key 自由定義的一個字符串-->
<span style="white-space:pre">		</span><string>YPYD.UITouchText.search</string>    <!--  必寫標籤的唯一標識vale -->
<span style="white-space:pre">	</span></dict>
<span style="white-space:pre">	</span><dict>
<span style="white-space:pre">		</span><key>UIApplicationShortcutItemIconType</key>
<span style="white-space:pre">		</span><string>UIApplicationShortcutIconTypeHome</string>
<span style="white-space:pre">		</span><key>UIApplicationShortcutItemTitle</key>
<span style="white-space:pre">		</span><string>首頁</string>
<span style="white-space:pre">		</span><key>UIApplicationShortcutItemType</key>
<span style="white-space:pre">		</span><string>YPYD.UITouchText.home</string>
<span style="white-space:pre">	</span></dict>
</array>
如果你的手機支持 3D Touch 真機運行程序,會有圖3所示的效果。
動態標籤
動態標籤是我們在程序中,通過代碼添加的,與之相關的類,主要有三個:
UIApplicationShortcutItem 創建3DTouch標籤的類
UIMutableApplicationShortcutItem 創建可變的3DTouch標籤的類
UIApplicationShortcutIcon 創建標籤中圖片Icon的類
因爲這些類是iOS9中新增加的類,所以其api的複雜程度並不大,下面我們來對其中方法與屬性進行簡要講解:
UIApplicationShortcutItem
@interface UIApplicationShortcutItem : NSObject <NSCopying, NSMutableCopying>
//下面是兩個初始化方法 通過設置type,title等屬性來創建一個標籤,這裏的icon是UIApplicationShortcutIcon對象,我們後面再說
- (instancetype)initWithType:(NSString *)type localizedTitle:(NSString *)localizedTitle localizedSubtitle:(nullableNSString *)localizedSubtitle icon:(nullableUIApplicationShortcutIcon *)icon userInfo:(nullableNSDictionary *)userInfoNS_DESIGNATED_INITIALIZER;
- (instancetype)initWithType:(NSString *)type localizedTitle:(NSString *)localizedTitle;
//下面這是一些只讀的屬性,獲取相應的屬性值
@property (nonatomic,copy,readonly)NSString *type;
@property (nonatomic,copy,readonly)NSString *localizedTitle;
@property (nullable,nonatomic,copy,readonly)NSString *localizedSubtitle;
@property (nullable,nonatomic,copy,readonly)UIApplicationShortcutIcon *icon;//系統定義的圖標
@property (nullable,nonatomic,copy,readonly)NSDictionary<NSString *,id <NSSecureCoding>> *userInfo;
UIMutableApplicationShortcutItem
//這個類繼承於 UIApplicationShortcutItem,創建的標籤可變
@interface UIMutableApplicationShortcutItem : UIApplicationShortcutItem
@property (nonatomic,copy) NSString *type;
@property (nonatomic,copy)NSString *localizedTitle;
@property (nullable,nonatomic,copy)NSString *localizedSubtitle;
@property (nullable,nonatomic,copy)UIApplicationShortcutIcon *icon;
@property (nullable,nonatomic,copy)NSDictionary<NSString *,id <NSSecureCoding>> *userInfo;
@end
UIApplicationShortcutIcon
//這個類創建標籤中的icon
@interface UIApplicationShortcutIcon : NSObject <NSCopying>
//創建系統風格的icon
+ (instancetype)iconWithType:(UIApplicationShortcutIconType)type;
//創建自定義的圖片icon
+ (instancetype)iconWithTemplateImageName:(NSString *)templateImageName;
@end
/** 創建shortcutItems */
- (void)configShortCutItems {
NSMutableArray *shortcutItems = [NSMutableArray array];
UIApplicationShortcutItem *item1 = [[UIApplicationShortcutItem alloc]initWithType:@"YPYD.UITouchText.home" localizedTitle:@"測試1" localizedSubtitle:nil icon:[UIApplicationShortcutIcon iconWithType:UIApplicationShortcutIconTypeHome] userInfo:nil];
UIApplicationShortcutItem *item2 = [[UIApplicationShortcutItem alloc]initWithType:@"YPYD.UITouchText.search" localizedTitle:@"測試2" localizedSubtitle:@"測試2副標題" icon:[UIApplicationShortcutIcon iconWithType:UIApplicationShortcutIconTypeSearch]
userInfo:nil];
[shortcutItems addObject:item2];
[shortcutItems addObject:item1];
[[UIApplication sharedApplication] setShortcutItems:shortcutItems];
}
</pre><p style="margin-top:0px; margin-bottom:0px; font-size:14px; line-height:normal; font-family:Menlo"></p><p style="color:rgb(51,51,51); font-family:Menlo; font-size:14px; margin-top:0px; margin-bottom:0px; line-height:normal"></p><div style="color:rgb(51,51,51); font-family:Verdana,sans-serif,宋體; font-size:16px"></div><p style="margin-top:0px; margin-bottom:0px; line-height:normal"><img src="https://img-blog.csdn.net/20160128105549280?watermark/2/text/aHR0cDovL2Jsb2cuY3Nkbi5uZXQv/font/5a6L5L2T/fontsize/400/fill/I0JBQkFCMA==/dissolve/70/gravity/Center" width="375" height="667" alt="" /></p><p style="color:rgb(51,51,51); font-family:Helvetica; font-size:16px; margin-top:0px; margin-bottom:0px; line-height:normal"><img src="" alt="" /></p><p style="color:rgb(51,51,51); font-family:Helvetica; font-size:16px; margin-top:0px; margin-bottom:0px; line-height:normal">圖 8 </p><p style="color:rgb(51,51,51); font-family:Helvetica; font-size:16px; margin-top:0px; margin-bottom:0px; line-height:normal"><span style="color:rgb(51,51,51); font-family:Verdana,sans-serif,宋體; font-size:16px; letter-spacing:0.5px">這裏,將系統風格icon的枚舉列舉如下:</span></p><p style="color:rgb(51,51,51); font-family:Helvetica; font-size:16px; margin-top:0px; margin-bottom:0px; line-height:normal"><span style="color:rgb(51,51,51); font-family:Verdana,sans-serif,宋體; font-size:16px; letter-spacing:0.5px"></span><pre name="code" class="objc">typedef NS_ENUM(NSInteger, UIApplicationShortcutIconType) {
    UIApplicationShortcutIconTypeCompose,
    UIApplicationShortcutIconTypePlay,
    UIApplicationShortcutIconTypePause,
    UIApplicationShortcutIconTypeAdd,
    UIApplicationShortcutIconTypeLocation,
    UIApplicationShortcutIconTypeSearch,
    UIApplicationShortcutIconTypeShare,
    UIApplicationShortcutIconTypeProhibit       NS_ENUM_AVAILABLE_IOS(9_1),
    UIApplicationShortcutIconTypeContact        NS_ENUM_AVAILABLE_IOS(9_1),
    UIApplicationShortcutIconTypeHome           NS_ENUM_AVAILABLE_IOS(9_1),
    UIApplicationShortcutIconTypeMarkLocation   NS_ENUM_AVAILABLE_IOS(9_1),
    UIApplicationShortcutIconTypeFavorite       NS_ENUM_AVAILABLE_IOS(9_1),
    UIApplicationShortcutIconTypeLove           NS_ENUM_AVAILABLE_IOS(9_1),
    UIApplicationShortcutIconTypeCloud          NS_ENUM_AVAILABLE_IOS(9_1),
    UIApplicationShortcutIconTypeInvitation     NS_ENUM_AVAILABLE_IOS(9_1),
    UIApplicationShortcutIconTypeConfirmation   NS_ENUM_AVAILABLE_IOS(9_1),
    UIApplicationShortcutIconTypeMail           NS_ENUM_AVAILABLE_IOS(9_1),
    UIApplicationShortcutIconTypeMessage        NS_ENUM_AVAILABLE_IOS(9_1),
    UIApplicationShortcutIconTypeDate           NS_ENUM_AVAILABLE_IOS(9_1),
    UIApplicationShortcutIconTypeTime           NS_ENUM_AVAILABLE_IOS(9_1),
    UIApplicationShortcutIconTypeCapturePhoto   NS_ENUM_AVAILABLE_IOS(9_1),
    UIApplicationShortcutIconTypeCaptureVideo   NS_ENUM_AVAILABLE_IOS(9_1),
    UIApplicationShortcutIconTypeTask           NS_ENUM_AVAILABLE_IOS(9_1),
    UIApplicationShortcutIconTypeTaskCompleted  NS_ENUM_AVAILABLE_IOS(9_1),
    UIApplicationShortcutIconTypeAlarm          NS_ENUM_AVAILABLE_IOS(9_1),
    UIApplicationShortcutIconTypeBookmark       NS_ENUM_AVAILABLE_IOS(9_1),
    UIApplicationShortcutIconTypeShuffle        NS_ENUM_AVAILABLE_IOS(9_1),
    UIApplicationShortcutIconTypeAudio          NS_ENUM_AVAILABLE_IOS(9_1),
    UIApplicationShortcutIconTypeUpdate         NS_ENUM_AVAILABLE_IOS(9_1)
}
如果上述系統默認圖標沒你想要的 ,你還可以調用這個方法 手動 自定義圖標。
+ (instancetype)iconWithTemplateImageName:(NSString *)templateImageName;
如果上述系統默認圖標沒你想要的 ,你還可以調用這個方法 手動 自定義圖標。
響應標籤的行爲
類似推送,當我們點擊標籤進入應用程序時,也可以進行一些操作,我們可以看到,在applocation中增加了這樣一個方法:
- (void)application:(UIApplication *)application performActionForShortcutItem:(UIApplicationShortcutItem *)shortcutItem completionHandler:(void(^)(BOOL succeeded))completionHandler NS_AVAILABLE_IOS(9_0);
當我們通過標籤進入app時,就會在appdelegate中調用這樣一個回調,我們可以獲取shortcutItem的信息進行相關邏輯操作。
這裏有一點需要注意:我們在app的入口函數:
- (BOOL)application:(UIApplication *)application didFinishLaunchingWithOptions:(NSDictionary *)launchOptions;也需要進行一下判斷,在launchOptions中有UIApplicationLaunchOptionsShortcutItemKey這樣一個鍵,通過它,我們可以區別是否是從標籤進入的app,如果是則處理結束邏輯後,返回NO,防止處理邏輯被反覆回調。
實現3D Touch 標籤 跳轉的參考方法
因爲app的啓動會首先加載
- (BOOL)application:(UIApplication *)application didFinishLaunchingWithOptions:(nullableNSDictionary *)launchOptions ;
即爲app啓動,並已存在self.window 和 UITabBarController 視圖控制器,因此,你可以通過 通知的方式來實現
performActionForShortcutItem 的 相關 跳轉顯示。
// iOS9 的 3D Touch 響應通知
- (void)application:(UIApplication *)application performActionForShortcutItem:(UIApplicationShortcutItem *)shortcutItem completionHandler:(void(^)(BOOL succeeded))completionHandler
{
    if ([[[UIDevice currentDevice] systemVersion] floatValue] >= 9.0 &&self.window.traitCollection.forceTouchCapability == UIForceTouchCapabilityAvailable)
    {
        YPYDLog(@"你的手機支持3D Touch!");
        YPYDNetCountManager * sharedNetCountManager = [YPYDNetCountManager sharedNetCountManager];
        sharedNetCountManager.applicationShortcutItemTitle = shortcutItem.type;


        //首頁
        if([shortcutItem.type isEqualToString:@"YPYD.UITouchText.home"])
        {
            [[NSNotificationCenter defaultCenter] postNotificationName:@"YPYD.UITouchText.home" object:nil userInfo:nil];
        }
        //搜索商品
        if([shortcutItem.type isEqualToString:@"YPYD.UITouchText.search"])
        {
            [[NSNotificationCenter defaultCenter] postNotificationName:@"YPYD.UITouchText.search" object:nil userInfo:nil];
        }
        //購物車
        if([shortcutItem.type isEqualToString:@"YPYD.UITouchText.cart"])
        {
            [[NSNotificationCenter defaultCenter] postNotificationName:@"YPYD.UITouchText.cart" object:nil userInfo:nil];
        }
        //我的U
        if([shortcutItem.type isEqualToString:@"YPYD.UITouchText.myU"])
        {
            [[NSNotificationCenter defaultCenter] postNotificationName:@"YPYD.UITouchText.home" object:nil userInfo:nil];
        }
    }
    else
    {
        YPYDLog(@"你的手機暫不支持3D Touch!");
    }
}
// 3D Touch 具體通知響應
- (void)applicationShortcutItemResponse
{
    YPYDNetCountManager * sharedNetCountManager = [YPYDNetCountManagersharedNetCountManager];
    // 配合系統 判斷是否已經完成登錄方法 主要用於,app處於關閉狀態時,先登錄賬號,再進入相關功能頁面
    //    YPYDLog(@"netGoodsListCount  %d", sharedNetCountManager.hadAutoLogin);
    //    if (!sharedNetCountManager.hadAutoLogin)
    //    {
    //        return;
    //    }
    //    else

    //首頁
    if([ sharedNetCountManager.applicationShortcutItemTitleisEqualToString:@"YPYD.UITouchText.home"])
    {
        self.selectedIndex =0;
        [[NSNotificationCenterdefaultCenter]postNotificationName:@"UITouchText.home"object:niluserInfo:nil];
    }
    //搜索商品
    if([ sharedNetCountManager.applicationShortcutItemTitleisEqualToString:@"YPYD.UITouchText.search"])
    {
        self.selectedIndex =0;

        YPYDSearchController * searchController = [[YPYDSearchControlleralloc]init];
        searchController.navigationItem.title =@"搜索";
        YPYDLog(@"self.selectedViewController  %@",self.selectedViewController.childViewControllers[0]);
        [self.selectedViewController.childViewControllers[0].navigationControllerpushViewController:searchControlleranimated:YES];
    }
    //購物車
    if([ sharedNetCountManager.applicationShortcutItemTitleisEqualToString:@"YPYD.UITouchText.cart"])
    {
        self.selectedIndex =2;
    }
    //我的 U
    if([ sharedNetCountManager.applicationShortcutItemTitleisEqualToString:@"YPYD.UITouchText.myU"])
    {
        self.selectedIndex =3;
    }
}
3D Touch 的 peek and pop 使用與相關api詳解
根據蘋果的介紹,Peek手勢允許用戶通過短時間按壓屏幕進行操作,可在郵件、照片等應用彈出全新功能菜單,給出預覽內容。如果按壓力度加大,則是Pop手勢功能,會讓被點擊內容完全呈現,這些內容可以是文字、圖像、網頁以及其他各種內容。簡單來說,Peek專注於預覽,Pop可以全面展現內容。如 圖9 圖 10。


實現peek and pop步驟
1、遵守協議 UIViewControllerPreviewingDelegate
@interface YPYDHomeViewController ()
<UITableViewDelegate,UITableViewDataSource,UIViewControllerPreviewingDelegate>2、註冊Peek和Pop方法
[self registerForPreviewingWithDelegate:self sourceView:self.view];3、實現代理方法
#pragma mark peek && pop 代理方法輕按進入浮動預覽頁面
/** peek手勢 */
- (nullable UIViewController *)previewingContext:(id <UIViewControllerPreviewing>)previewingContext viewControllerForLocation:(CGPoint)location
{
    YPYDPOPTestViewController1 *childVC = [[YPYDPOPTestViewController1alloc]init];
    // 獲取用戶手勢點所在cell的下標。同時判斷手勢點是否超出tableView響應範圍。
    if (![selfgetShouldShowRectAndIndexPathWithLocation:location])
        return nil;
    previewingContext.sourceRect = self.sourceRect;

    // 加個白色背景
    UIView *bgView =[[UIViewalloc]initWithFrame:CGRectMake(20,10,ScreenWidth -40,ScreenHeight -20 -64 *2)];
    bgView.backgroundColor = [UIColorwhiteColor];
    bgView.layer.cornerRadius =10;
    bgView.clipsToBounds = YES;
    [childVC.view addSubview:bgView];

    // 加個lable
    UILabel *lable = [[UILabelalloc]initWithFrame:bgView.bounds];
    lable.textAlignment =NSTextAlignmentCenter;
    lable.numberOfLines = 3;
    lable.text =[NSStringstringWithFormat:@"按着的是 %@\n用力,再按重一點...",self.items[self.indexPath.row]];
    [bgView addSubview:lable];

    return childVC;
}
/** 獲取用戶手勢點所在cell的下標。同時判斷手勢點是否超出tableView響應範圍。*/
#pragma mark  比較巧妙 準確的 獲取高亮區域的方法
/** 獲取用戶手勢點所在cell的下標。同時判斷手勢點是否超出tableView響應範圍。*/
- (BOOL)getShouldShowRectAndIndexPathWithLocation:(CGPoint)location
{
    YPYDLog(@"%f",location.y);
    // 根據手指按壓的區域,結合 tableView 的 Y 偏移量(上下)
    location.y = self.homeTableView.contentOffset.y+location.y;
    //定位到當前,按壓的區域處於哪個 cell  獲得 cell 的indexPath
    self.indexPath = [self.homeTableView indexPathForRowAtPoint:location];
    // 根據cell 的indexPath 取出 cell
    UITableViewCell * cell = [self.homeTableView cellForRowAtIndexPath:self.indexPath];
//    cell.backgroundColor = [UIColor redColor];
    // 根據 獲得cell ,確定高亮的區域,記得 高亮區域是相對於屏幕  位置來算,記得減去 tableView 的 Y偏移量
    self.sourceRect = CGRectMake(cell.frame.origin.x, cell.frame.origin.y-self.homeTableView.contentOffset.y, cell.frame.size.width,cell.frame.size.height);
    // 如果row越界了,返回NO 不處理peek手勢
    return (self.indexPath.row >= self.items.count &&self.indexPath.row<0) ? NO : YES;
}
/** pop手勢 */
- (void)previewingContext:(id <UIViewControllerPreviewing>)previewingContext commitViewController:(UIViewController *)viewControllerToCommit
{
    [selftableView:self.homeTableViewdidSelectRowAtIndexPath:self.indexPath];
}
- (void)tableView:(UITableView *)tableView didSelectRowAtIndexPath:(NSIndexPath *)indexPath
{
    YPYDPOPTestViewController1 * testVC = [[YPYDPOPTestViewController1alloc]init];
    [self.navigationControllerpushViewController:testVCanimated:YES];
}
完成後,即可實現圖9、圖10的效果。
預覽時上滑底部菜單的添加
在我們剛剛創建的預覽控制器YPYDPOPTestViewController1裏實現
如 圖 11。
//遵守協議
@interface YPYDPOPTestViewController1 ()<UIViewControllerPreviewingDelegate>//預覽頁面 底部Action Items
- (NSArray<id<UIPreviewActionItem>> *)previewActionItems
{
    UIPreviewAction *p1 =[UIPreviewActionactionWithTitle:@"分享"style:UIPreviewActionStyleDefaulthandler:^(UIPreviewAction *_Nonnull action, UIViewController *_Nonnull previewViewController) {       NSLog(@"點擊了分享");    }];
    UIPreviewAction *p2 =[UIPreviewActionactionWithTitle:@"收藏"style:UIPreviewActionStyleDefaulthandler:^(UIPreviewAction *_Nonnull action, UIViewController *_Nonnull previewViewController) {       NSLog(@"點擊了收藏");    }];
    NSArray *actions = @[p1,p2];
    return actions;
}
圖 11
3D Touch 的Force Properties 使用與相關api詳解
在iOS 9中,UITouch類支持3D觸摸應用程序定製實現了兩個新的屬性:force 和 maximumpossibleforce 。
// Force of the touch, where 1.0 represents the force of an average touch
@property(nonatomic,readonly) CGFloat force NS_AVAILABLE_IOS(9_0);
// Maximum possible force with this input mechanism
@property(nonatomic,readonly) CGFloat maximumPossibleForce NS_AVAILABLE_IOS(9_0);#pragma mark 獲取壓力的大小非常簡單,我們可以通過UITouch類中的一些屬性來完成。我們只需要在ToucheMoved的事件中捕獲這些信息,請注意,不用判斷 x,y 值變化
//我這裏 只做了一個簡單的 壓力感應示例,如需更復雜的效果,可以自行編制。
- (void)touchesMoved:(NSSet<UITouch *> *)touches withEvent:(UIEvent *)event
{
//宣告一個UITouch的指標來存放事件觸發時所擷取到的狀態
UITouch *touch = [[event allTouches] anyObject];
_forceLab.text = [NSString stringWithFormat:@"當前壓力值爲: %f",touch.force];
// YPYDLog(@"最大壓力值 %f",touch.maximumPossibleForce);最大壓力值 6.666667
if (touch.force>0.2)
{
_lab.font = [UIFont systemFontOfSize:20*touch.force];
_lab.textColor = YPYDColor(255*touch.force/6.5, 0, 0, 1);
}
}結語
關於3DTouch功能 更詳細的實現步驟,你可以參考下方的3D Touch Demo,如有疑問,可以在下方評論留言,或者QQ:823023927,最後,如有疏漏和錯誤之處,歡迎指正。
github地址:https://github.com/wyk125/3DTouchDemo.git 覺得不錯,記得Start哦,謝過!