


概述講義:
GitLab是一個開源版本管理系統,是集代碼託管,測試,部署於一體的開源git倉庫管理軟件,可通過web界面來進行訪問公開的或私人項目。與Github類似,GitLab能夠瀏覽代碼,管理缺陷和註釋。可以管理團隊對倉庫的訪問,它非常易於瀏覽提交過的版本,並提供一個文件歷史庫。是目前非常流行好用的研發版本控制系統。
Git有三個類分別爲:
Git: 是本地版本控制系統工具。
Github:是官方在線代碼託管倉庫,可自行註冊使用,https://github.com。
GitLab:是自建的一個非官方的自有版本倉庫。通俗一點就是公司內部的。
這裏要給大家分享的是搭建一個屬於自己的Git倉庫,也就是Gitlab。
GitLab對硬件還是有一定要求的,因Gitlab有多個job任務及進程,對內存是有要求的,建議1cpu以上,2G內存以上。
搭建前準備工作:這裏是用Centos 7版本的系統
1、關閉防火牆
2、關閉SELinux
3、關閉NetworkManager
[root@gitlab ~]# sed -i 's/SELINUX=enforcing/SELINUX=disabled/g' /etc/selinux/config
[root@gitlab ~]#
[root@gitlab ~]# setenforce 0
[root@gitlab ~]#
[root@gitlab ~]# systemctl stop NetworkManager
[root@gitlab ~]# systemctl disable NetworkManager
[root@gitlab ~]# systemctl disable iptables
[root@gitlab ~]# systemctl stop iptables
安裝Gitlab
使用在線yum安裝Gitlab 和git工具集
[root@gitlab ~]# yum install -y curl policycoreutils openssh-server openssh-clients postfix
[root@gitlab ~]# systemctl restart postfix
[root@gitlab ~]# systemctl enable postfix
[root@gitlab ~]# curl -sS https://packages.gitlab.com/install/repositories/gitlab/gitlab-ce/script.rpm.sh | sudo bash
[root@gitlab ~]# yum install -y  gitlab-ce  git      --開始安裝Gitlab 大約270M,耐心等待下就好了。
Gitlab 的常用命令
Gitlab命令分爲兩部分:通用命令 和服務管理命令
通用命令:
語法:gitlab-ctl 命令參數
命令參數如下:
help                  幫助

reconfigure       修改配置文件之後,需要重新加載下

show-config      查看所有服務配置文件信息

uninstall            卸載這個軟件

cleanse            刪除gitlab數據,重新白手起家
服務管理命令:
start               啓動所有服務

stop               關閉所有服務

restart            重啓所有服務

status            查看所有服務狀態

tail                 查看日誌信息

service-list     列舉所有啓動服務

graceful-kill    平穩停止一個服務
配置GitLab
安裝完成後接下就是配置
[root@gitlab ~]# gitlab-ctl reconfigure      --第一次加載配置的時候會很慢,耐心等待就好,直到加載完成。
...
... ...
... ... ...
... ... ... ...
...
Running handlers:
Running handlers complete
Chef Client finished, 2/516 resources updated in 09 seconds
gitlab Reconfigured!
加載完成後,開始啓動Gitlab,GitLab默認會佔用80、8080和9090端口
[root@gitlab ~]# gitlab-ctl restart
ok: run: gitaly: (pid 42828) 0s
ok: run: gitlab-monitor: (pid 42852) 0s
ok: run: gitlab-workhorse: (pid 42858) 0s
ok: run: logrotate: (pid 42867) 0s
ok: run: nginx: (pid 42874) 0s
ok: run: node-exporter: (pid 42879) 0s
ok: run: postgres-exporter: (pid 42884) 1s
ok: run: postgresql: (pid 42894) 0s
ok: run: prometheus: (pid 42897) 0s
ok: run: redis: (pid 42907) 0s
ok: run: redis-exporter: (pid 42912) 1s
ok: run: sidekiq: (pid 42997) 0s
ok: run: unicorn: (pid 43007) 0s

[root@gitlab ~]# lsof -i:80
COMMAND   PID       USER   FD   TYPE DEVICE SIZE/OFF NODE NAME
nginx   42874       root    7u  IPv4 125185      0t0  TCP *:http (LISTEN)
nginx   42875 gitlab-www    7u  IPv4 125185      0t0  TCP *:http (LISTEN)

[root@gitlab web-demo]# lsof -i:8080
COMMAND   PID USER   FD   TYPE DEVICE SIZE/OFF NODE NAME
bundle  40358  git   18u  IPv4 119105      0t0  TCP localhost:webcache (LISTEN)
bundle  40650  git   18u  IPv4 119105      0t0  TCP localhost:webcache (LISTEN)
bundle  40652  git   18u  IPv4 119105      0t0  TCP localhost:webcache (LISTEN)
開戶訪問web界面
第一次訪問,系統會要求重置新密碼,管理員的用戶名爲root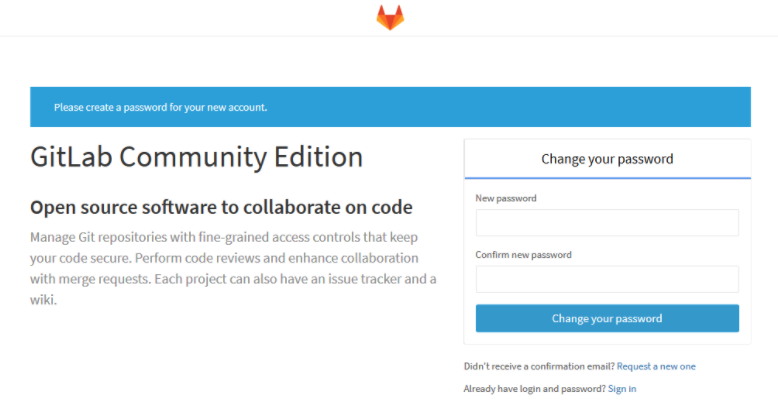
漢化Gitlab
Gitlab默認語言是英文,對於想加強英文的同學,建議繼續使用英文,但要求使用中文,這裏需要下載一個漢化包
下載最新的漢化包:
[root@gitlab ~]# git clone https://gitlab.com/xhang/gitlab.git如果要下載指定版本的漢化包,需要加上版本號。
例:下載10.5.1,命令如下:
[root@gitlab ~]# git clone https://gitlab.com/xhang/gitlab.git -b v10.5.1-zh下載完成後,將下載的文件夾內容複製到gitlab目錄下
複製前先停止Gitlab
[root@gitlab ~]# gitlab-ctl stop
ok: down: gitaly: 0s, normally up
ok: down: gitlab-monitor: 0s, normally up
ok: down: gitlab-workhorse: 1s, normally up
ok: down: logrotate: 0s, normally up
ok: down: nginx: 1s, normally up
ok: down: node-exporter: 0s, normally up
ok: down: postgres-exporter: 1s, normally up
ok: down: postgresql: 0s, normally up
ok: down: prometheus: 0s, normally up
ok: down: redis: 0s, normally up
ok: down: redis-exporter: 1s, normally up
ok: down: sidekiq: 0s, normally up
ok: down: unicorn: 1s, normally up

[root@gitlab ~]# cp -r -f  ./gitlab/*  /opt/gitlab/embedded/service/gitlab-rails/
複製時可能不斷提示是否要覆蓋,這時可能是系統每次執行cp命令時,其實是執行了cp -i命令的別名。出現這種情況可以修改~/.bashrc,在“alias cp=’cp -i’”前加#註釋,再刷新文件 source ~/.bashrc
在複製過程中提示,以下信息是正常的
複製完成後,需要重新加載配置,並啓動Gitlab
[root@gitlab ~]# gitlab-ctl reconfigure
...
... ...
... ... ...
... ... ... ...
...
Running handlers:
Running handlers complete
Chef Client finished, 2/516 resources updated in 09 seconds
gitlab Reconfigured!

[root@gitlab ~]# gitlab-ctl restart
ok: run: gitaly: (pid 42828) 0s
ok: run: gitlab-monitor: (pid 42852) 0s
ok: run: gitlab-workhorse: (pid 42858) 0s
ok: run: logrotate: (pid 42867) 0s
ok: run: nginx: (pid 42874) 0s
ok: run: node-exporter: (pid 42879) 0s
ok: run: postgres-exporter: (pid 42884) 1s
ok: run: postgresql: (pid 42894) 0s
ok: run: prometheus: (pid 42897) 0s
ok: run: redis: (pid 42907) 0s
ok: run: redis-exporter: (pid 42912) 1s
ok: run: sidekiq: (pid 42997) 0s
ok: run: unicorn: (pid 43007) 0s

[root@gitlab ~]# lsof -i:80
COMMAND   PID       USER   FD   TYPE DEVICE SIZE/OFF NODE NAME
nginx   42874       root    7u  IPv4 125185      0t0  TCP *:http (LISTEN)
nginx   42875 gitlab-www    7u  IPv4 125185      0t0  TCP *:http (LISTEN)

[root@gitlab web-demo]# lsof -i:8080
COMMAND   PID USER   FD   TYPE DEVICE SIZE/OFF NODE NAME
bundle  40358  git   18u  IPv4 119105      0t0  TCP localhost:webcache (LISTEN)
bundle  40650  git   18u  IPv4 119105      0t0  TCP localhost:webcache (LISTEN)
bundle  40652  git   18u  IPv4 119105      0t0  TCP localhost:webcache (LISTEN)
再次訪問web界面,顯示的已經爲漢化熟悉的中文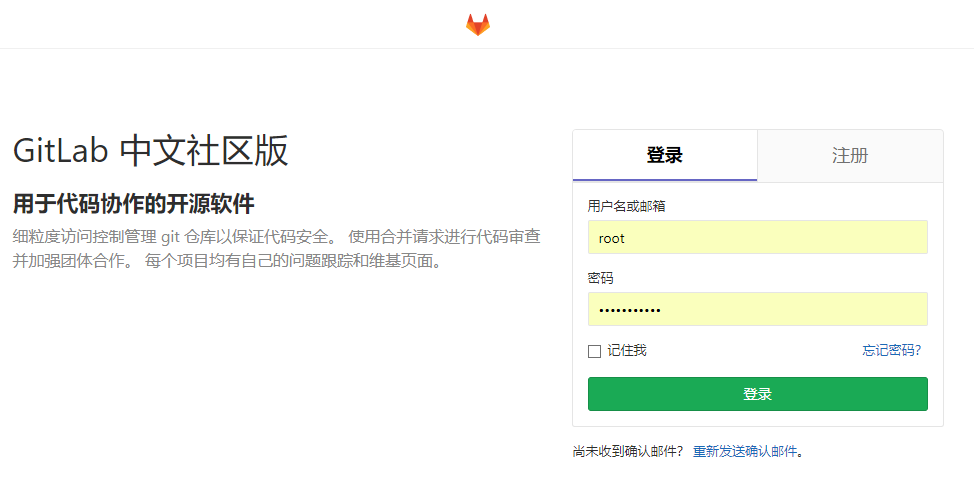
Gitlab私有倉庫的使用
登陸進來Gitlab,創建一個項目,但創建項目前我們先創建一個組,讓項目歸屬一個組裏
新建一個組
在新建的dev-demo組裏,創建一個項目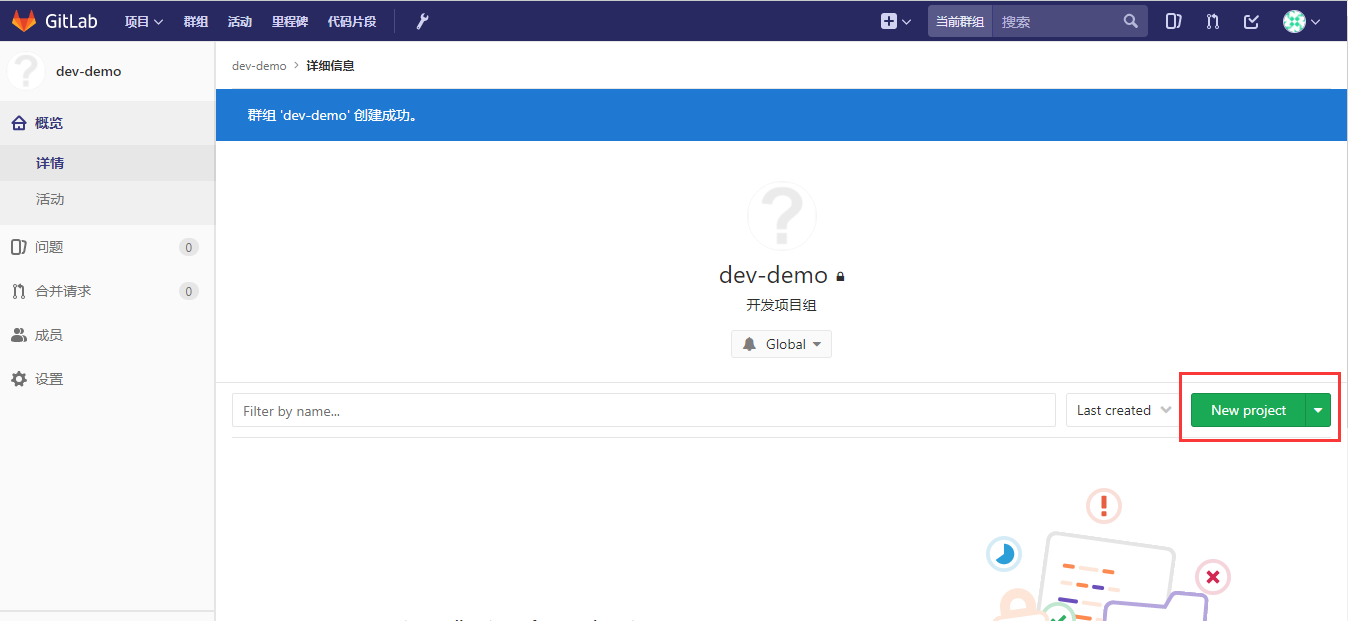
創建一個項目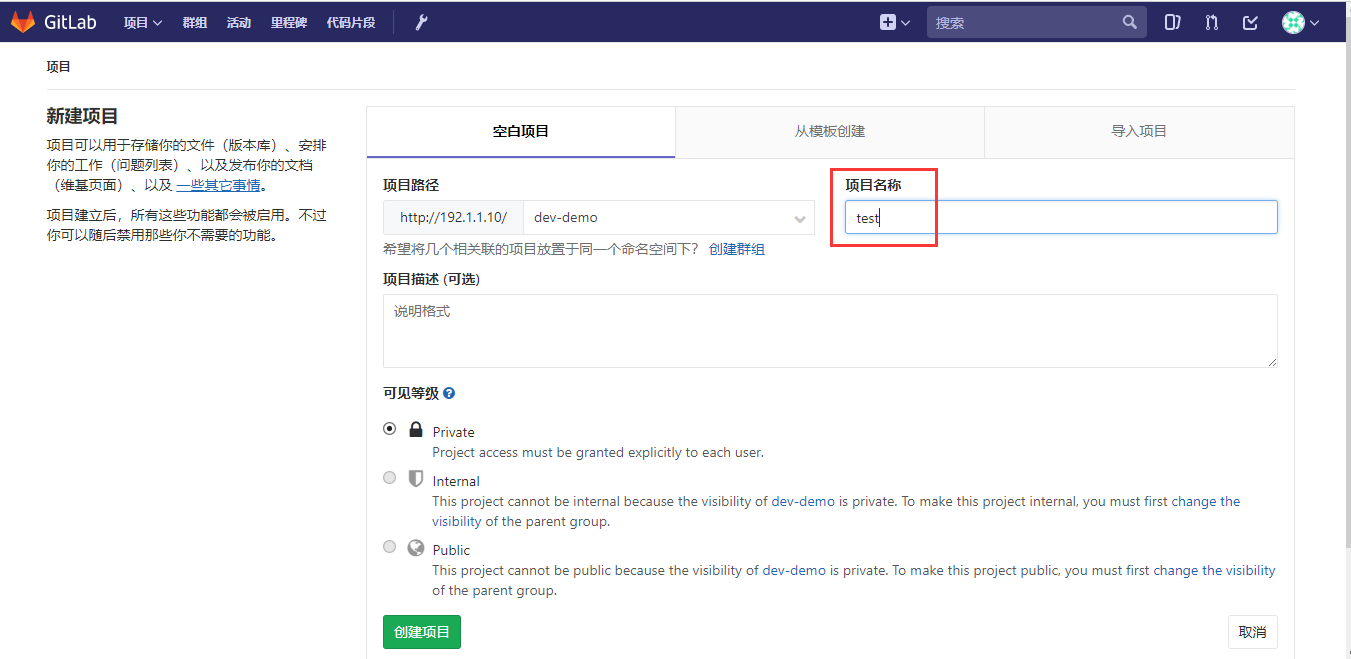
在項目裏創建一個README文件,一會用於測試用
在項目創建成功後,界面有提示要建ssh-key,這裏先建自述文件,後面再來建ssh-key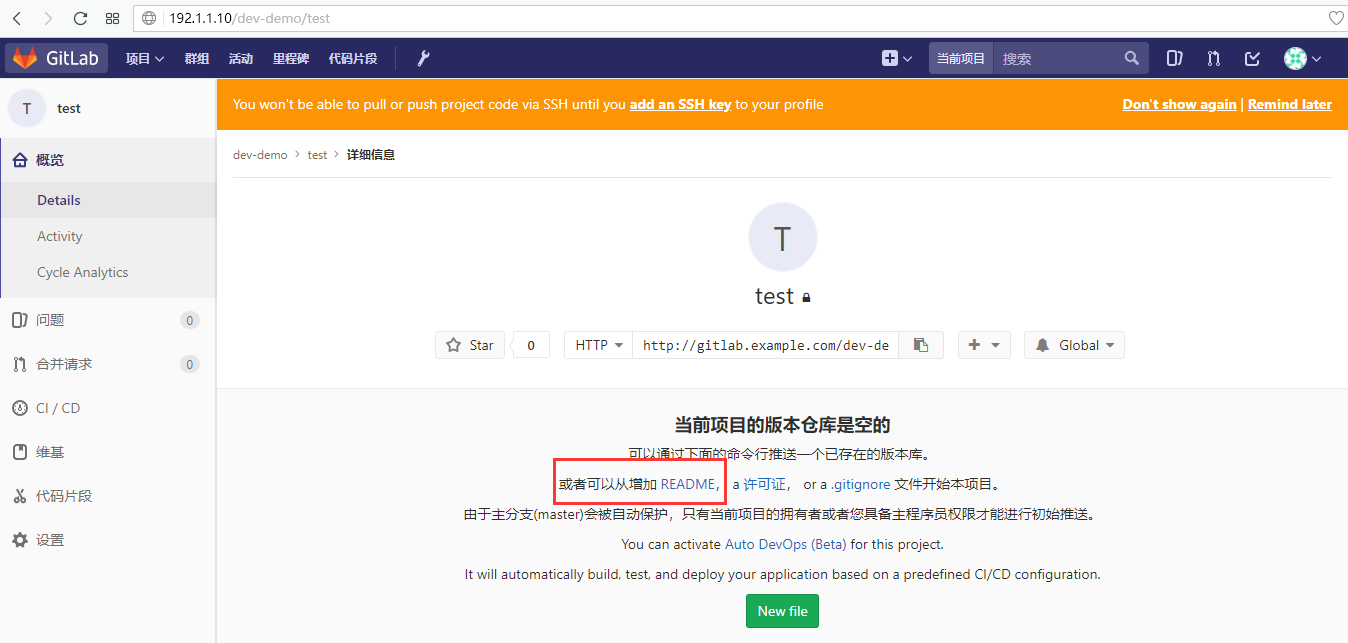
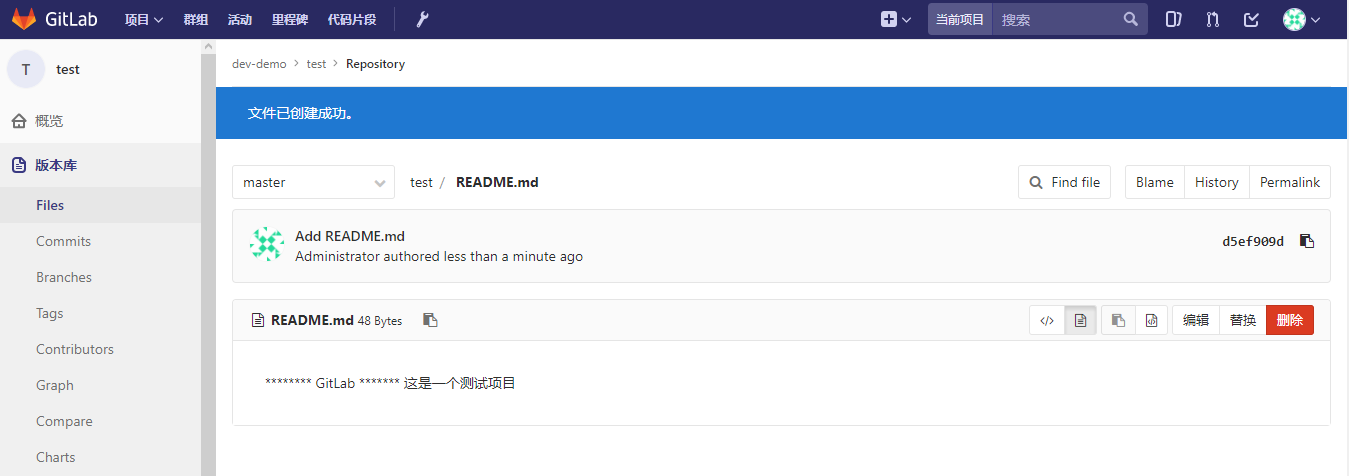
給README文件添加點內容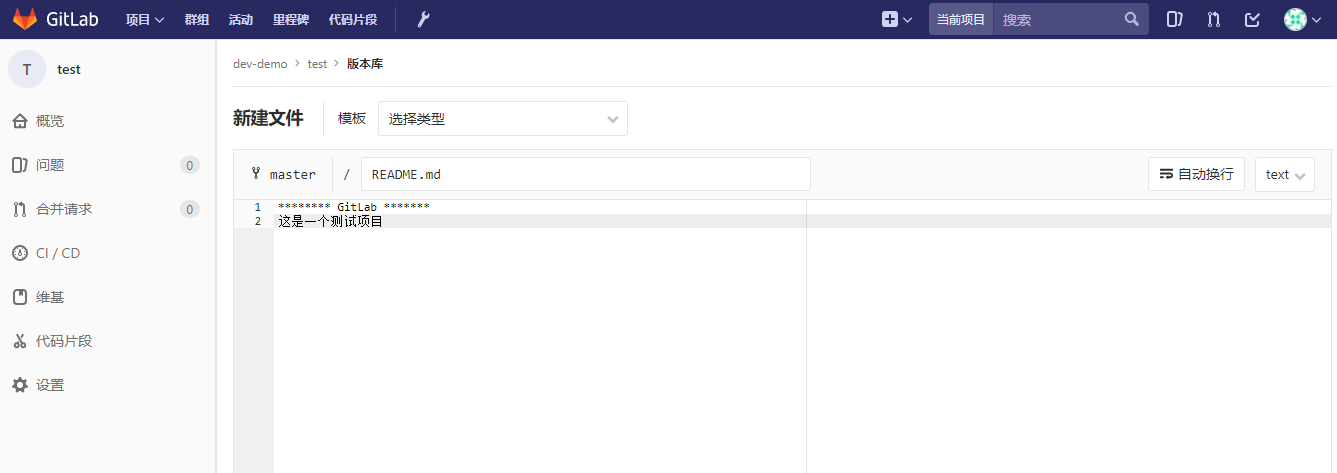
在工作區的Git服務器上創建key,再添加至Gitlab
在Git工作區機器上創建ssh-key,我這裏用的是192.1.1.52機器來創建ssh-key,Gitlab是在192.1.1.10機器。
[root@agent02 ~]# ssh-keygen -t rsa -b 4096
Generating public/private rsa key pair.
Enter file in which to save the key (/root/.ssh/id_rsa):
/root/.ssh/id_rsa already exists.
Overwrite (y/n)? y
Enter passphrase (empty for no passphrase):
Enter same passphrase again:
Your identification has been saved in /root/.ssh/id_rsa.
Your public key has been saved in /root/.ssh/id_rsa.pub.
The key fingerprint is:
SHA256:/fqioPb2oKlcjiF8U+Pjw3FSNXcowo2y4qtT/TjV2TA root@agent02
The keys randomart image is:
+---[RSA 4096]----+
|      . o   .    |
|     . + = o .   |
|      o o + .    |
|   . . . E       |
|  . oo. S *      |
|.  oo+.o o o     |
|..oo+oX     .    |
| +.*+Oo+  ..     |
| .*o=++.o..o.    |
+----[SHA256]-----+

[root@agent02 ~]# cat .ssh/id_rsa.pub
ssh-rsa AAAAB3NzaC1yc2EAAAADAQABAAACAQCkgVRWoKTblJlloKNo8+YcBM3B8AA0X5QoyQGtjoNwz6L1iO2WEhVUqGqVK/ujG+i/NaOCkrVXlowc0a53mB3Wk1Bk+6INxtXmtPDqmSVHamCtuq86XGSIoGbE5j9cYaWasWs0kEx60BO5+/jqz9LWGeFJehDHQd0K32eHQpn836XCIhyXN7mWJ7XmUwYfyf6B9PjO0z/4hsM21qXuE3giQDrGDHCjqkWNoK7hwNwfQGaIo+kClgvgquq6I0d9XWb30C7/Xr+ZuXROHHSncteCJU8Chqk7uiOyUHcgMMrF5AhfEG8wyDQKOPDW3nPin3YvzSZg0jgIn3X9e1dIl4OZoyCIj1OW1gx/JZ0P9xBhjFCcWFjXSVqX34S05F7CiHdW/MIJgJBWc5qFjSTsaIVEUhwc3DzHhPcW1ZEbskqc6kBZyB5Ei3ZIvITPpa9tUV3BHPVFKPio6Leow5Vi0ne+b1Khm3KCKatGdkqRjbyZ6Me1J7+KQnAmT9FmCNo3V8IFs4PpFljDCNBxm93lbaiqAcFeAEhcm1M20BiGGmTJnVMrGGRlXcutnj9G5s0C4oOVL8ujFIS4wwcp6XWWNzkqOw1GiJp9GhFO1fXyg/vdiS+mgeMXjZNsKl4BAPZ+GYbiDOMSGdjXKVch5dmXfwDetbTl4+T/6COX5L0G6ijlVw== root@agent02
上面key已經創建好了,複製上面打印出來的密鑰,放到Gitlab裏面來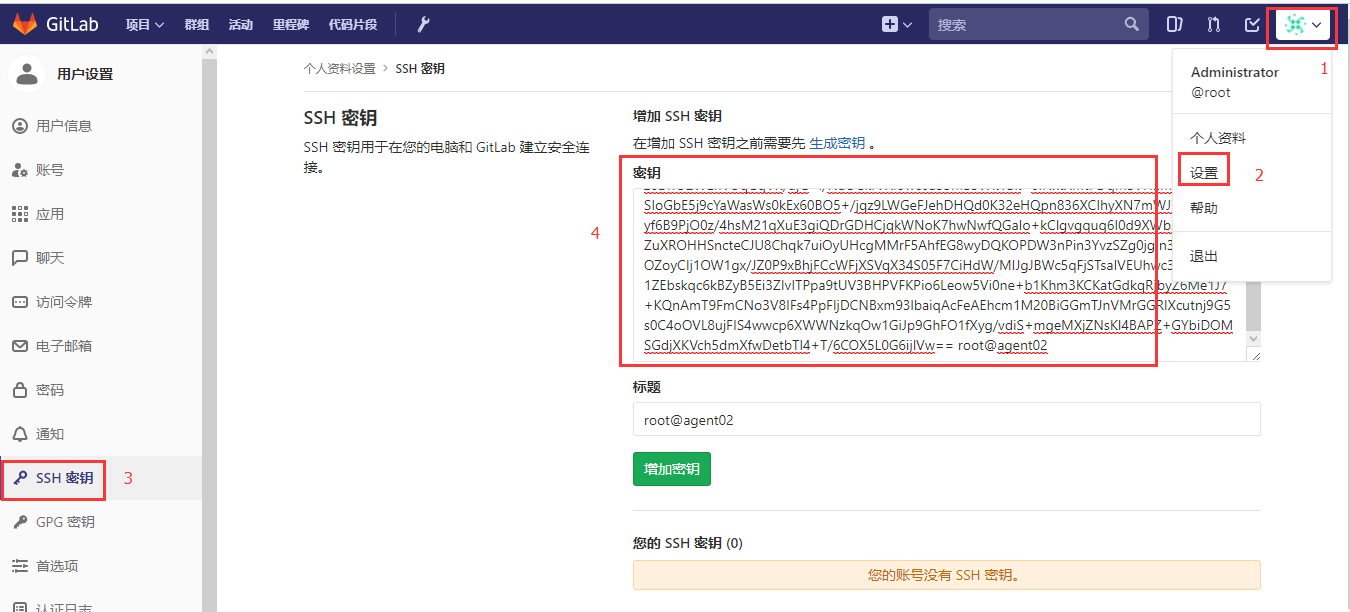

接着再回到剛纔test項目裏面,查看詳情,這裏有顯示該項目的git鏈接地址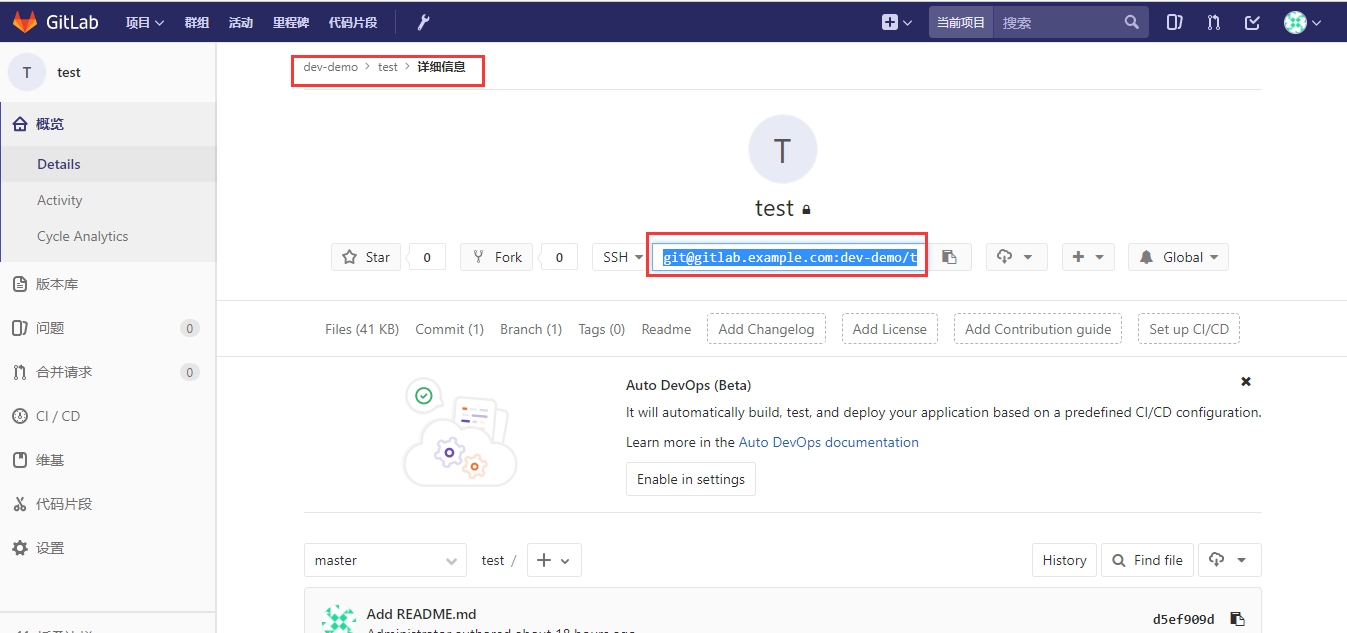
接下來,在192.1.1.52機器上,把Gitlab裏面test項目克隆到本地來
[root@agent02 ]#  echo "192.1.1.10    gitlab.example.com" >> /etc/hosts         --注意一定要把Gitlab機器名和IP地址寫進hosts記錄裏

[root@agent02 ]# mkdir /dev-demo
[root@agent02 ]# cd /dev-demo

[root@agent02 dev-demo]# git init
Reinitialized existing Git repository in /dev-demo/.git/

[root@agent02 dev-demo]# git clone [email protected]:dev-demo/test.git
Cloning into 'test'...
The authenticity of host 'gitlab.example.com (192.1.1.10)' can't be established.
ECDSA key fingerprint is SHA256:885XnAhlZsdYbCLIzq1qh7cCt+yF9i/AtusSI7QmPcE.
ECDSA key fingerprint is MD5:e9:95:51:51:e4:ce:b9:5c:b1:d7:ce:2a:d8:7d:fe:ee.
Are you sure you want to continue connecting (yes/no)? yes
Warning: Permanently added 'gitlab.example.com,192.1.1.10' (ECDSA) to the list of known hosts.
remote: Counting objects: 3, done.
remote: Total 3 (delta 0), reused 0 (delta 0)
Receiving objects: 100% (3/3), done.

[root@agent02 dev-demo]# ls
test

[root@agent02 dev-demo]# cat test/README.md
******** GitLab *******
這是一個測試項目
在本地模擬開發過程,再和Gitlab同步
[root@agent02 dev-demo]# vi test/index.html
<h1> 我是GitLab私有服務器 </h1>

[root@agent02 dev-demo]# git config --global user.email "[email protected]"
[root@agent02 dev-demo]# git config --global user.name "LX"
[root@agent02 dev-demo]#
[root@agent02 dev-demo]# git add ./*
[root@agent02 dev-demo]# git commit -m "代碼提交index.html"
[master (root-commit) b348c78] 代碼提交index.html
 1 file changed, 1 insertion(+)
 create mode 160000 test
代碼提交完成後,我們再來到Gitlab裏查看項目test裏是否有剛提交的index.html文件和內容
[root@agent02 test]# vi aa.html
<h1> 測試代碼 </h1>

[root@agent02 test]# git add ./*
[root@agent02 test]# git commit -m "提交代碼"
[master be2c1f8] 提交代碼
 2 files changed, 3 insertions(+)
 create mode 100644 index.html

[root@agent02 test]#
[root@agent02 test]# git push
warning: push.default is unset; its implicit value is changing in
Git 2.0 from 'matching' to 'simple'. To squelch this message
and maintain the current behavior after the default changes, use:

  git config --global push.default matching

To squelch this message and adopt the new behavior now, use:

  git config --global push.default simple

See 'git help config' and search for 'push.default' for further information.
(the 'simple' mode was introduced in Git 1.7.11. Use the similar mode
'current' instead of 'simple' if you sometimes use older versions of Git)

Counting objects: 5, done.
Compressing objects: 100% (2/2), done.
Writing objects: 100% (4/4), 389 bytes | 0 bytes/s, done.
Total 4 (delta 0), reused 0 (delta 0)
To [email protected]:dev-demo/test.git
   d5ef909..be2c1f8  master -> master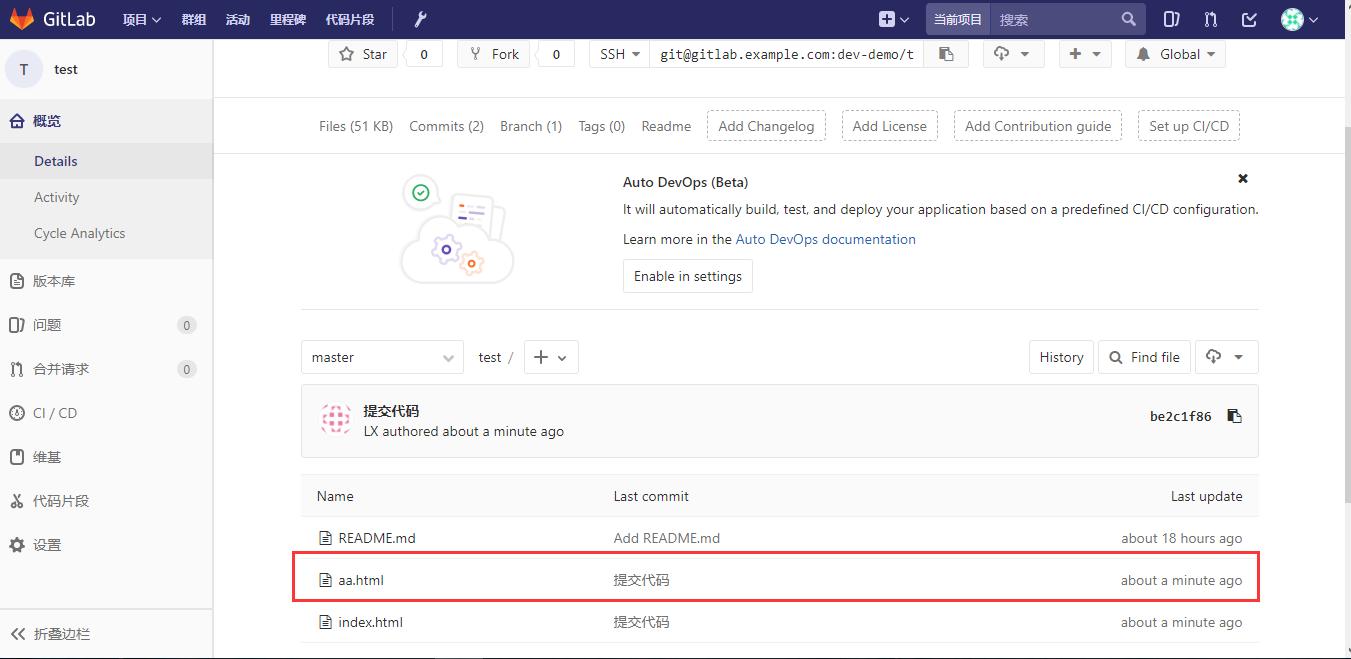
配置註冊Gitlab時發郵件確認
配置在Gitlab註冊用戶時的郵件發送確認動作
[root@gitlab ~]# vi /etc/gitlab/gitlab.rb
    429  gitlab_rails['smtp_enable'] = true
    430  gitlab_rails['smtp_address'] = "smtp.qq.com"
    431  gitlab_rails['smtp_port'] = 465
    432  gitlab_rails['smtp_user_name'] = "[email protected]"
    433  gitlab_rails['smtp_password'] = "QQ password"
    434  gitlab_rails['smtp_domain'] = "qq.com"
    435  gitlab_rails['smtp_authentication'] = "login"
    436  gitlab_rails['smtp_enable_starttls_auto'] = true
    437  gitlab_rails['smtp_tls'] = true
        438  gitlab_rails['gitlab_email_from'] = '[email protected]'
配置完成後,需要重新生成gitlab參數
[root@gitlab ~]# gitlab-ctl reconfigure

[root@gitlab ~]# gitlab-ctl restart

[root@gitlab ~]# lsof -i:80
COMMAND   PID       USER   FD   TYPE DEVICE SIZE/OFF NODE NAME
nginx   40422       root    7u  IPv4 117999      0t0  TCP *:http (LISTEN)
nginx   40423 gitlab-www    7u  IPv4 117999      0t0  TCP *:http (LISTEN)

[root@gitlab ~]# lsof -i:8080
COMMAND   PID USER   FD   TYPE DEVICE SIZE/OFF NODE NAME
bundle  40358  git   18u  IPv4 119105      0t0  TCP localhost:webcache (LISTEN)
bundle  40650  git   18u  IPv4 119105      0t0  TCP localhost:webcache (LISTEN)
bundle  40652  git   18u  IPv4 119105      0t0  TCP localhost:webcache (LISTEN)
設置註冊Gitlab用戶時發送郵件確認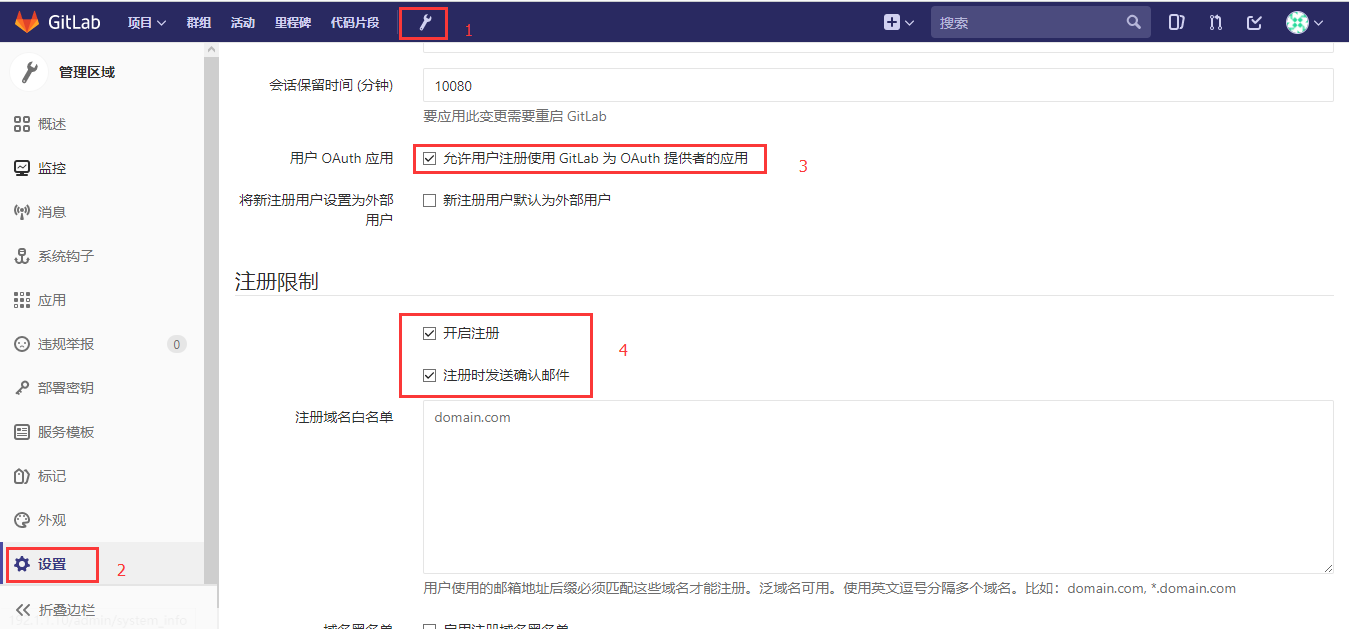
拉到最下面,點保存,再退出來,在登陸界面,註冊一個新的帳號,會向你的註冊時的郵箱發送一封確認的郵件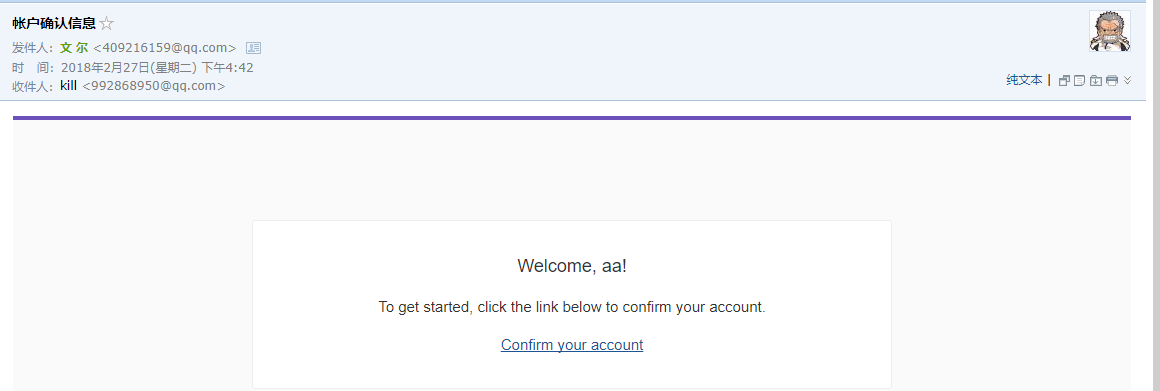
至此,GitLab私有服務器搭建完成。