一、 實驗目的
實現跨交換機的相同VLAN通信。
二、 實驗環境
- 軟件
eNSP 1.2.00.500 - 虛擬設備
PC:PC1 – PC4
S3700交換機:SW1、SW2
三、 實驗拓撲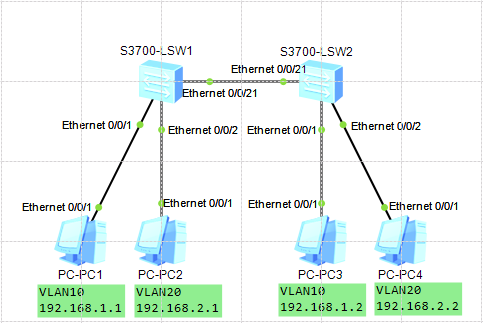
四、 實驗步驟
手動配置PC1 – PC4的IP地址及子網掩碼,過程不進行敘述和展示。
SW1:
<Huawei>sys #進入視圖模式
[Huawei]sys SW1 #修改設備名稱爲SW1
[SW1]vlan ba 10 20 #批量創建VLAN10、20
[SW1]dis vl #查看VLAN是否創建成功
[SW1]int eth 0/0/1 #進入1端口
[SW1-Ethernet0/0/1]port link-t ac #將該端口配置爲access端口模式
[SW1-Ethernet0/0/1]po de vl 10 #將該端口加入VLAN10
[SW1-Ethernet0/0/1]int eth 0/0/2 #進入2端口
[SW1-Ethernet0/0/2]port link-t ac #將該端口配置爲access端口模式
[SW1-Ethernet0/0/2]po de vl 20 #將該端口加入VLAN20
[SW1-Ethernet0/0/2]quit #返回視圖模式
[SW1]dis vl #查看端口的VLAN配置是否成功
[SW1]int eth 0/0/21 #進入21端口
[SW1-Ethernet0/0/21]port link-t t #將該端口配置Trunk模式
[SW1-Ethernet0/0/21]port trunk all vl 10 20 #允許VLAN10、20的數據幀通過
[SW1-Ethernet0/0/21]quit #返回視圖模式
SW2:
    <Huawei>sys                             #進入視圖模式
    [Huawei]sys SW2                         #修改設備名稱爲SW2
    [SW2]vlan ba 10 20                          #批量創建VLAN10、20
[SW2]dis vl #查看VLAN是否創建成功
[SW2]int eth 0/0/1 #進入1端口
[SW2-Ethernet0/0/1]port link-t ac #將該端口配置爲access端口模式
[SW2-Ethernet0/0/1]po de vl 10 #將該端口加入VLAN10
[SW2-Ethernet0/0/1]int eth 0/0/2 #進入2端口
[SW2-Ethernet0/0/2]port link-t ac #將該端口配置爲access端口模式
[SW2-Ethernet0/0/2]po de vl 20 #將該端口加入VLAN20
[SW2-Ethernet0/0/2]quit #返回視圖模式
[SW2]dis vl #查看端口的VLAN配置是否成功
[SW2]int eth 0/0/21 #進入21端口
[SW2-Ethernet0/0/21]port link-t t #將該端口配置Trunk模式
[SW2-Ethernet0/0/21]port trunk all vl 10 20 #允許VLAN10、20的數據幀通過
[SW2-Ethernet0/0/21]quit #返回視圖模式
五、 結果驗證
SW1:
VLAN配置:
[SW1]dis vl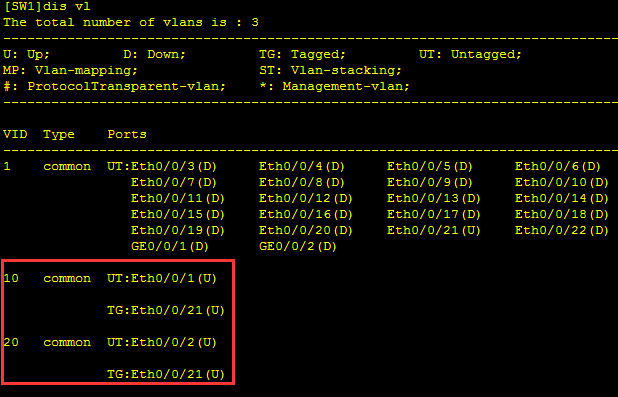
Trunk端口配置:
[SW1]int eth 0/0/21
[SW1-Ethernet0/0/21]dis th
SW2:
    VLAN配置:
        [SW2]dis vl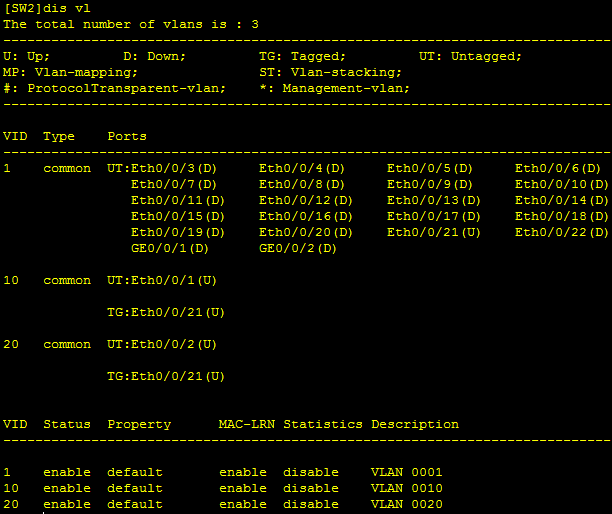
    Trunk端口配置:
        [SW2]int eth 0/0/21
        [SW2-Ethernet0/0/21]dis th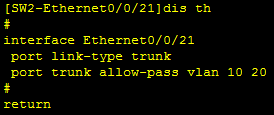
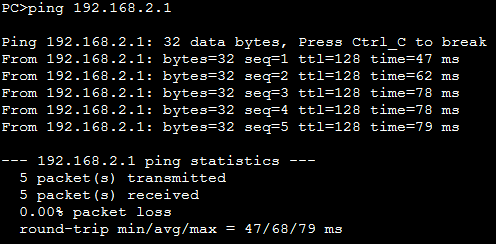
SW1上的PC1 ping SW2上的PC3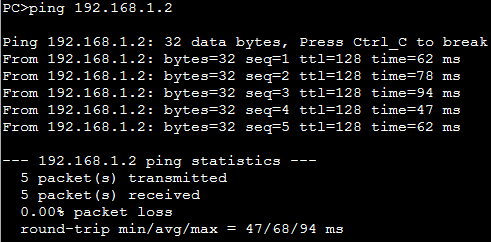
SW2上的PC3 ping SW1上的PC1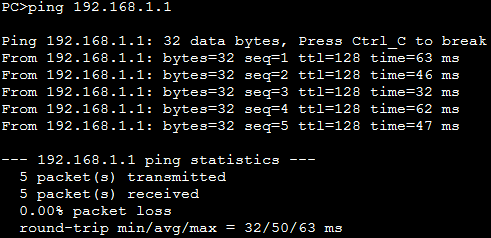
SW1上的PC2 ping SW2上的PC4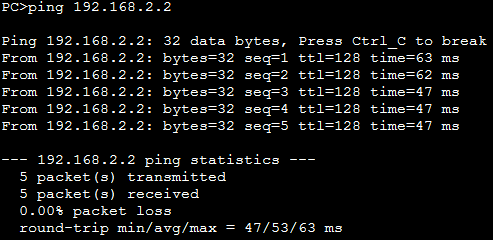
SW2上的PC4 ping SW1上的PC2