一、環境準備
1、安裝epel擴展源
[root@cacti ~]# yum install -y epel-release |
2、搭建lamp環境
3 4 5 6 7 8 9 10 11 12 13 14 15 16 17 18 19 20 21 22 23 24 25 26 27 28 29 30 31 32 33 34 35 36 37 | [root@cacti ~]# yum install -y httpd php php-mysql mysql mysql-server mysql-devel php-gd libjpeg libjpeg-devel libpng-devel[root@cacti ~]# /etc/init.d/httpd start正在啓動 httpd: [確定][root@cacti ~]# /etc/init.d/mysqld start初始化 MySQL 數據庫: Installing MySQL system tables...OKFilling help tables...OKTo start mysqld at boot time you have to copysupport-files/mysql.server to the right place for your systemPLEASE REMEMBER TO SET A PASSWORD FOR THE MySQL root USER !To do so, start the server, then issue the following commands:/usr/bin/mysqladmin -u root password 'new-password'/usr/bin/mysqladmin -u root -h cacti password 'new-password'Alternatively you can run:/usr/bin/mysql_secure_installationwhich will also give you the option of removing the testdatabases and anonymous user created by default. This isstrongly recommended for production servers.See the manual for more instructions.You can start the MySQL daemon with:cd /usr ; /usr/bin/mysqld_safe &You can test the MySQL daemon with mysql-test-run.plcd /usr/mysql-test ; perl mysql-test-run.plPlease report any problems with the /usr/bin/mysqlbug script! [確定]正在啓動 mysqld: [確定] |
3、安裝cacti監控主機
1 2 3 4 5 6 7 8 9 10 11 12 13 14 15 16 17 18 19 20 21 22 23 24 25 26 27 28 29 30 31 32 33 34 35 36 37 38 | [root@cacti ~]# yum install -y cacti net-snmp net-snmp-utils rrdtool net-snmp-devel net-snmp-libs lm-sensors php-xml zlib libpng freetype cairo-devel pango-devel gd[root@cacti ~]# /etc/init.d/snmpd start正在啓動 snmpd: [確定][root@cacti ~]# mysql -u rootWelcome to the MySQL monitor. Commands end with ; or \g.Your MySQL connection id is 4Server version: 5.1.73 Source distributionCopyright (c) 2000, 2013, Oracle and/or its affiliates. All rights reserved.Oracle is a registered trademark of Oracle Corporation and/or itsaffiliates. Other names may be trademarks of their respectiveowners.Type 'help;' or '\h' for help. Type '\c' to clear the current input statement.mysql> create database cacti;mysql> grant all on cacti.* to 'cactiuser'@'localhost' identified by 'cactiuser';Query OK, 0 rows affected (0.00 sec)mysql> exitBye[root@cacti ~]# mysql -u root cacti < /usr/share/doc/cacti-0.8.8b/cacti.sql[root@cacti ~]# vim /usr/share/cacti/include/config.php$database_type = "mysql";$database_default = "cacti";$database_hostname = "localhost";$database_username = "cactiuser";$database_password = "cactiuser";$database_port = "3306";$database_ssl = false;[root@cacti ~]# vim /etc/httpd/conf.d/cacti.confDeny from all 修改爲 Allow from all[root@cacti ~]# /etc/init.d/httpd restart停止 httpd: [確定]正在啓動 httpd: [確定] |
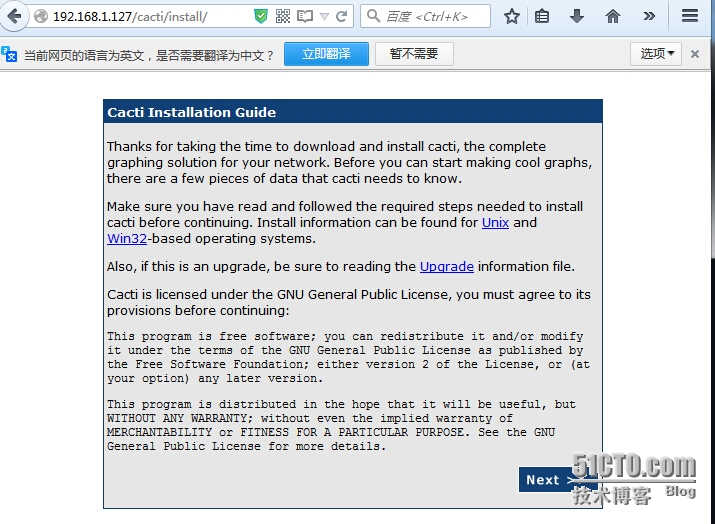
4、通過瀏覽器訪問
如果訪問不了,請檢查主機的iptables和selinux
圖:一
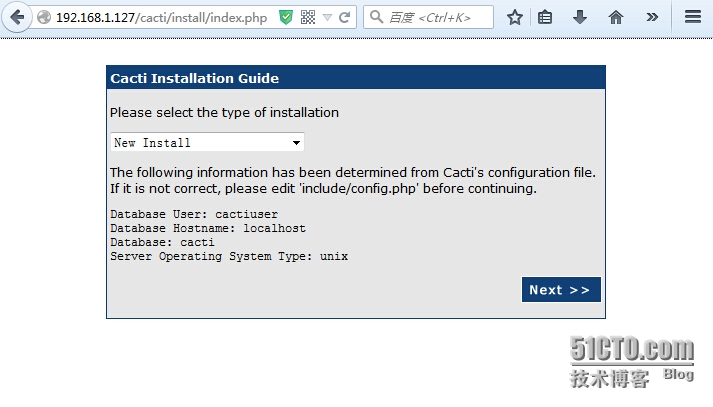
圖:二
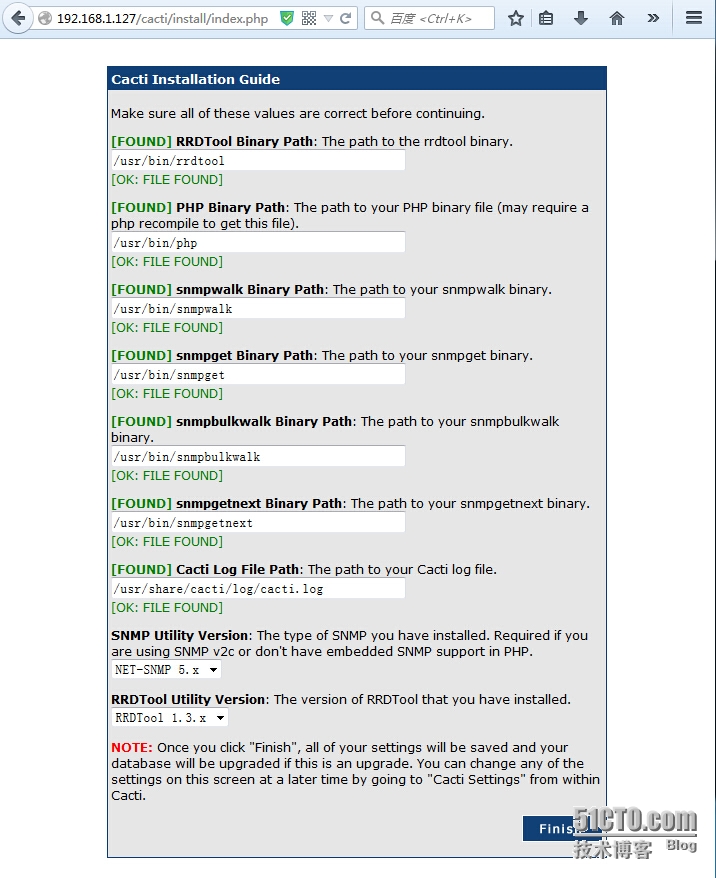
圖:三
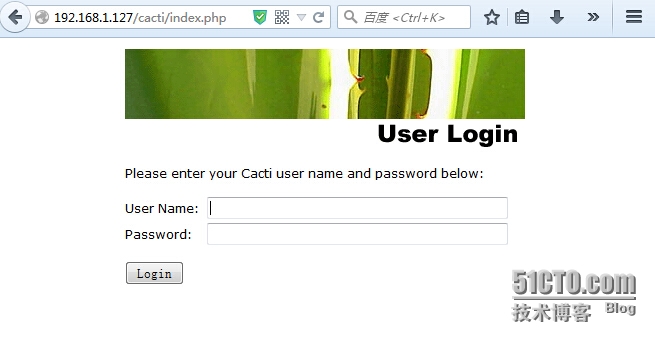
到了登陸,默認的賬號爲admin,密碼爲admin
圖:四
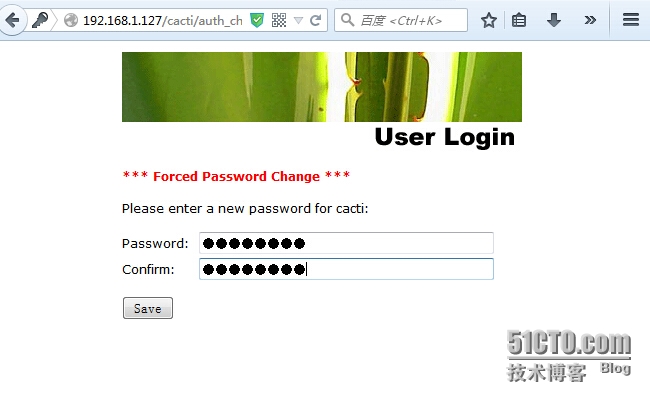
登陸之後,系統會強制用戶更改密碼
圖:五
圖:六
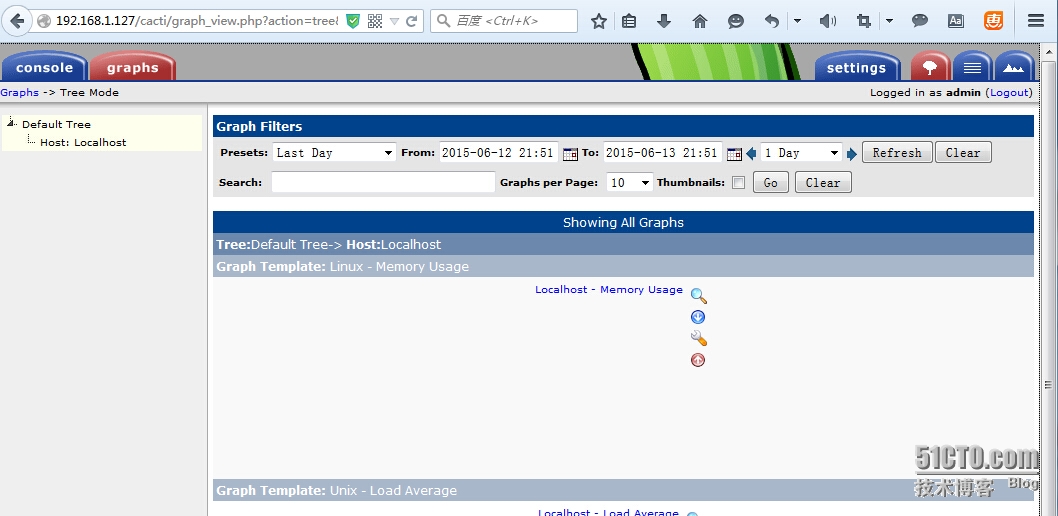
點擊graphs-Default Tree-Host Localhost,進入系統監控界面
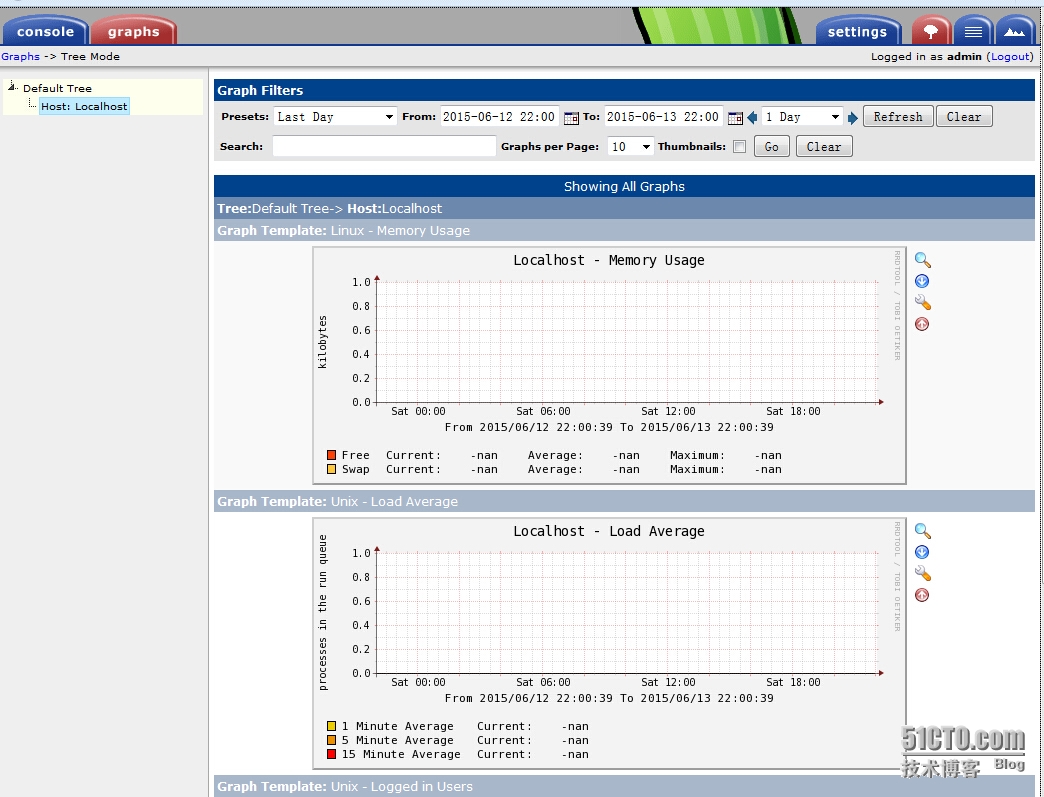
我們看到監控界面,沒有出圖,設置一下出圖
1 2 3 4 5 6 7 8 9 10 | [root@cacti ~]# /usr/bin/php /usr/share/cacti/poller.php OK u:0.00 s:0.00 r:0.00OK u:0.00 s:0.00 r:0.01OK u:0.00 s:0.00 r:0.03OK u:0.00 s:0.00 r:0.05OK u:0.00 s:0.00 r:0.0806/13/2015 09:59:49 PM - SYSTEM STATS: Time:0.1974 Method:cmd.php Processes:1 Threads:N/A Hosts:2 HostsPerProcess:2 DataSources:5 RRDsProcessed:5[root@cacti ~]# crontab -e# 讓命令每5分鐘執行一次*/5 * * * * /usr/bin/php /usr/share/cacti/poller.php > /dev/null 2>&1 |
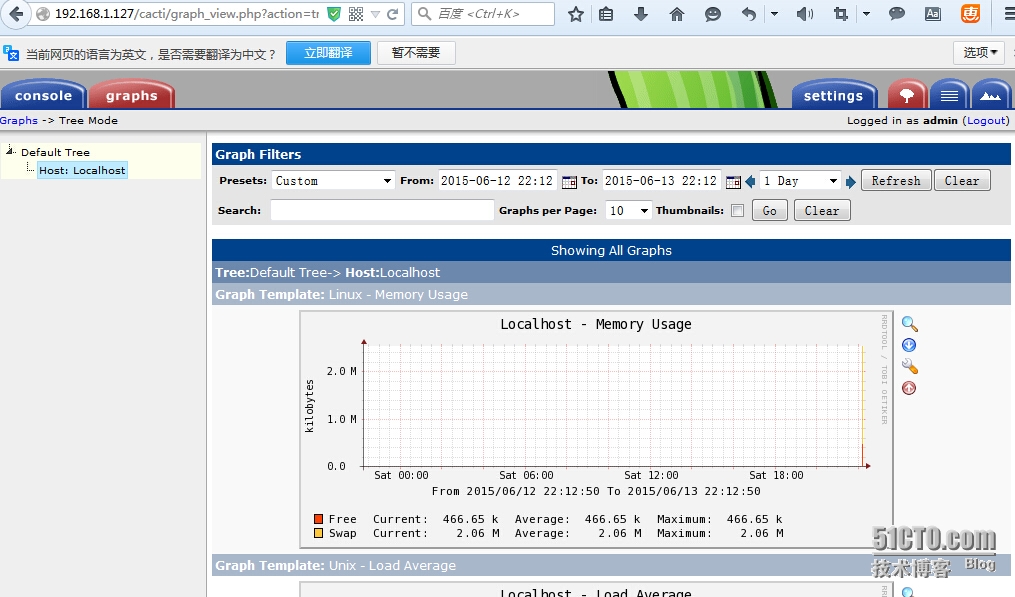
我們在刷新一下,圖就出來了
圖:八
數據需要等待一會兒,才能出來
接下來我們添加被監控的主機
1 2 3 4 5 6 7 8 9 10 11 12 13 | # 在被監控的主機上安裝[root@rsa ~]# yum install -y net-snmp lm_sensors[root@rsa ~]# vim /etc/snmp/snmpd.conf#syslocation Unknown (edit /etc/snmp/snmpd.conf)syslocation 192.168.1.118# group context sec.model sec.level prefix read write notifaccess notConfigGroup "" any noauth exact all none noneview all included .1 80 去掉註釋符“#”[root@rsa ~]# /etc/init.d/snmpd start正在啓動 snmpd: [確定] |
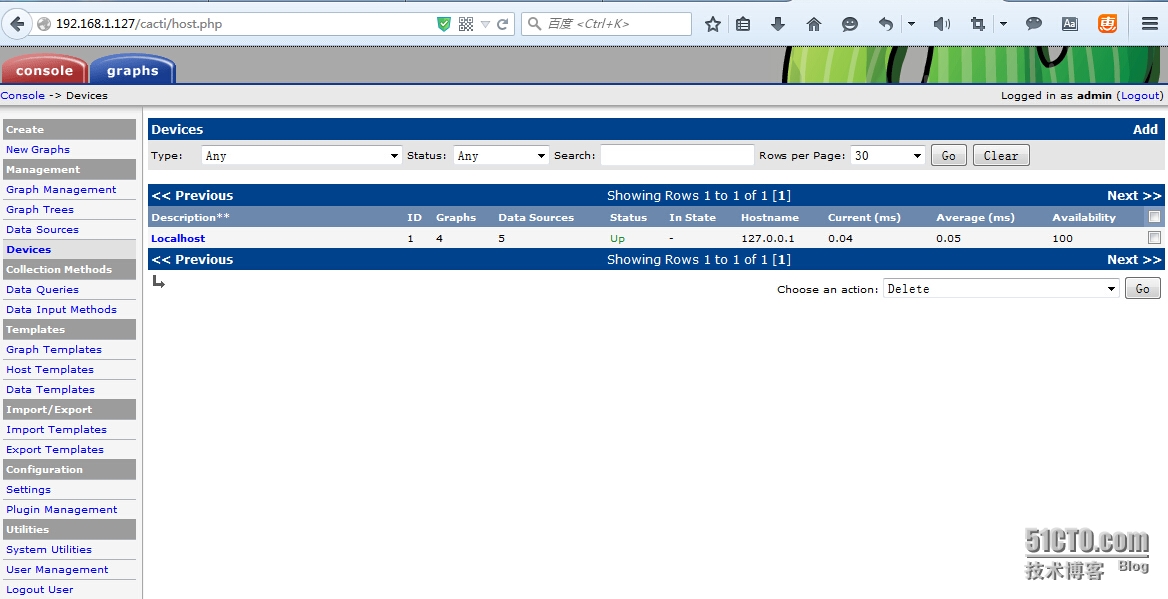
依次點擊console -> Devices -> add,添加主機
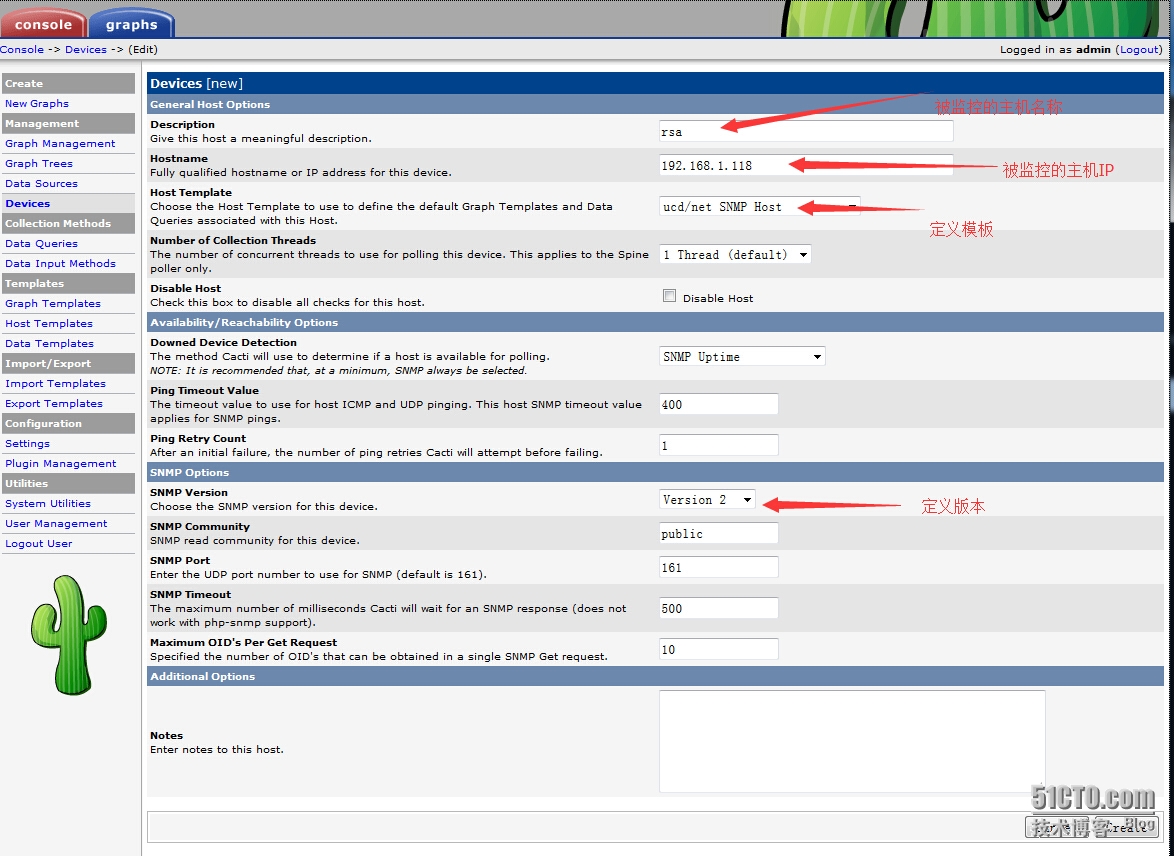
開始添加被監控主機的信息,填寫完畢,點擊Create
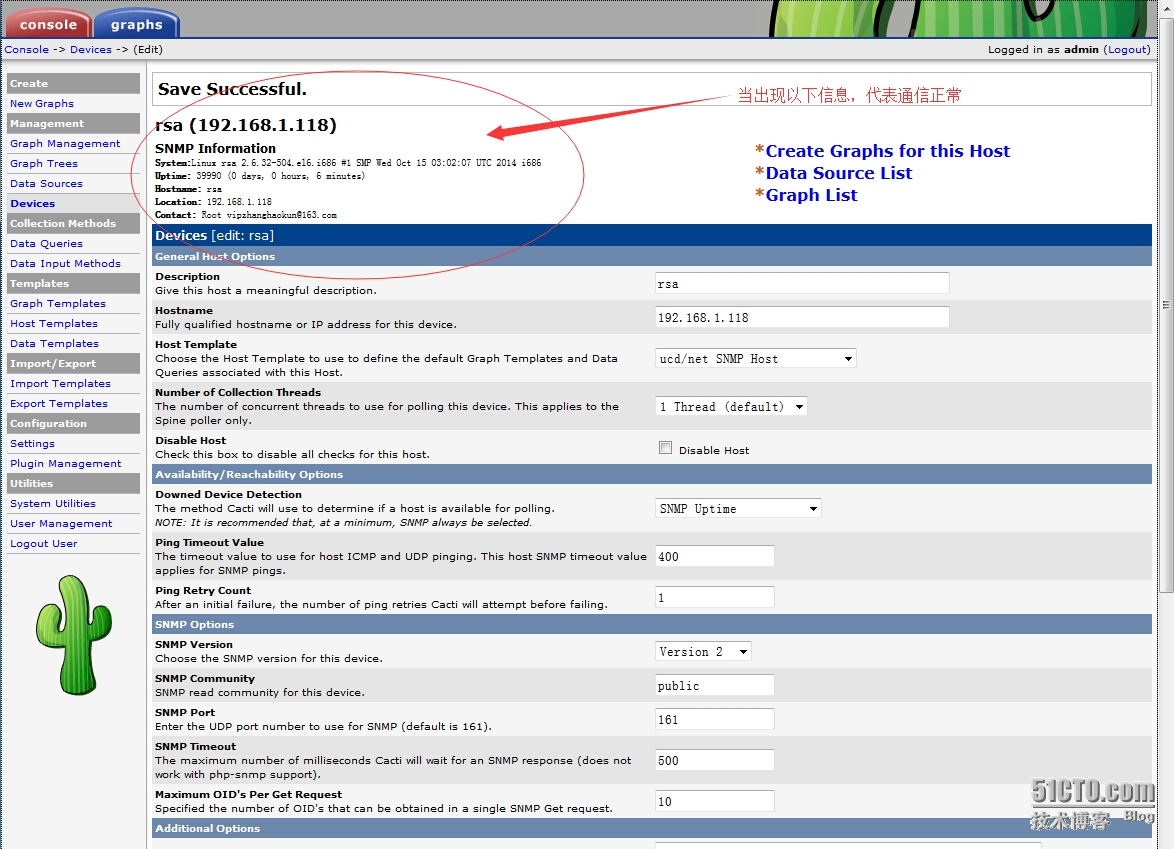
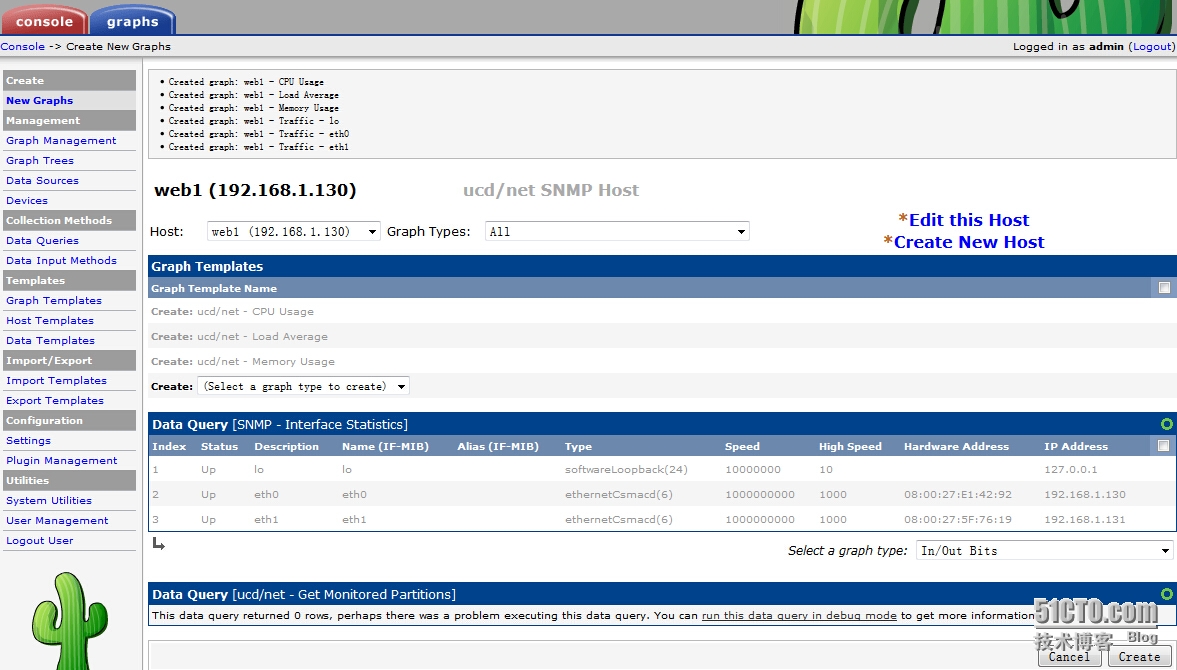
創建完畢,看是否通信正常,創建完主機,創建要監控的項目點擊 Create Graphs for this Host,
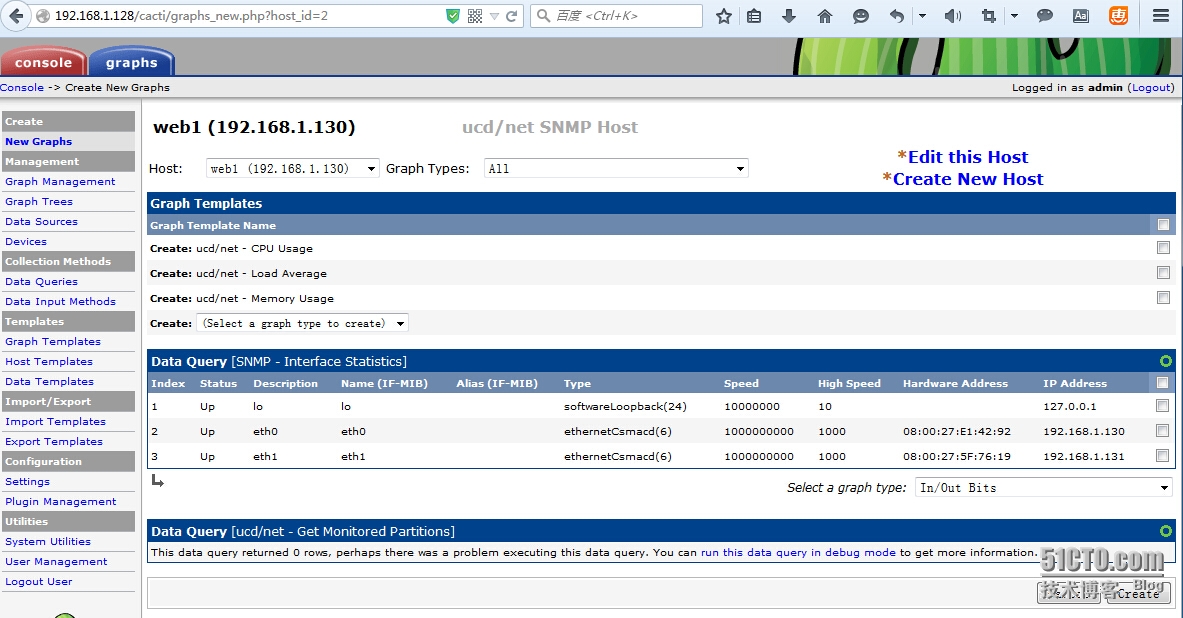
根據需要,去選擇要監控的項目
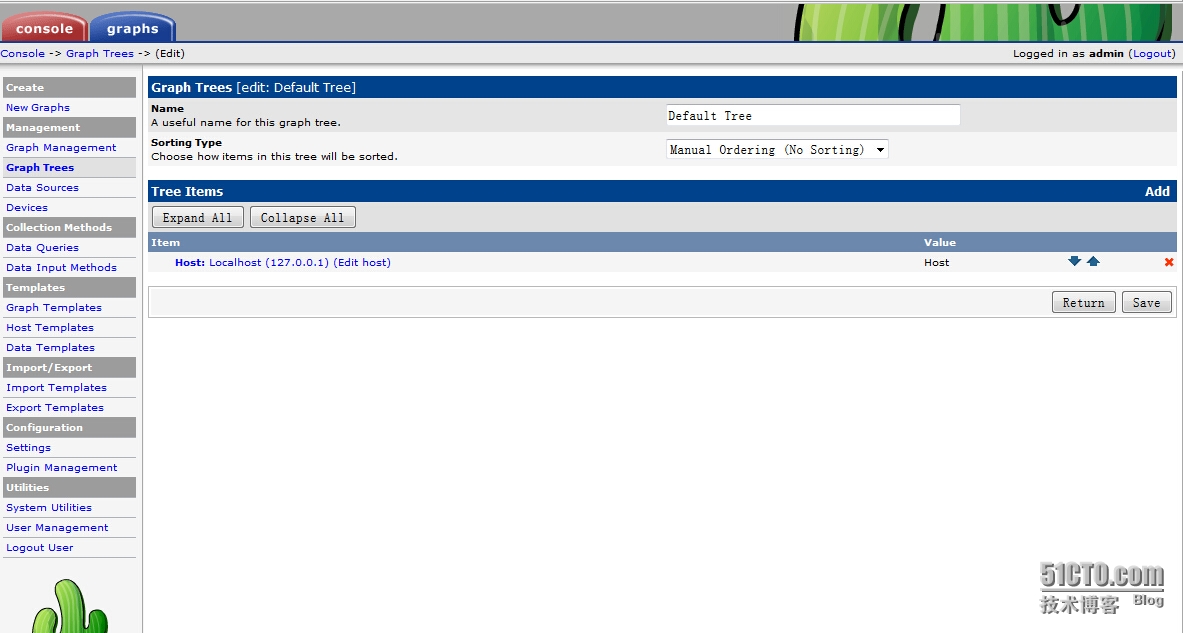
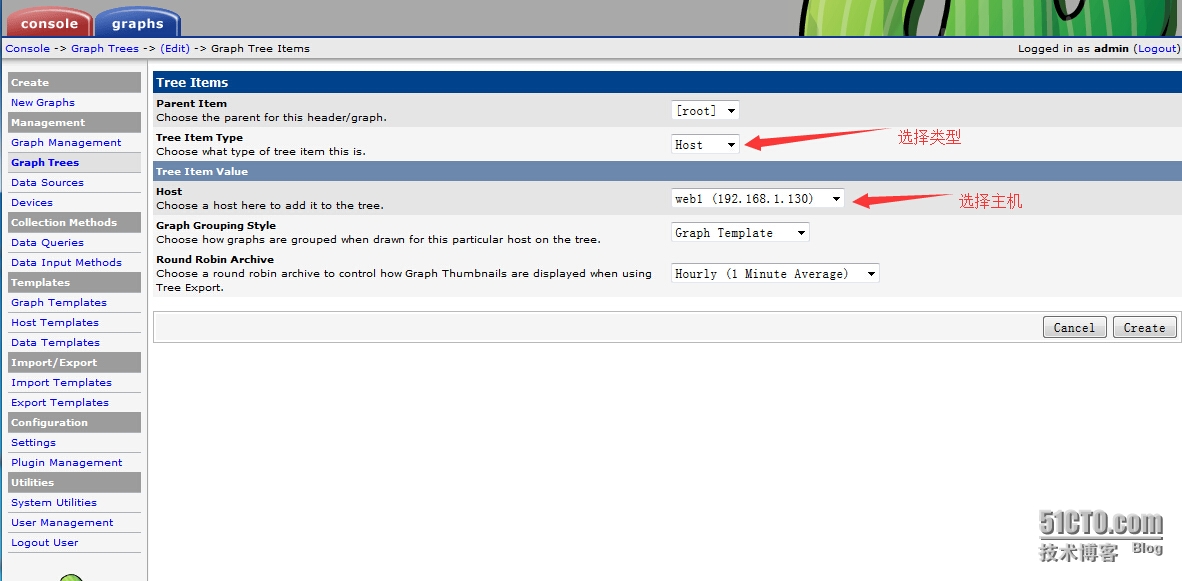
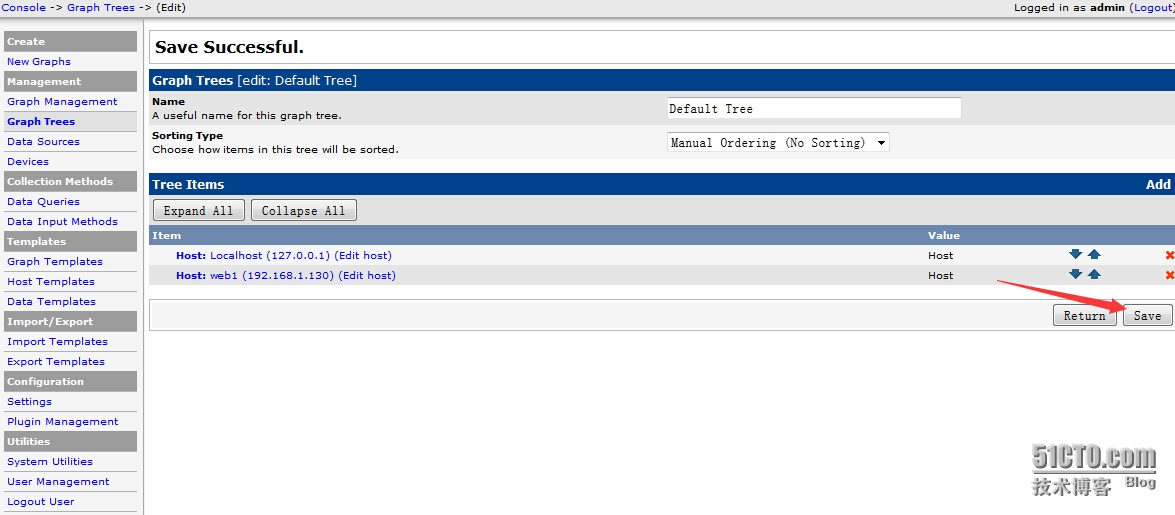
監控項目添加完畢,將主機添加到監控主幹線上,點擊左側Graph Trees
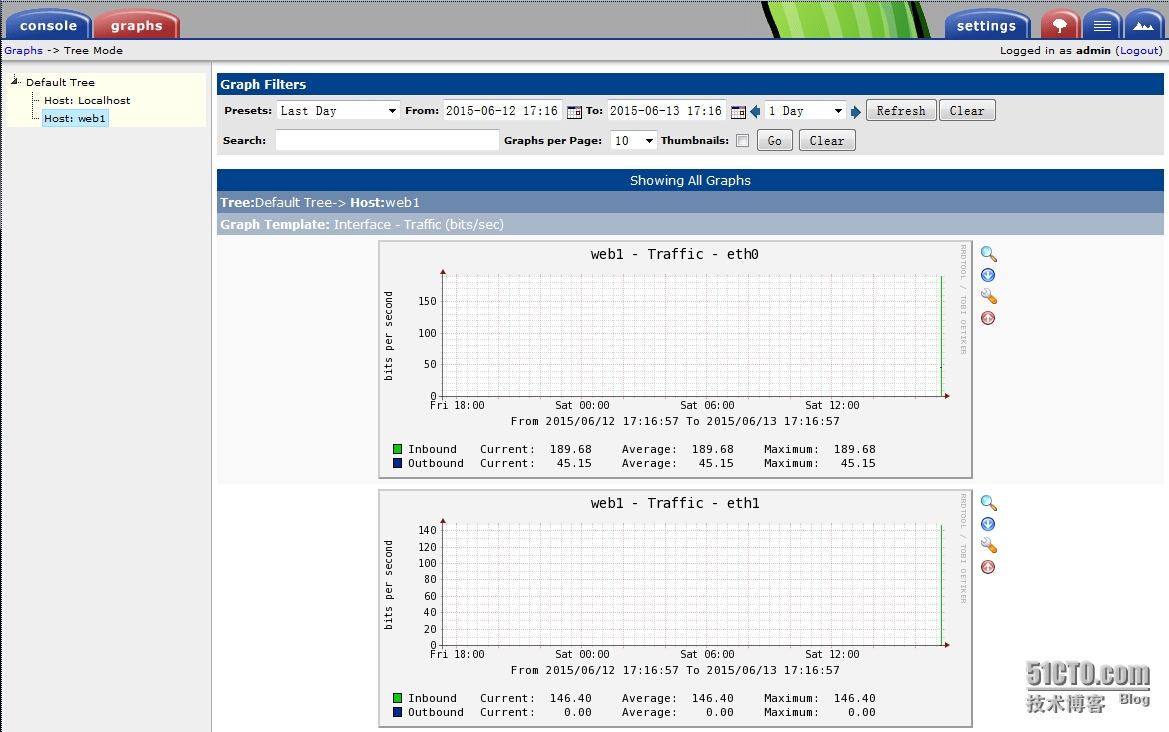
到主界面查看,是否添加成功,最好在監控服務器上刷新一下
1 2 3 4 5 6 7 8 9 10 11 12 13 14 15 16 17 18 19 | [root@cacti ~]# /usr/bin/php /usr/share/cacti/poller.php --forceOK u:0.00 s:0.00 r:0.00OK u:0.00 s:0.00 r:0.01OK u:0.00 s:0.00 r:0.03OK u:0.00 s:0.00 r:0.05OK u:0.00 s:0.00 r:0.08OK u:0.00 s:0.00 r:0.09OK u:0.00 s:0.00 r:0.09OK u:0.00 s:0.00 r:0.09OK u:0.00 s:0.00 r:0.09OK u:0.00 s:0.00 r:0.09OK u:0.00 s:0.00 r:0.09OK u:0.00 s:0.00 r:0.09OK u:0.00 s:0.00 r:0.09OK u:0.00 s:0.00 r:0.09OK u:0.00 s:0.00 r:0.09OK u:0.00 s:0.00 r:0.09OK u:0.00 s:0.00 r:0.1006/13/2015 05:16:53 PM - SYSTEM STATS: Time:0.2109 Method:cmd.php Processes:1 Threads:N/A Hosts:3 HostsPerProcess:3 DataSources:20 RRDsProcessed:17 |
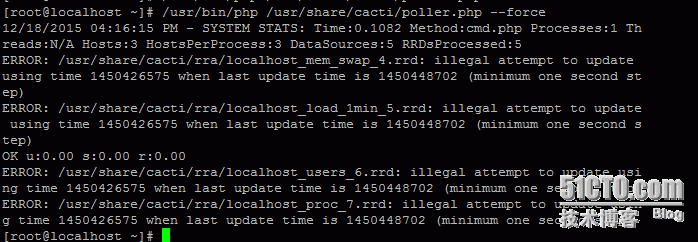
cacti監控主機執行/usr/bin/php /usr/share/cacti/poller.php --force報錯解決
解決方法:
現在再次執行就不會報錯了
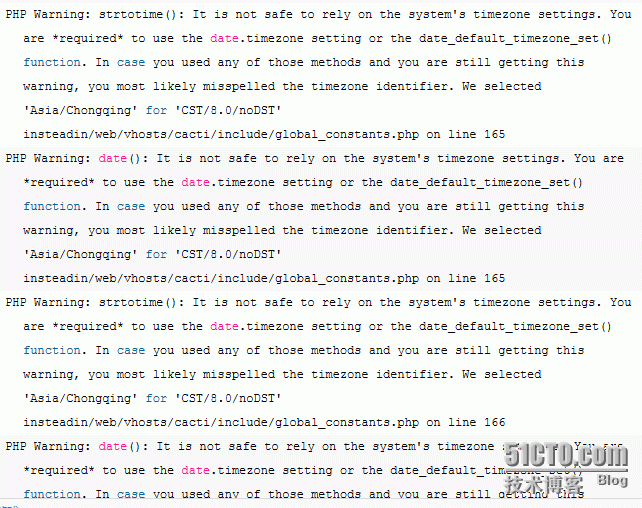
如果報這個錯
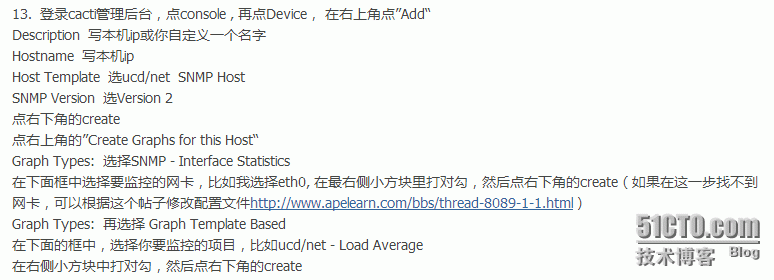
功夫不負有心人,終於各種測試,找到了昨晚試驗沒出現的網卡;
方法如下:
前面的所有步驟和銘哥論壇帖子一樣。web裏面的配置也一樣。後面找到的配置不需要修改;(按照配置修改後會提示snmp error錯誤)
只需要在客戶機(你要監控的機器)修改配置文件:
[root@localhost ~]# vi /etc/snmp/snmpd.conf
view systemview included .1.3.6.1.2.1.1
修改爲:
view systemview included .1.3.6.1.2.1
然後重啓snmpd服務;
[root@localhost ~]# /etc/init.d/snmpd restart
在web監控裏面添加
類型選擇Graph Types: SNMP - Interface Statistics 就看到你客戶機的網卡了。點擊create。保存。
在Graphs中就可以看到添加的網卡流量信息了;

