


說明:
mmm是一套支持雙主故障切換和雙主日常管理的腳本程序。基於perl實現,用來對mysql replication進行監控和故障遷移。雖然叫做雙主複製,但是業務上同一時刻只允許對一個主進行寫入,另一臺備選主上提供部分讀服務,以加速在主主切換時備選主的預熱,可以說mmm這套程序一方面實現了故障切換的功能,另一方面其內部附加的工具腳本也可以實現多個slave的read負載均衡。
.
.
拓撲圖: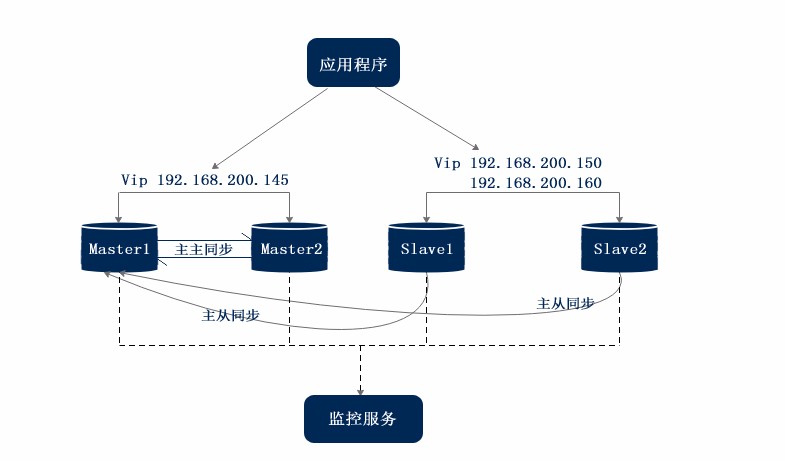
.
.
實驗環境: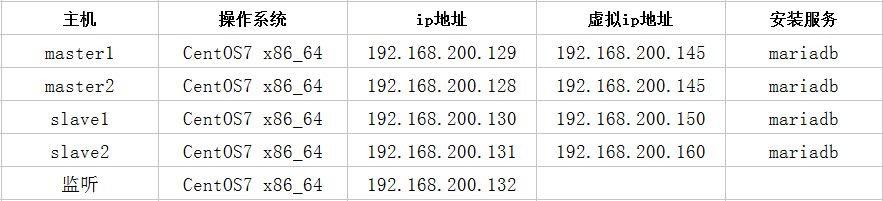
.
.
實驗步驟如下:
.
.
1 . 在四臺數據庫佈署安裝mariadb
systemctl stop firewalld.service
setenforce 0    #關閉防火牆
wget -O /etc/yum.repos.d/CentOS-Base.repo http://mirrors.aliyun.com/repo/Centos-7.repo  #從遠程終端獲取yum倉庫配置,來自阿里雲配置文件
yum install epel-release -y     #安裝epel源
yum clean all && yum makecache  #清空緩存,加載緩存源數據
yum install mariadb-server mariadb -y   #安裝mariadb
.
.
2 . 在四臺服務器上修改配置文件
vim /etc/my.cnf
把[mysqld]底下刪除,重新插入
[mysqld]
log_error=/var/lib/mysql/mysql.err  #錯誤日誌文件位置
log=/var/lib/mysql/mysql_log.log    #訪問日誌文件位置
log_slow_queries=/var/lib/mysql_slow_queris.log    #慢日誌文件位置
binlog-ignore-db=mysql,information_schema   #mysql與information_schema兩個數據庫不生成二進制日誌文件
character_set_server=utf8   #字符集
log_bin=mysql_bin   #二進制日誌功能開啓
server_id=1 #其它id號不能相同
log_slave_updates=true  #同步開啓
sync_binlog=1   #同步二進制文件
auto_increment_increment=2  #增量
auto_increment_offset=1     #起始值,防止衝突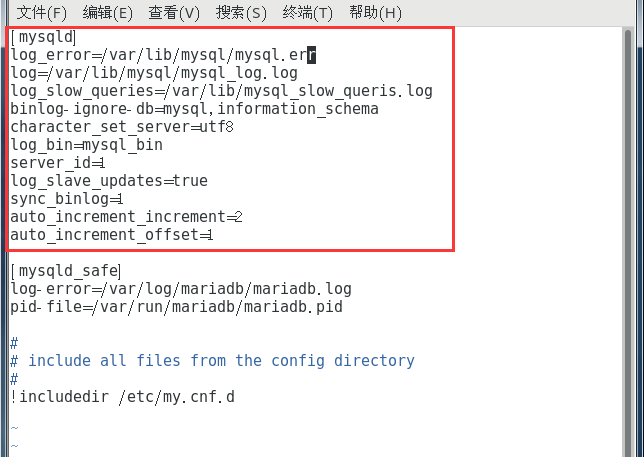
systemctl start mariadb.service #開啓mariadb
.
.
3 .配置主主複製,兩臺主服務器相互複製show master status; #查看日誌文件名與偏移量
兩臺都查看,接下來需要輸入對方主機的日誌文件名與偏移量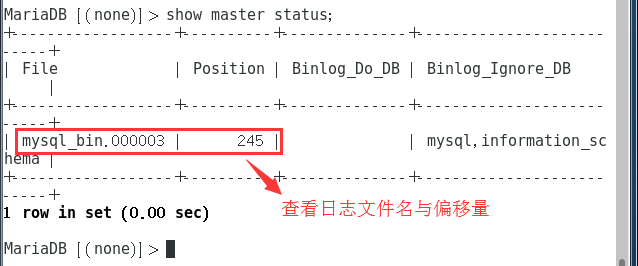
grant replication slave on *.* to 'replication'@'192.168.200.%' identified by '123123'; #授權登錄
change master to master_host='對方主服務器ip地址',master_user='replication',master_password='123123',master_log_file='mysql_bin.000003',master_log_pos=245;  #給憑證
start slave;    #開啓同步功能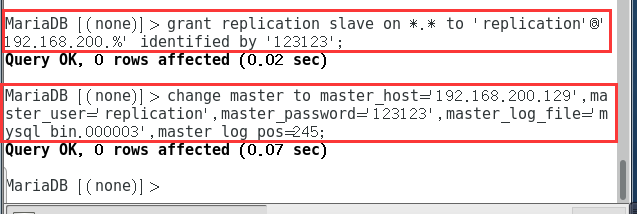
show slave status \G; #查看同步結果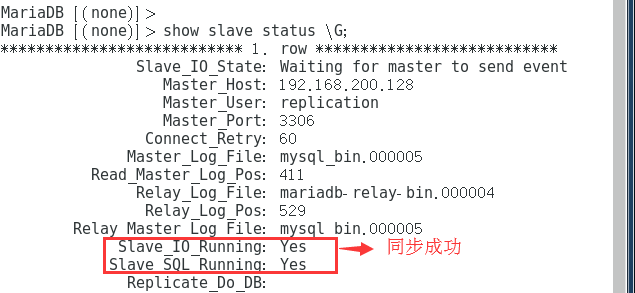
.
.
4 . 兩臺從服務器向主服務器同步
change master to master_host='主服務器 ip地址',master_user='replication',master_password='123123',master_log_file='mysql_bin.000003',master_log_pos=245;
start slave;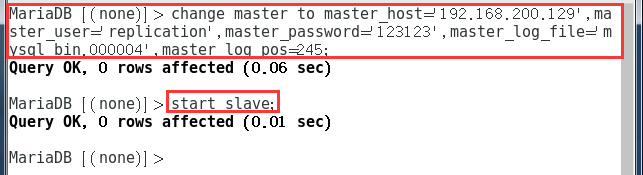
.
.
5 . 四臺服務器
yum install mysql-mmm -y #基於epel源基礎配置的
cd /etc/mysql-mmm/
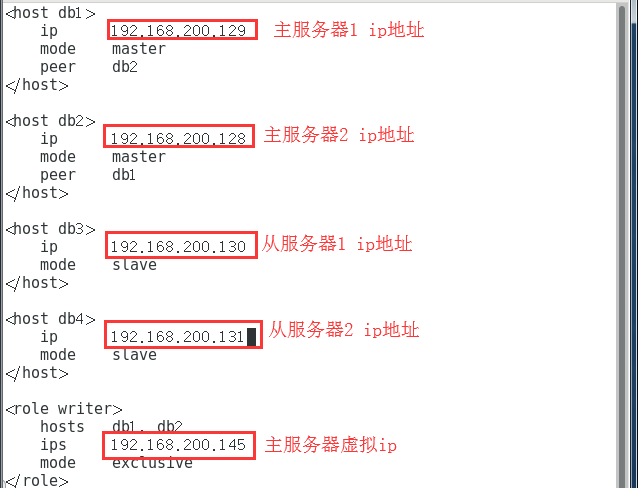
vim mmmcommon.conf
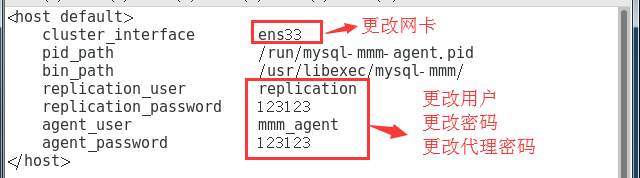
< host default>
clusterinterface ens33 #更改網卡名稱
pidpath /run/mysql-mmm-agent.pid
binpath /usr/libexec/mysql-mmm/
replicationuser replication #更改用戶
replicationpassword 123123 #更改密碼
agentuser mmmagent
agentpassword 123123 #更改代理密碼*
</host>
. . . . . .

.
.
6 .將配置文件遠程複製給其它服務器
scp mmmcommon.conf [email protected]:/etc/mysql-mmm/
scp mmmcommon.conf [email protected]:/etc/mysql-mmm/
scp mmmcommon.conf [email protected]:/etc/mysql-mmm/   #遠程複製給其它服務器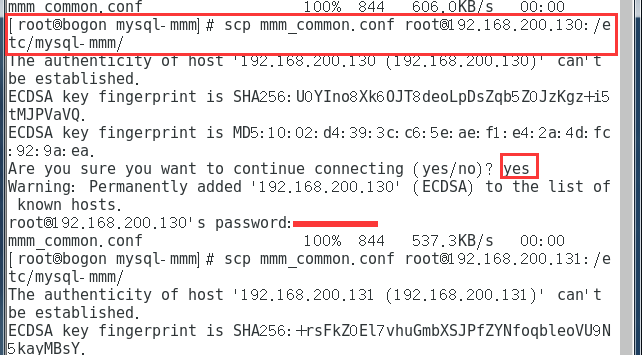
.
.
7 .設置監控服務器
wget -O /etc/yum.repos.d/CentOS-Base.repo http://mirrors.aliyun.com/repo/Centos-7.repo  #從遠程終端獲取yum倉庫配置,來自阿里雲
yum install epel-release -y
yum install mysql-mmm -y
主服務器遠程複製配置文件給監控服務器
scp mmm_common.conf root@監控服務器ip地址:/etc/mysql-mmm/
cd /etc/mysql-mmm/
   vim mmm_mon.conf
<monitor>
    ip                  127.0.0.1
    pid_path            /run/mysql-mmm-monitor.pid
    bin_path            /usr/libexec/mysql-mmm
    status_path         /var/lib/mysql-mmm/mmm_mond.status
    ping_ips            192.168.200.129,192.168.200.128,192.168.200.130,192.168.200.131    #監控所有服務器範圍--ip地址
    auto_set_online     10  #自動上線時間,單位s
   .....
<host default>
    monitor_user        mmm_monitor
    monitor_password    123123      #更改密碼
</host>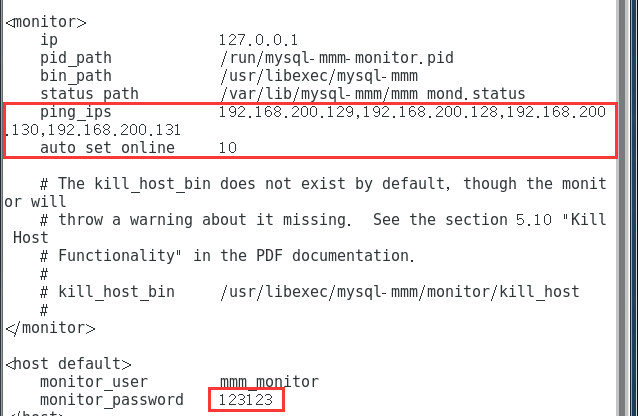
.
.
8 .在所有數據庫上爲mmm_agent代理授權
grant super,replication client,process on *.* to 'mmm_agent'@'192.168.200.%' identified by '123123';
在所有數據庫上爲mmm_monitor監控帳戶授權
grant replication client on *.* to 'mmm_monitor'@'192.168.200.%' identified by '123123';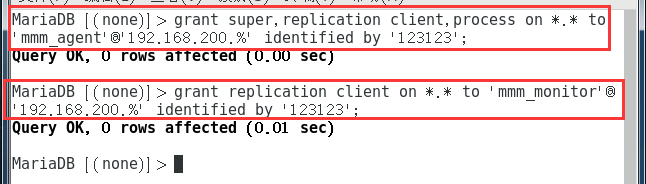
.
.
9 .在四臺服務器上修改db值vim mmm_agent.conf 修改db1~4數值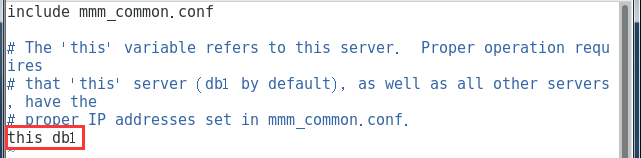
systemctl start mysql-mmm-agent.service #開啓服務
.
.
10 .回到監控服務器
systemctl start mysql-mmm-monitor.service   #啓用監控服務
mmm_control show    #查看各服務器節點情況
此時可以觀察到各服務器節點狀況。可以關掉一臺服務器,然後查看監控。會看到關閉的服務器虛擬ip被其它服務接替。