


IV.資源
當日歷最初加載時,有幾個聯繫人和位置可用。表示它們的對象是Contact和Location類的實例。創建它們之後,我們將它們添加到日曆計劃的聯繫人和位置集合中。
var resource;

// Add professor names to the schedule.contacts collection.
resource = new p.Contact();
resource.firstName = "Prof. William";
resource.lastName = "Dyer";
calendar.schedule.contacts.add(resource);

resource = new p.Location();
resource.name = "Room D";
calendar.schedule.locations.add(resource);
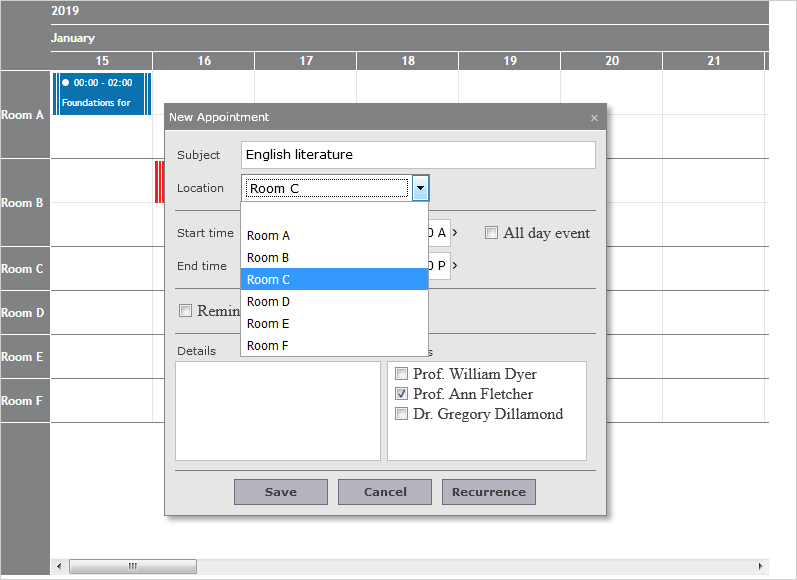
現在,當用戶創建新課程時,他們將在“Create Item/創建項目”表單的“Options/選項”窗格中看到“Contact and Location/聯繫人和位置 ”:
V. 項目
這些項是Item類的實例。他們代表不同講師的班級。我們使用Item的startTime和endTime屬性來指定類何時發生。該主題屬性賦予類的名稱:
//always start with the current date
var date = p.DateTime.today();

item = new p.Item();
item.startTime = p.DateTime.addHours(date.addDays(1), 14);
item.endTime = p.DateTime.addHours(item.startTime, 1);
item.subject = "Classical Mechanics";.subject = "Classical Mechanics";
我們使用位置和聯繫人屬性來設置講座的位置以及講授者。請注意,contacts屬性屬於集合類型,我們可以將多個講師分配給一個類:
item.location = calendar.schedule.locations.items()[0];.location = calendar.schedule.locations.items()[0];
item.contacts.add(calendar.schedule.contacts.items()[0]);.contacts.add(calendar.schedule.contacts.items()[0]);
我們從日程表的列表中獲取位置和聯繫人的位置和聯繫人我們還必須設置項目的詳細信息 - 如果您記得的話,它們將呈現爲工具提示。我們希望工具提示顯示講師的兩個名字和位置。以下是我們必須如何定義它:
item.details = item.contacts.items()[0].firstName + " " +.details = item.contacts.items()[0].firstName + " " +
item.contacts.items()[0].lastName + " - " + item.location.name;.contacts.items()[0].lastName + " - " + item.location.name;
我們必須將添加項目到項目的集合計劃,我們呈現的日曆使日曆
calendar.render();
.render();
VI.事件
當用戶創建新項目時,我們必須設置其詳細信息以告知新類的名稱和位置。我們處理itemCreating事件來執行此操作:
// attach handler - creating an item
calendar.itemCreating.addEventListener(handleItemCreating); .itemCreating.addEventListener(handleItemCreating);

function handleItemCreating(sender, args) {function handleItemCreating(sender, args) {
    handleItemModified(sender, args);(sender, args);
    if (args.item.contacts.count() > 0) {if (args.item.contacts.count() > 0) {
        //the details field is used by the tooltip//the details field is used by the tooltip
        args.item.details = args.item.contacts.items()[0].firstName + " " +.item.details = args.item.contacts.items()[0].firstName + " " +
                args.item.contacts.items()[0].lastName;.item.contacts.items()[0].lastName;

        if (args.item.location != null)if (args.item.location != null)
            args.item.details += " - " + args.item.location.name;.item.details += " - " + args.item.location.name;
    }}

}}
所述itemCreating事件提供的實例ItemModifyingEventArgs類作爲第二個參數處理程序方法。我們使用item屬性告訴我們正在修改哪個項目。然後,我們從項目的聯繫人和位置屬性中獲取所需的聯繫人和位置信息。
當新課程項目被拖動到另一個位置時,我們必須相應地更改其顏色。我們通過處理itemModified事件來完成此操作。
// attach handler - modifying an item
calendar.itemModified.addEventListener(handleItemModified);.itemModified.addEventListener(handleItemModified);
項目的不同背景顏色是通過自定義CSS類實現的。我們使用Item類的cssClass屬性。CSS樣式在網頁的< HEAD >部分中定義:
.mfp-planner.standard .itemClass1 .mfp-item {.mfp-planner.standard .itemClass1 .mfp-item {
            background-color: 	#0c71af;-color: 	#0c71af;
        }}

.mfp-planner.standard .itemClass2 .mfp-item {.mfp-planner.standard .itemClass2 .mfp-item {
            background-color: #f81e1e;-color: #f81e1e;
        }}
......................
處理程序方法檢查新位置並分配適當的CSS樣式:
function handleItemModified(sender, args) handleItemModified(sender, args)
{{
    // you don't have to check any other conditions like dragging to another room, // you don't have to check any other conditions like dragging to another room,
    // as it will stay the same color if you make other changes (other than dragging to a different room)// as it will stay the same color if you make other changes (other than dragging to a different room)
    if (args.item != null){if (args.item != null){
        switch (args.item.location.name) {switch (args.item.location.name) {
            case "Room A":  //we can also implement it with forcase "Room A":  //we can also implement it with for
                args.item.cssClass = 'itemClass1';.item.cssClass = 'itemClass1';
                console.log("a");.log("a");
                break;break;
            case "Room B":case "Room B":
                args.item.cssClass = 'itemClass2';.item.cssClass = 'itemClass2';
                break;break;
            case "Room C":case "Room C":
                args.item.cssClass = 'itemClass3';.item.cssClass = 'itemClass3';
                break;break;
            case "Room D":case "Room D":
                args.item.cssClass = 'itemClass1';.item.cssClass = 'itemClass1';
                break;break;
            case "Room E":case "Room E":
                args.item.cssClass = 'itemClass2';.item.cssClass = 'itemClass2';
                break;break;
            case "Room F":case "Room F":
                args.item.cssClass = 'itemClass3';.item.cssClass = 'itemClass3';
                break;break;
            default:default:
                args.item.cssClass = 'itemClass1';.item.cssClass = 'itemClass1';
        }}
    }}
}}
handler方法的args參數的item屬性提供對已修改項的訪問。
VII.過濾Professors
我們想在我們的應用程序中添加最後一個功能。我們希望用戶只能由給定的教授渲染課程。
我們首先添加帶有講師姓名的複選框。每個複選框都具有與click事件相同的處理程序方法:
<input id="dyer" checked="checked" name="subscribe" type="checkbox" value="Dyer> id="dyer" checked="checked" name="subscribe" type="checkbox" value="Dyer>
<label for=">Prof. William Dyer<label for=">Prof. William Dyer

<input id="fletcher" checked="checked" name="subscribe" type="checkbox" value="Fletcher"><input id="fletcher" checked="checked" name="subscribe" type="checkbox" value="Fletcher">
<label for="fletcher">Prof. Ann Fletcher</label><label for="fletcher">Prof. Ann Fletcher</label>
...........................
處理程序方法需要查看兩種情況。第一種情況是由一位教授講授課程。在這種情況下,我們循環瀏覽所有項目並使項目可見或不顯示,具體取決於是否選中了具有教授姓名的複選框:
// if there is at least one present professor from the lecture professors, the lecture will not disappear
function handleClick(cb) {function handleClick(cb) {
for (var i = 0; i < calendar.schedule.items.count(); i++) {for (var i = 0; i < calendar.schedule.items.count(); i++) {
        var item = calendar.schedule.items.items()[i]; //we iterate through every elementvar item = calendar.schedule.items.items()[i]; //we iterate through every element
        if (item.contacts.count() == 1) {if (item.contacts.count() == 1) {
            if (item.contacts.items()[0].lastName == cb.value)if (item.contacts.items()[0].lastName == cb.value)
                item.visible = cb.checked;.visible = cb.checked;
        }}
      }}
..............................................
}}
在第二種情況下,我們會查看由多位講師講授的課程。在這種情況下,如果選中了至少有一位講師姓名的複選框,我們會顯示該項目:
else if (item.contacts.count() > 1) { if (item.contacts.count() > 1) {
for (var j = 0; j < item.contacts.count() ; j++) {for (var j = 0; j < item.contacts.count() ; j++) {
                if (item.contacts.items()[j].lastName == cb.value) { // the checked/unchecked professor is in the contacts of this itemif (item.contacts.items()[j].lastName == cb.value) { // the checked/unchecked professor is in the contacts of this item
                    if (cb.checked == true) item.visible = true; // if there is a check, the item must be visibleif (cb.checked == true) item.visible = true; // if there is a check, the item must be visible
                    else { // if there is no check, we see if there is at least one professor in the list of contacts of the itemelse { // if there is no check, we see if there is at least one professor in the list of contacts of the item
                        item.visible = professorPresent(item);.visible = professorPresent(item);
                    }}

                }}
            }}
        }}
最後我們重新繪製日曆:
// repaint the calendar
this.calendar.repaint(true);this.calendar.repaint(true);
在這裏,professorPresent方法檢查是否至少選中了一個帶有教授的複選框,這些複選框在我們作爲參數提供的項目中作爲講師出現:
// return true if even 1 professor from the item's contacts is present, false otherwise
function professorPresent(item) {function professorPresent(item) {
    console.log(item.contacts.count());.log(item.contacts.count());
    for (var j = 0; j < item.contacts.count() ; j++) {for (var j = 0; j < item.contacts.count() ; j++) {
        var checkBoxId = item.contacts.items()[j].lastName.toLowerCase();var checkBoxId = item.contacts.items()[j].lastName.toLowerCase();
        var checkBox = document.getElementById(checkBoxId);var checkBox = document.getElementById(checkBoxId);
        if (checkBox!= null && checkBox.checked == true) {if (checkBox!= null && checkBox.checked == true) {
            return true;return true;
        }}
    }}
    return false;return false;
}}