1 下載nexus安裝包 網址:http://www.sonatype.org/nexus/
建議下載最新的版本,最新的版本支持比較新的jdk版本
2 啓動nexus服務
進入nexus的文件目錄:D:\nexus-oss-webapp-1.9.2.4-bundle\nexus-oss-webapp-1.9.2.4\bin\jsw\windows-x86-32下面,
Installnexus.bat 表示安裝nexus服務到window服務中去。
Startnexus.bat 表示啓動nexus服務。
nexus.bat 表示啓動nexus應用程序 。
Resumenexus.bat 表示重啓nexus 。
Stopnexus.bat 表示停止nexus服務
啓動nexus 無需啓動tomcat,只需要點擊“nexus.bat "就可以啓動。
啓動成功後 在瀏覽器地址欄中輸入:
http://localhost:8081/nexus/index.html
如果看到nexus界面 說明啓動成功。
3 設置maven的setting.xml文件
3.1 設置自定義的倉庫
默認倉庫會保存在c盤的C:\Users\dell\.m2下面,
如果要使用自定義的倉庫,則在setting.xml中配置
<?xml version="1.0" encoding="UTF-8"?>
<settings xmlns="http://maven.apache.org/SETTINGS/1.0.0" xmlns:xsi="http://www.w3.org/2001/XMLSchema-instance" xsi:schemaLocation="http://maven.apache.org/SETTINGS/1.0.0 http://maven.apache.org/xsd/settings-1.0.0.xsd">
	<!-- 本地倉庫 -->
	<localRepository>D:/java/maven_store/repository</localRepository>
	<interactiveMode>true</interactiveMode>
	<offline>false</offline>
	<pluginGroups></pluginGroups>
	<proxies></proxies>
	<servers>
		<server>
			<id>user-snapshots</id>
			<username>deployment</username>
			<password>deployment123</password>
		</server>
		<server>
			<id>user-releases</id>
			<username>deployment</username>
			<password>deployment123</password>
		</server>
		<server>
			<id>thirdparty</id>
			<username>deployment</username>
			<password>deployment123</password>
		</server>
	</servers>
<!--
	<mirrors>
		<mirror>
			<id>nexus</id>
			<mirrorOf>central</mirrorOf>
			<name>使用私庫替換maven預定義的centra倉庫</name>
			<url>http://XXX.XXX.XX.XX:8081/nexus/content/groups/public/</url>
		</mirror>
	</mirrors>
-->
	<profiles>
		<profile>
			<id>dev</id>
			<repositories>
				<repository>
					<id>nexus</id>
					<url>http://XXX.XX.XX.XXX:8081/nexus/content/groups/public/</url>
					<releases>
						<enabled>true</enabled>
					</releases>
					<snapshots>
						<enabled>true</enabled>
					</snapshots>
				</repository>
			</repositories>
			<pluginRepositories>
				<pluginRepository>
					<id>nexus</id>
					<url>http://XXX.XXX.X.XXX:8081/nexus/content/groups/public/</url>
					<releases>
						<enabled>true</enabled>
					</releases>
					<snapshots>
						<enabled>true</enabled>
					</snapshots>
				</pluginRepository>
			</pluginRepositories>
		</profile>

		<profile>
			<id>jdk-1.7</id>
			<activation>
				<activeByDefault>true</activeByDefault>
				<jdk>1.7</jdk>
			</activation>
			<properties>
				<maven.compiler.source>1.7</maven.compiler.source>
				<maven.compiler.target>1.7</maven.compiler.target>
				<maven.compiler.compilerVersion>1.7</maven.compiler.compilerVersion>
			</properties>
		</profile>
	</profiles>

	<activeProfiles>
		<activeProfile>dev</activeProfile>
	</activeProfiles>
</settings>
保存文件。
4 登錄nexus 用戶名admin 密碼 admin123.
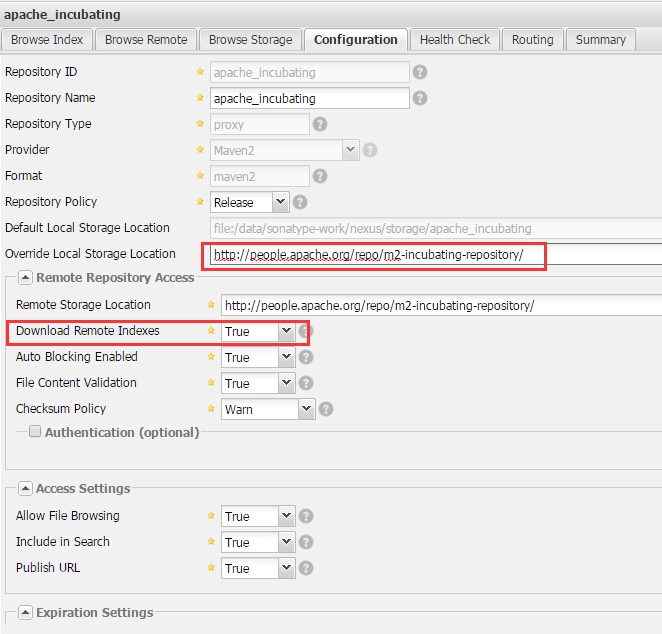
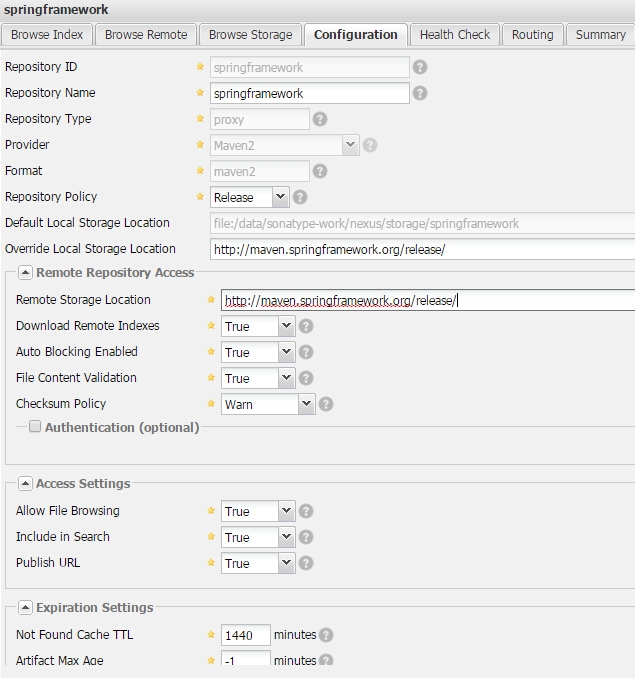
進入Repository菜單,修改 Apache Snapshots,Codehaus Snapshots,Maven Central的Download Remote indexs 爲true.
並右擊每一個倉庫的 repair Index ,進行更新index 並把所有的proxy類型的倉庫添加到public repository中去。
自己覺得比較好的其他的代理倉庫如下:
添加新的repository 即代理倉庫
1、http://people.apache.org/repo/m2-snapshot-repository
2、http://people.apache.org/repo/m2-incubating-repository/
3、http://maven.springframework.org/release/
https://repository.jboss.org/nexus/content/repositories/releases/
https://repository.jboss.org/nexus/content/groups/public-jboss
http://repository.jboss.com/maven2/
http://mirrors.ibiblio.org/pub/mirrors/maven2/org/acegisecurity/
http://repository.jboss.org/nexus/content/groups/public/
https://repository.jboss.org/nexus/content/groups/developer/
http://morphia.googlecode.com/svn/mavenrepo/
5 更新 public repository 的index
經過上面的配置後,基本的Maven+Nexus倉庫就搭建好了 可以創建一個新的Maven project 進行測試。
6 備註
如果你安裝的jdk是1.7的版本或者更高,請使用nexus版本2.0以上的版本
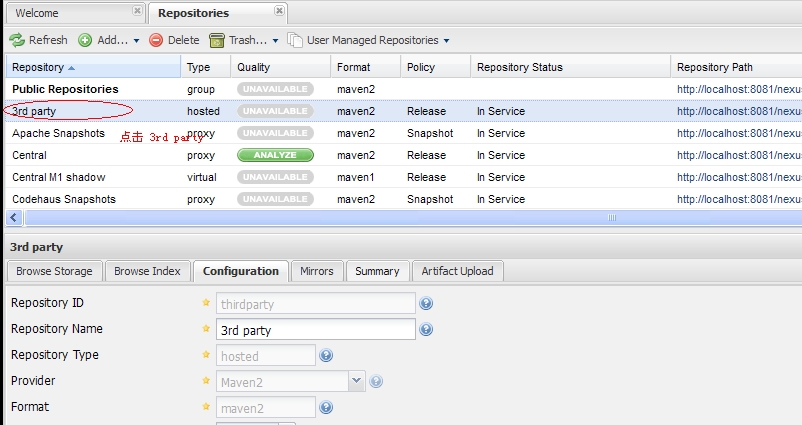
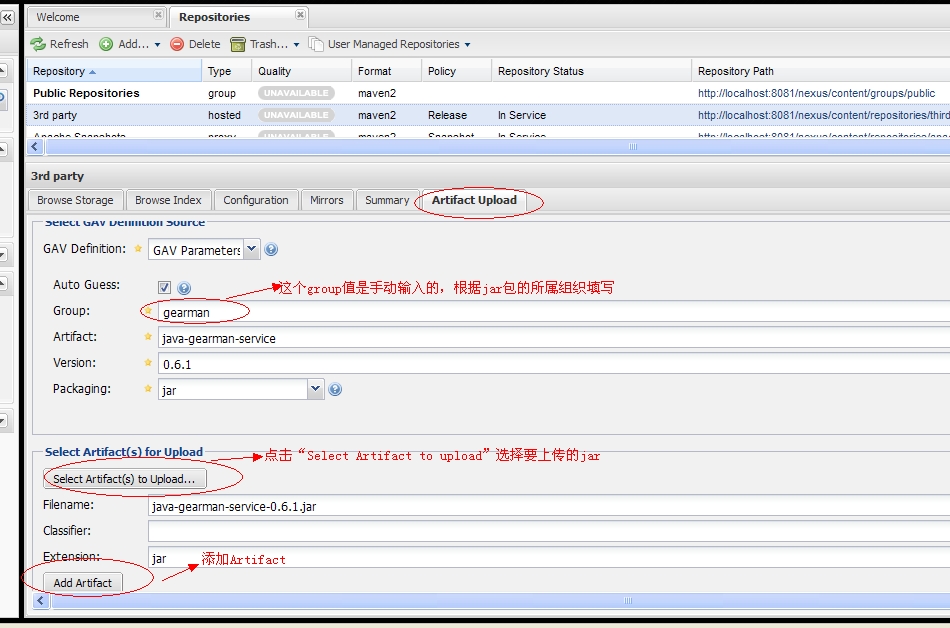
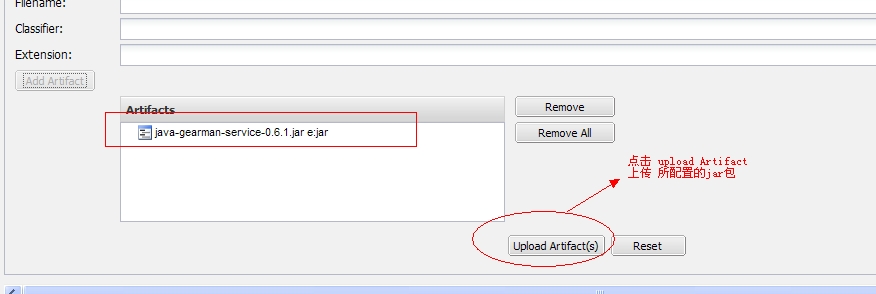
7 上傳jar到本地倉庫,如第三方的jar包 gearman 相關的jar包
選中3rd party 點擊Artifact Upload標籤

![T`(95PZ`553S50~A1S]IB88.png wKiom1VupZChrKIuAALlRzxxV8U126.jpg](https://s3.51cto.com/wyfs02/M01/6D/E7/wKiom1VupZChrKIuAALlRzxxV8U126.jpg)
