


序
本文是對Word頁眉頁腳的操作方法的進一步的闡述。在“C# 添加Word頁眉頁腳、頁碼”一文中,介紹了添加簡單頁眉頁腳的方法,該文中的方法可滿足於大多數的頁眉頁腳添加要求,但是對於比較複雜一點的文檔,對頁眉頁腳的添加要求比較嚴格的,如需要設置奇、偶頁的頁眉頁腳不同、首頁頁眉頁腳不同、設置頁碼時需要對不同章節的內容設置不同頁碼、對包含重要信息的頁眉頁腳需要設置編輯權限、相同性質的文檔需要複製指定頁眉頁腳等等操作,則可以參考本文中的方法。
鑑於此,本文就以上操作要求分以下幾個示例要點來進行:
- 設置Word奇偶頁頁眉頁腳不同
- 設置Word首頁頁眉頁腳不同
- 不連續設置頁碼(即對不同章節的內容設置不同頁碼)
- 複製頁眉頁腳
- 鎖定頁眉頁腳
- 刪除頁眉頁腳
使用工具:Free Spire.Doc for .NET(社區版)
注:編程時注意在相應程序中添加引用Spire.Doc.dll,dll文件可在安裝路徑下的Bin文件夾中獲取。![C# 操作Word頁眉頁腳——奇偶頁/首頁不同、不連續設置頁碼、複製頁眉頁腳、鎖定頁眉頁腳、刪除頁眉]()
C#代碼示例
【示例1】設置Word奇偶頁頁眉頁腳不同
using System;
using System.Collections.Generic;
using System.Linq;
using System.Text;
using Spire.Doc;
using Spire.Doc.Documents;
using Spire.Doc.Fields;
using System.Drawing;

namespace HeadersFootersForOddAndEvenPages
{
    class Program
    {
        static void Main(string[] args)
        {
            //創建Document類,並加載測試文檔
            Document document = new Document();
            document.LoadFromFile("test.docx");

            //獲取指定節,並設置頁眉頁腳奇偶頁不同的屬性爲true
            Section section = document.Sections[0];
            section.PageSetup.DifferentOddAndEvenPagesHeaderFooter = true;

            //設置奇偶數頁的頁腳
            Paragraph P1 = section.HeadersFooters.EvenFooter.AddParagraph();
            TextRange EF = P1.AppendText("偶數頁頁腳");
            EF.CharacterFormat.FontName = "Calibri";
            EF.CharacterFormat.FontSize = 12;
            EF.CharacterFormat.TextColor = Color.Green;
            EF.CharacterFormat.Bold = true;
            P1.Format.HorizontalAlignment = HorizontalAlignment.Right;
            Paragraph P2 = section.HeadersFooters.OddFooter.AddParagraph();
            TextRange OF = P2.AppendText("奇數頁頁腳");
            P2.Format.HorizontalAlignment = HorizontalAlignment.Left ;
            OF.CharacterFormat.FontName = "Calibri";
            OF.CharacterFormat.FontSize = 12;
            OF.CharacterFormat.Bold = true;
            OF.CharacterFormat.TextColor = Color.Blue;

            //設置奇偶數頁的頁眉
            Paragraph P3 = section.HeadersFooters.OddHeader.AddParagraph();
            TextRange OH = P3.AppendText("奇數頁頁眉");
            P3.Format.HorizontalAlignment = HorizontalAlignment.Left;
            OH.CharacterFormat.FontName = "Calibri";
            OH.CharacterFormat.FontSize = 12;
            OH.CharacterFormat.Bold = true;
            OH.CharacterFormat.TextColor = Color.Blue;
            Paragraph P4 = section.HeadersFooters.EvenHeader.AddParagraph();
            TextRange EH = P4.AppendText("偶數頁頁眉");
            P4.Format.HorizontalAlignment = HorizontalAlignment.Right;
            EH.CharacterFormat.FontName = "Calibri";
            EH.CharacterFormat.FontSize = 12;
            EH.CharacterFormat.Bold = true;
            EH.CharacterFormat.TextColor = Color.Green;

            //保存文檔
            document.SaveToFile("result.docx", FileFormat.Docx2010);
            System.Diagnostics.Process.Start("result.docx");
        }
    }
}
奇偶頁頁眉頁腳不同設置效果: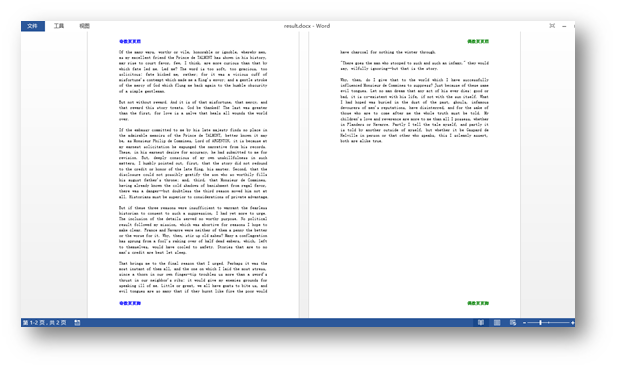
【示例2】設置Word首頁頁眉頁腳不同
using System;
using System.Collections.Generic;
using System.Linq;
using System.Text;
using Spire.Doc;
using Spire.Doc.Documents;
using Spire.Doc.Fields;
using System.Drawing;

namespace HeaderFootersDifferentFromFirstPage
{
    class Program
    {
        static void Main(string[] args)
        {
            //創建Document類的對象,並加載測試文檔
            Document document = new Document();
            document.LoadFromFile("test.docx");

            //獲取指定節,並設置頁眉頁腳首頁不同屬性爲true
            Section section = document.Sections[0];
            section.PageSetup.DifferentFirstPageHeaderFooter = true;

            //加載圖片添加到首頁頁眉
            Paragraph paragraph1 = section.HeadersFooters.FirstPageHeader.AddParagraph();
            paragraph1.Format.HorizontalAlignment = HorizontalAlignment.Left;
            DocPicture headerimage = paragraph1.AppendPicture(Image.FromFile("2.png"));
            //添加文字到首頁頁腳
            Paragraph paragraph2 = section.HeadersFooters.FirstPageFooter.AddParagraph();
            paragraph2.Format.HorizontalAlignment = HorizontalAlignment.Center;
            TextRange FF = paragraph2.AppendText("首頁頁眉");
            FF.CharacterFormat.FontSize = 12;

            //添加頁眉頁腳到其他頁面
            Paragraph paragraph3 = section.HeadersFooters.Header.AddParagraph();
            paragraph3.Format.HorizontalAlignment = HorizontalAlignment.Center;
            TextRange NH = paragraph3.AppendText("非首頁頁眉");
            NH.CharacterFormat.FontSize = 12;
            Paragraph paragraph4 = section.HeadersFooters.Footer.AddParagraph();
            paragraph4.Format.HorizontalAlignment = HorizontalAlignment.Center;
            TextRange NF = paragraph4.AppendText("非首頁頁腳");
            NF.CharacterFormat.FontSize = 12;

            //保存文檔
            document.SaveToFile("result.docx", FileFormat.Docx2010);
            System.Diagnostics.Process.Start("result.docx");
        }
    }
}
首頁頁眉頁腳不同設置效果: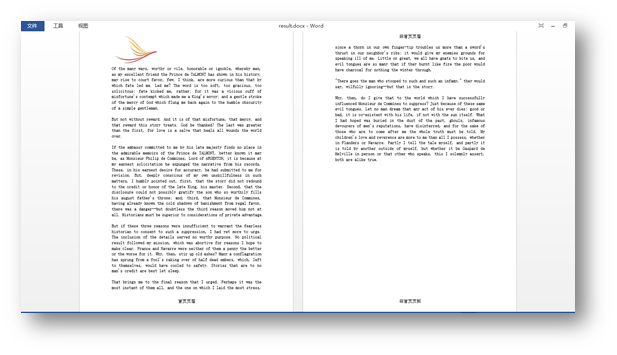
【示例3】不連續設置頁碼
using Spire.Doc;
using Spire.Doc.Documents;
using System.Drawing;

namespace DifferentPageNumber_Doc
{
    class Program
    {
        static void Main(string[] args)
        {
            //創建Document對象,並加載測試文檔
            Document doc = new Document();
            doc.LoadFromFile("test.docx");

            //實例化HeaderFooter對象(指定頁碼添加位置:頁眉或頁腳)
            HeaderFooter footer = doc.Sections[0].HeadersFooters.Footer;
            //添加段落到頁腳
            Paragraph footerParagraph = footer.AddParagraph();
            //添加頁碼域到頁腳
            footerParagraph.AppendField("page number", FieldType.FieldPage);
            //設置頁碼右對齊
            footerParagraph.Format.HorizontalAlignment = HorizontalAlignment.Right;

            //創建段落樣式,包括字體名稱、大小、顏色
            ParagraphStyle style = new ParagraphStyle(doc);
            style.CharacterFormat.Font = new Font("黑體", 10, FontStyle.Bold);
            style.CharacterFormat.TextColor = Color.Black;
            doc.Styles.Add(style);
            //應用段落樣式到頁腳
            footerParagraph.ApplyStyle(style.Name);

            //將第一節的頁碼樣式設置爲羅馬數字
            doc.Sections[0].PageSetup.PageNumberStyle = PageNumberStyle.RomanLower;

            //將第二節的頁碼樣式設置爲阿拉伯數字,並重新開始編碼
            doc.Sections[1].PageSetup.PageNumberStyle = PageNumberStyle.Arabic;
            doc.Sections[1].PageSetup.RestartPageNumbering = true;
            doc.Sections[1].PageSetup.PageStartingNumber = 1;//此處可任意指定起始頁碼數

            //保存文檔
            doc.SaveToFile("output.docx", FileFormat.Docx2010);
            System.Diagnostics.Process.Start("output.docx");
        }
    }
}
頁碼添加效果:
【示例4】複製頁眉頁腳
using Spire.Doc;

namespace CopyHeaderAndFooter_Doc
{
    class Program
    {
        static void Main(string[] args)
        {
            //新建Word文檔1,並加載帶頁眉的源文檔
            Document doc1 = new Document();
            doc1.LoadFromFile("test1.docx");

            //獲取文檔1的頁眉
            HeaderFooter Header = doc1.Sections[0].HeadersFooters.Header;

            //新建文檔2,並加載目標文檔
            Document doc2 = new Document("test2.docx");

            //遍歷文檔2中的所有Section
            foreach (Section section in doc2.Sections)
            {
                foreach (DocumentObject obj in Header.ChildObjects)
                {
                    //將複製的頁眉對象添加到section
                    section.HeadersFooters.Header.ChildObjects.Add(obj.Clone());
                }
            }

            //保存並打開文檔
            doc2.SaveToFile("copyHeader.docx", FileFormat.Docx2013);
            System.Diagnostics.Process.Start("copyHeader.docx");
        }
    }
}
測試文檔: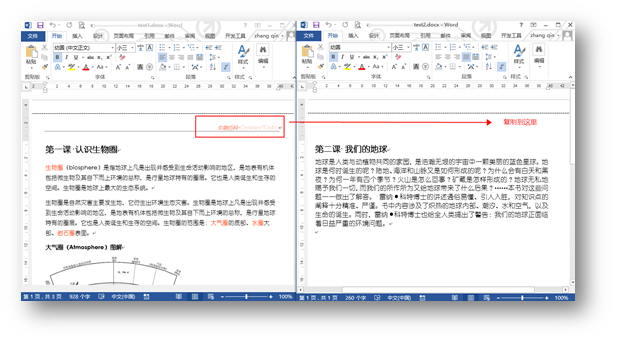
測試結果:
【示例5】鎖定頁眉頁腳
using Spire.Doc;

namespace ProtectHeaderFooter_Doc
{
    class Program
    {
        static void Main(string[] args)
        {
            //加載測試文檔
            Document doc = new Document();
            doc.LoadFromFile("sample.docx");

            //獲取第一個section
            Section section = doc.Sections[0];

            //保護文檔並設置 ProtectionType 爲 AllowOnlyFormFields,並設置啓用編輯的密碼
            doc.Protect(ProtectionType.AllowOnlyFormFields, "123");

            //設置ProtectForm 爲false 允許編輯其他區域
            section.ProtectForm = false;

            //保存文檔
            doc.SaveToFile("result.docx", FileFormat.Docx2013);
            System.Diagnostics.Process.Start("result.docx");
        }
    }
}
運行程序生成的文檔中,頁眉將不允許被編輯,正確輸入密碼後,方可編輯頁眉。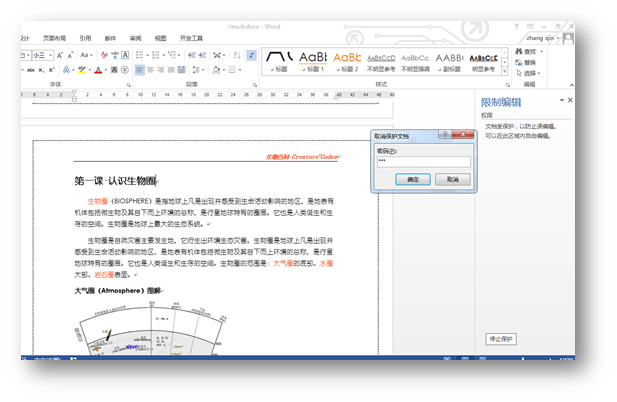
【示例6】刪除頁眉頁腳
1.刪除所有頁面的頁眉頁腳
using Spire.Doc;

namespace RemoveHeaderFooter_Doc
{
    class Program
    {
        static void Main(string[] args)
        {
            //創建一個Document實例並加載示例文檔
            Document doc = new Document();
            doc.LoadFromFile("sample.docx");
            //獲取第一個section
            Section section = doc.Sections[0];

            //刪除頁眉
            section.HeadersFooters.Header.ChildObjects.Clear();

            //刪除頁腳
            section.HeadersFooters.Footer.ChildObjects.Clear();

            //保存文檔
            doc.SaveToFile("result.docx", FileFormat.Docx);
            System.Diagnostics.Process.Start("result.docx");
        }
    }
}
刪除效果: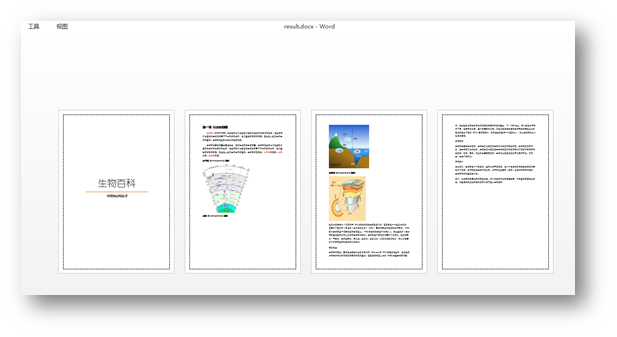
2.刪除首頁的頁眉頁腳
(適用於文檔封面,不需要頁眉頁腳的情況,或者其他情形)
using Spire.Doc;

namespace RemoveHeaderFooter2_Doc
{
    class Program
    {
        static void Main(string[] args)
        {
            //創建一個Document實例並加載示例文檔
            Document doc = new Document();
            doc.LoadFromFile("sample.docx");

            //獲取第一個section
            Section section = doc.Sections[0];

            //設置頁眉頁腳首頁不同
            section.PageSetup.DifferentFirstPageHeaderFooter = true;

            //刪除首頁頁眉頁腳
            section.HeadersFooters.FirstPageHeader.ChildObjects.Clear();

            //保存文檔
            doc.SaveToFile("output.docx", FileFormat.Docx);
            System.Diagnostics.Process.Start("output.docx");
        }
    }
}
刪除效果: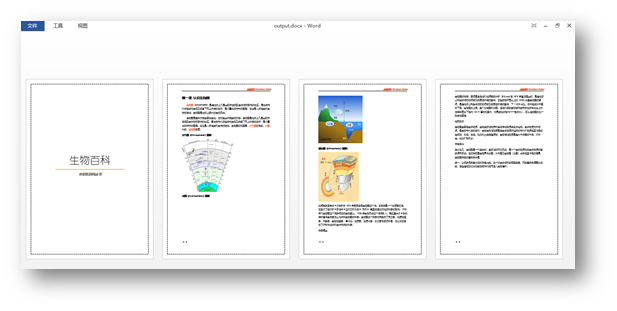
(本文完)
轉載請註明出處!