


一、準備一臺Linux主機
1、開SSH
systemctl enable sshd
2、關閉SELINUX
vi /etc/sysconfig/selinux
修改下邊紅字部分
# This file controls the state of SELinux on the system.
# SELINUX= can take one of these three values:
# enforcing - SELinux security policy is enforced.
# permissive - SELinux prints warnings instead of enforcing.
# disabled - No SELinux policy is loaded.
SELINUX=disabled
# SELINUXTYPE= can take one of three two values:
# targeted - Targeted processes are protected,
# minimum - Modification of targeted policy. Only selected processes are protected.
# mls - Multi Level Security protection.
SELINUXTYPE=targeted
3、安裝rz
yum -y install lrzsz
之後上傳文件一定要用-be參數(其中-b是--binary用二進制的方式上傳,-e是--escape強制escape所有控制字符),否則上傳的文件不完整
rz –be
4、安裝wget
yum -y install wget
5、更換yum源,用於提速yum
(1)備份yum源
mv /etc/yum.repos.d/CentOS-Base.repo /etc/yum.repos.d/CentOS-Base.repo.backup
(2)下載新的CentOS-Base.repo 到/etc/yum.repos.d/
wget -O /etc/yum.repos.d/CentOS-Base.repo http://mirrors.aliyun.com/repo/Centos-7.repo
清理緩存
yum clean all
重新生成緩存
yum makecache
6、用firewalld開80、8181、8080、3306、443、2222端口(80用於Nginx連接,8080用於Jumpserver連接,8081用於guacamole連接,5000用於Coco連接,3306用於MySQL連接、2222用於ssh連接)
firewall-cmd --permanent --add-port=80/tcp
firewall-cmd --permanent --add-port=8080/tcp
firewall-cmd --permanent --add-port=8081/tcp
firewall-cmd --permanent --add-port=5000/tcp
firewall-cmd --permanent --add-port=3306/tcp
firewall-cmd --permanent --add-port=443/tcp
firewall-cmd --permanent --add-port=2222/tcp
firewall-cmd –reload
7、修改字符集,否則可能報 input/output error的問題,因爲日誌裏打印了中文
localedef -c -f UTF-8 -i zh_CN zh_CN.UTF-8
export LC_ALL=zh_CN.UTF-8
echo 'LANG="zh_CN.UTF-8"' > /etc/locale.conf
二、MySQL
1、安裝:
(1)、配置YUM源
在MySQL官網中下載YUM源rpm安裝包:http://dev.mysql.com/downloads/repo/yum/


(2)下載mysql源安裝包
cd /home
mkdir software
cd software
wget http://dev.mysql.com/get/mysql57-community-release-el7-11.noarch.rpm
(3)安裝mysql源
yum localinstall mysql57-community-release-el7-11.noarch.rpm
(4)檢查mysql源是否安裝成功
yum repolist enabled | grep "mysql.*-community.*"

(5)安裝MySQL
yum install mysql-community-server
如果之前安裝CentOS時選擇了安裝MySQL,則先用yum remove mariadb*卸載掉才能繼續安裝

2、啓動:
systemctl start mysqld
查看是否啓動:
systemctl status mysqld出現Active: active (running)和PID代表啓動成功

得到默認密碼:
grep 'temporary password' /var/log/mysqld.log

用root登錄進去:
mysql -uroot -p
注意:如果默認密碼帶有任何標點符號,需要在每個標點符號前加轉義字符:\,否則會提示如下錯誤

修改默認密碼:
mysql> set password for 'root'@'localhost' = password('********');
設置任何IP都可以遠程訪問MySQL,沒有這行的話之後配置數據庫會出錯
mysql> grant all privileges on *.* to 'root'@'%' identified by '********';
退出MySQL
mysql> quit
3、設置開機啓動:yum安裝的MySQL默認就是服務,可以用systemctl list-unit-files查看,但開機沒啓動(disabled狀態),所以要用systemctl enable mysqld激活開機啓動,然後systemctl daemon-reload
MySQL默認配置文件路徑: 配置文件:/etc/my.cnf 日誌文件:/var/log//var/log/mysqld.log 服務啓動腳本:/usr/lib/systemd/system/mysqld.service socket文件:/var/run/mysqld/mysqld.pid
三、準備 Python3 和 Python 虛擬環境
1、安裝依賴包
yum -y install wget sqlite-devel xz gcc automake zlib-devel openssl-devel epel-release git
2、編譯安裝
cd /home/software
wget https://www.python.org/ftp/python/3.6.1/Python-3.6.1.tar.xz
tar xvf Python-3.6.1.tar.xz && cd Python-3.6.1
./configure && make && make install
# 這裏必須執行編譯安裝,否則在安裝 Python 庫依賴時會有麻煩...
3、建立 Python 虛擬環境
因爲 CentOS 6/7 自帶的是 Python2,而 Yum 等工具依賴原來的 Python,爲了不擾亂原來的環境我們來使用 Python 虛擬環境
cd /opt
python3 -m venv py3
source /opt/py3/bin/activate
# 看到下面的提示符代表成功

以後運行 Jumpserver 都要先運行以上 source 命令,以下所有命令均在該虛擬環境中運行
四、安裝 Jumpserver 1.3.3
1、下載或 Clone 項目
項目提交較多時 git clone較大,你可以選擇去 Github 項目頁面直接下載zip包。
git clone https://github.com/jumpserver/jumpserver.git && cd jumpserver && git checkout master
echo "source /opt/py3/bin/activate" > /opt/jumpserver/.env # 進入 jumpserver 目錄時將自動載入 python 虛擬環境
# 首次進入 jumpserver 文件夾會有提示,按 y 即可
# Are you sure you want to allow this? (y/N) y
2、安裝依賴 RPM 包
cd /opt/jumpserver/requirements
yum -y install $(cat rpm_requirements.txt) # 如果沒有任何報錯請繼續
3、安裝 Python 庫依賴
(1)加速pip
cd ~
mkdir .pip
ls ~/.pip
vi ~/.pip/pip.conf
[global]
index-url = http://mirrors.aliyun.com/pypi/simple/
[install]
trusted-host=mirrors.aliyun.com
(2)安裝
cd /opt/jumpserver/requirements
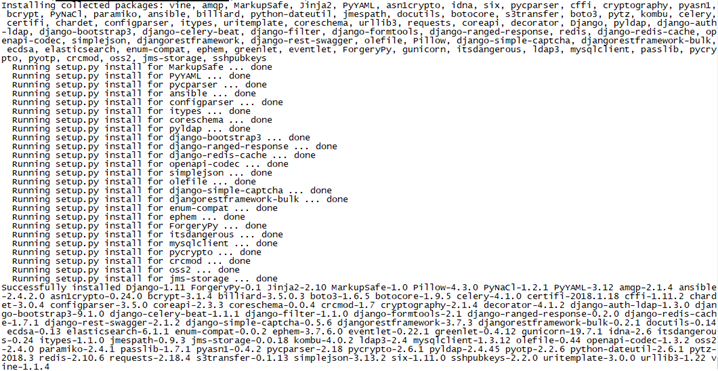
pip install -r requirements.txt # 不要指定-i參數,因爲鏡像上可能沒有最新的包,如果沒有任何報錯請繼續
上邊這條命令執行時間會非常長,大概15-20分鐘
如果有下載不過去的,等了很久的:修改requirements.txt,把那個包的行註釋掉,然後手動在本機下載,再rz –be上傳上去用pip install 包=版本 安裝

4、安裝 Redis, Jumpserver 使用 Redis 做 cache 和 celery broke
yum -y install redis
systemctl start redis
systemctl enable redis
5、創建Jumpserver數據庫並授權
mysql -uroot -p
mysql> create database jumpserver default charset 'utf8';
mysql> grant all on jumpserver.* to 'jumpserver'@'127.0.0.1' identified by '********';
mysql> flush privileges;
mysql> quit
6、修改 Jumpserver 配置文件
cd /opt/jumpserver
cp config_example.py config.py
vi config.py
# 我們計劃修改 DevelopmentConfig 中的配置,因爲默認 Jumpserver 使用該配置,它繼承自 Config
注意: 配置文件是 Python 格式,不要用 TAB,而要用空格
"""
jumpserver.config
~~~~~~~~~~~~~~~~~
Jumpserver project setting file
:copyright: (c) 2014-2017 by Jumpserver Team
:license: GPL v2, see LICENSE for more details.
"""
import os
BASE_DIR = os.path.dirname(os.path.abspath(__file__))
class Config:
# Use it to encrypt or decrypt data
# Jumpserver 使用 SECRET_KEY 進行加密,請務必修改以下設置
# SECRET_KEY = os.environ.get('SECRET_KEY') or '2vky!997d64mnz06ngffdhgfdhrdrwe54356765fgdgd353s_qj$1%x'
SECRET_KEY = '請隨意輸入隨機字符串(推薦字符大於等於 50位)'
# Django security setting, if your disable debug model, you should setting that
ALLOWED_HOSTS = ['*']
# DEBUG 模式 True爲開啓 False爲關閉,默認開啓,生產環境推薦關閉
# 注意:如果設置了DEBUG = False,訪問8080端口頁面會顯示不正常,需要搭建 nginx 代理纔可以正常訪問
DEBUG = os.environ.get("DEBUG") or True
# 日誌級別,默認爲DEBUG,可調整爲INFO, WARNING, ERROR, CRITICAL,默認INFO
LOG_LEVEL = os.environ.get("LOG_LEVEL") or 'DEBUG'
LOG_DIR = os.path.join(BASE_DIR, 'logs')
# 使用的數據庫配置,支持sqlite3, mysql, postgres等,默認使用sqlite3
# See https://docs.djangoproject.com/en/1.10/ref/settings/#databases
# 默認使用SQLite3,如果使用其他數據庫請註釋下面兩行
# DB_ENGINE = 'sqlite3'
# DB_NAME = os.path.join(BASE_DIR, 'data', 'db.sqlite3')
# 如果需要使用mysql或postgres,請取消下面的註釋並輸入正確的信息,本例使用mysql做演示(mariadb也是mysql)
DB_ENGINE = os.environ.get("DB_ENGINE") or 'mysql'
DB_HOST = os.environ.get("DB_HOST") or '127.0.0.1'
DB_PORT = os.environ.get("DB_PORT") or 3306
DB_USER = os.environ.get("DB_USER") or 'jumpserver'
DB_PASSWORD = os.environ.get("DB_PASSWORD") or ' ********'
DB_NAME = os.environ.get("DB_NAME") or 'jumpserver'
# Django 監聽的ip和端口,生產環境推薦把0.0.0.0修改成127.0.0.1,這裏的意思是允許x.x.x.x訪問,127.0.0.1表示僅允許自身訪問
# ./manage.py runserver 127.0.0.1:8080
HTTP_BIND_HOST = '127.0.0.1'
HTTP_LISTEN_PORT = 8080
# Redis 相關設置
REDIS_HOST = os.environ.get("REDIS_HOST") or '127.0.0.1'
REDIS_PORT = os.environ.get("REDIS_PORT") or 6379
REDIS_PASSWORD = os.environ.get("REDIS_PASSWORD") or ''
REDIS_DB_CELERY = os.environ.get('REDIS_DB') or 3
REDIS_DB_CACHE = os.environ.get('REDIS_DB') or 4
def __init__(self):
pass
def __getattr__(self, item):
return None
class DevelopmentConfig(Config):
pass
class TestConfig(Config):
pass
class ProductionConfig(Config):
pass
# Default using Config settings, you can write if/else for different env
config = DevelopmentConfig()
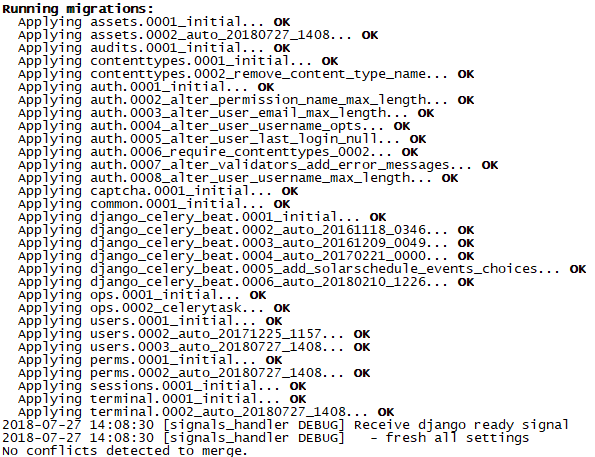
7、生成數據庫表結構和初始化數據
cd /opt/jumpserver/utils
bash make_migrations.sh
8、運行 Jumpserver
cd /opt/jumpserver
./jms start all # 後臺運行使用 -d 參數./jms start all -d
# 新版本更新了運行腳本,使用方式./jms start|stop|status|restart all 後臺運行請添加 -d 參數
運行不報錯,請瀏覽器訪問 http://192.168.1.15:8080/ 注意:這裏只是 Jumpserver, 沒有 Web Terminal,所以訪問 Web Terminal 會報錯。如果不能訪問請檢查主機8080端口號是否能訪問,AWS 的 EC2 的80、8080端口受到限制,需要 ICP 備案纔可以開放,遇到這種情況,可到 config.py 文件裏修改 Jumpserver 端口爲8888。
查看8080端口是否正常
netstat -lntup | grep 8080

Jumpserver默認賬號: admin 密碼: admin
附上重啓的方法
ps axu | egrep '(gunicorn|celery|beat)'
ps axu | egrep '(gunicorn|celery|beat)' | awk '{ print $2 }' | xargs kill -9
五、安裝 SSH Server 和 WebSocket Server: Coco
1、下載或 Clone 項目
另開一個終端,連接測試機,別忘了 source /opt/py3/bin/activate
cd /opt
source /opt/py3/bin/activate
git clone https://github.com/jumpserver/coco.git && cd coco && git checkout master
echo "source /opt/py3/bin/activate" > /opt/coco/.env # 進入 coco 目錄時將自動載入 python 虛擬環境
# 首次進入 coco 文件夾會有提示,按 y 即可
# Are you sure you want to allow this? (y/N) y
2、安裝依賴
cd /opt/coco/requirements
yum -y install $(cat rpm_requirements.txt)
pip install -r requirements.txt -i https://mirrors.aliyun.com/pypi/simple
requirements.txt文件內容:
asn1crypto==0.24.0
bcrypt==3.1.4
boto3==1.6.5
botocore==1.9.5
cachetools==2.0.1
certifi==2018.1.18
cffi==1.11.2
chardet==3.0.4
click==6.7
crcmod==1.7
cryptography==2.1.4
docutils==0.14
dotmap==1.2.20
elasticsearch==6.1.1
Flask==1.0.2
Flask-SocketIO==2.9.2
idna==2.6
itsdangerous==0.24
Jinja2==2.10
jmespath==0.9.3
jms-storage==0.0.18
jumpserver-python-sdk==0.0.44
MarkupSafe==1.0
oss2==2.4.0
paramiko==2.4.0
psutil==5.4.1
pyasn1==0.4.2
pycparser==2.18
PyNaCl==1.2.1
pyte==0.8.0
python-dateutil==2.6.1
python-engineio==2.1.0
python-gssapi==0.6.4
python-socketio==1.8.3
pytz==2018.3
requests==2.18.4
s3transfer==0.1.13
simplejson==3.13.2
six==1.11.0
tornado==4.5.2
urllib3==1.22
wcwidth==0.1.7
eventlet==0.22.1
Werkzeug==0.14.1
3、查看配置文件並運行
cd /opt/coco
cp conf_example.py conf.py # 如果 coco 與 jumpserver 分開部署,請手動修改 conf.py
./cocod start # 後臺運行使用 -d 參數./cocod start -d
# 新版本更新了運行腳本,使用方式./cocod start|stop|status|restart 後臺運行請添加 -d 參數
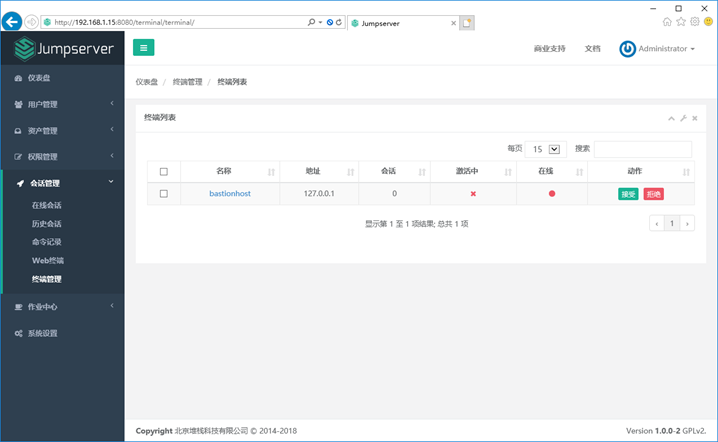
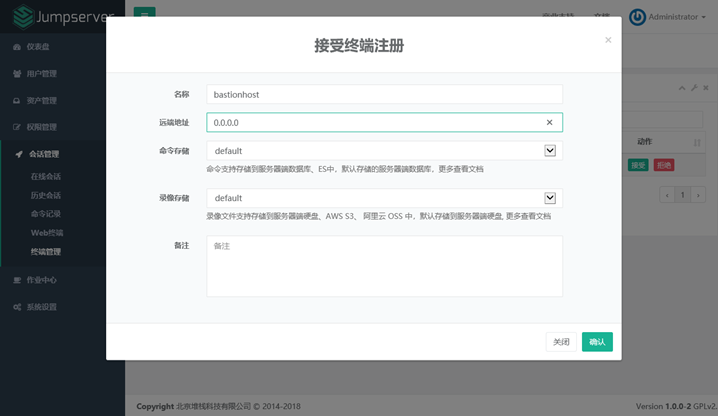
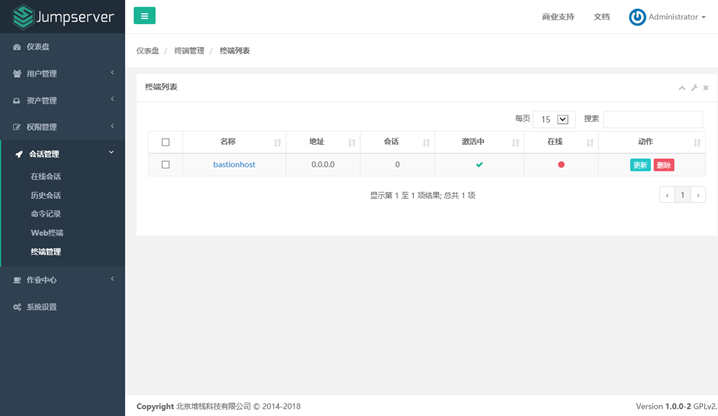
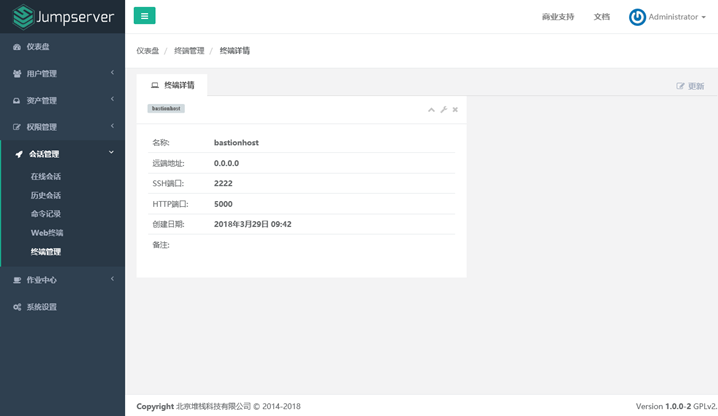
這時需要去 Jumpserver 管理後臺-會話管理-終端管理(http://192.168.1.15:8080/terminal/terminal/)接受 Coco 的註冊
Coco version 1.0.0, more see https://www.jumpserver.org
Starting ssh server at 0.0.0.0:2222
Quit the server with CONTROL-C.
4、測試連接:ssh端口2222
IP:192.168.1.15
賬號:admin
密碼:admin
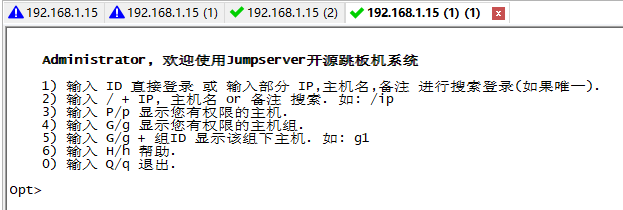
如果能登陸代表部署成功
六、安裝 Web Terminal 前端: Luna
Luna 已改爲純前端,需要 Nginx 來運行訪問。新開終端,訪問(https://github.com/jumpserver/luna/releases)下載對應版本的 release 包,直接解壓,不需要編譯
cd /opt
source /opt/py3/bin/activate
wget https://github.com/jumpserver/luna/releases/download/1.3.3/luna.tar.gz
tar xvf luna.tar.gz
chown -R root:root luna
ls /opt/luna
七、安裝 Windows 支持組件
因爲手動安裝 guacamole 組件比較複雜,這裏提供打包好的 docker 使用, 啓動 guacamole
1、Docker安裝 (僅針對CentOS7,CentOS6安裝Docker相對比較複雜)
# 安裝所需的軟件包 yum-utils、device-mapper-persistent-data和 lvm2
yum remove docker-latest-logrotate docker-logrotate docker-selinux dockdocker-engine
yum install -y yum-utils device-mapper-persistent-data lvm2
# 國內部分用戶可能無法連接docker官網提供的源,這裏提供阿里雲的鏡像節點供測試使用
yum-config-manager --add-repo http://mirrors.aliyun.com/docker-ce/linux/centos/docker-ce.repo
rpm --import http://mirrors.aliyun.com/docker-ce/linux/centos/gpg
yum makecache fast
yum -y install docker-ce
啓動docker和檢查運行狀態
systemctl start docker
systemctl status docker
將服務加入到啓動項
systemctl enable docker
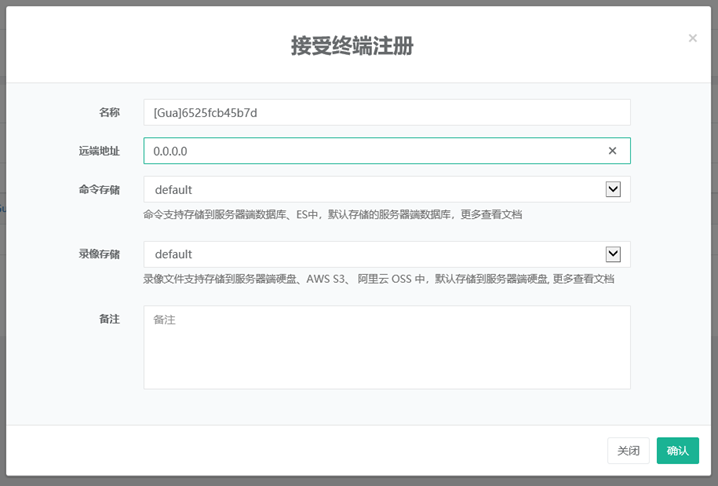
2、啓動 Guacamole
修改下面 docker run 裏的 JUMPSERVER_SERVER 參數,填上 Jumpserver 的 url 地址, 啓動成功後去 Jumpserver 會話管理-終端管理(http://192.168.1.15:8080/terminal/terminal/)接受[Gua]開頭的一個註冊,如果頁面顯示不正常可以等部署完成後再處理
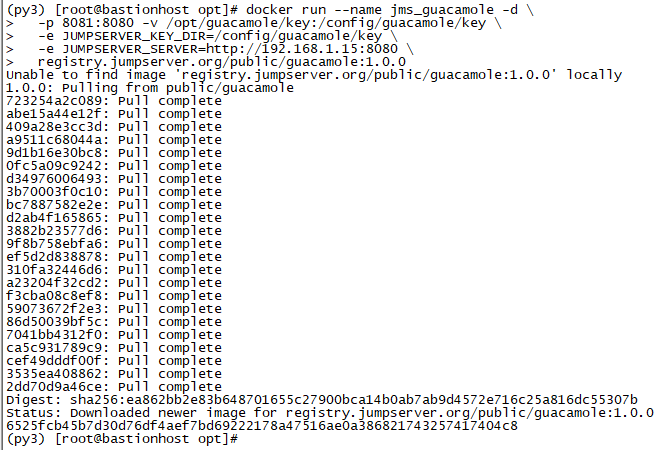
# 注意:這裏一定要改寫一下本機的IP地址, 否則會出錯, 此過程時間大概需要1-2小時
docker run --name jms_guacamole -d \
-p 8081:8080 -v /opt/guacamole/key:/config/guacamole/key \
-e JUMPSERVER_KEY_DIR=/config/guacamole/key \
-e JUMPSERVER_SERVER=http://192.168.1.15 \
registry.jumpserver.org/public/guacamole:latest
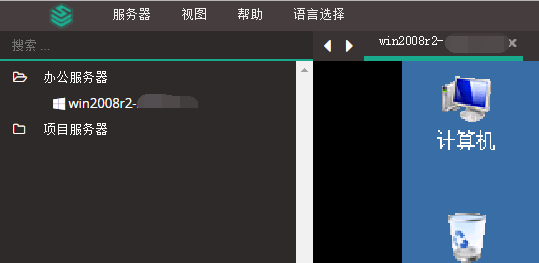
Guacamole故障處理:
1)如果重啓服務器後可能會出現連接Windows遠程桌面白屏的情況,
這可能是docker鏡像停了,需要再次啓動
docker ps #查看目前運行的鏡像
發現沒有docker鏡像

docker鏡像啓動的方法:
用docker ps -a查看所有鏡像

找到對應的CONTAINER ID,用docker start <con id>命令啓動


2)"終端管理"裏發現"在線"是紅色的

同時在web終端連接Windows時會提示下邊的信息:
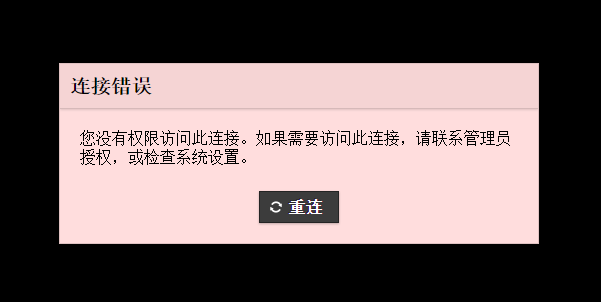
解決方法如下:
(1)停止 或 刪掉 guacamole 的docker
docker stop jms_guacamole # 如果名稱更改過或者不對,請使用docker ps 查詢容器的 CONTAINER ID ,然後docker stop <CONTAINER ID>
(2)在 Jumpserver後臺 會話管理 - 終端管理 刪掉它們
(3)啓動guacamole 的docker
docker start jms_guacamole
問題解決
八、Nginx
1、安裝Nginx:
安裝pcre
yum -y install pcre pcre-devel
注意如果CentOS7是基礎環境安裝的還要安裝gcc-c++包
yum -y install gcc-c++
安裝openssl,否則下邊編譯nginx時會報如下錯誤

yum -y install openssl openssl-devel
檢查OpenSSL的版本,不能低於1.0.2,否則不支持https v2
openssl version

下載最新版nginx並解壓
wget http://nginx.org/download/nginx-1.15.2.tar.gz
tar -zxvf nginx-1.15.2.tar.gz
cd nginx-1.15.2
加入需要安裝的模塊,編譯,如果路徑用的是nginx默認的,這裏就不再寫上了,否則要加路徑參數
./configure \
--with-pcre \
--with-http_ssl_module \
--with-http_realip_module \
--with-http_flv_module \
--with-http_mp4_module \
--with-http_gunzip_module \
--with-http_gzip_static_module \
--with-http_secure_link_module \
--with-http_v2_module \
--with-http_stub_status_module \
--with-http_sub_module
make
make install
查看nginx版本號,安裝了哪些模塊
/usr/local/nginx/sbin/nginx -V

2、啓動
在系統服務目錄裏創建nginx.service文件
vi /lib/systemd/system/nginx.service
內容如下
[Unit]
Description=nginx
After=network.target
[Service]
Type=forking
ExecStart=/usr/local/nginx/sbin/nginx
ExecReload=/usr/local/nginx/sbin/nginx -s reload
ExecStop=/usr/local/nginx/sbin/nginx -s quit
PrivateTmp=true
[Install]
WantedBy=multi-user.target
解釋:
[Unit]:服務的說明
Description:描述服務
After:描述服務類別
[Service]服務運行參數的設置
Type=forking是後臺運行的形式
ExecStart爲服務的具體運行命令
ExecReload爲重啓命令
ExecStop爲停止命令
PrivateTmp=True表示給服務分配獨立的臨時空間
注意:[Service]的啓動、重啓、停止命令全部要求使用絕對路徑
[Install]運行級別下服務安裝的相關設置,可設置爲多用戶,即系統運行級別爲3
啓動nginx服務
systemctl start nginx
設置開機啓動
systemctl enable nginx
2、配置Nginx:
②修改nginx默認用戶
添加nginx用戶,且不給登錄權限
groupadd nginx
useradd nginx -g nginx -s /sbin/nologin -M
vi /usr/local/nginx/conf/nginx.conf
將
#user nobody;
修改爲
user nginx nginx;
③關閉nginx版本號顯示
vi /usr/local/nginx/conf/nginx.conf
在http標籤中加入server_tokens off;如下:
http
{
……
server_tokens off;
……
}
④優化nginx性能
vi /usr/local/nginx/conf/nginx.conf
因爲是4核處理器,所以將
worker_processes 1;
修改爲
worker_processes 4;
再加一行,平均分配CPU每個核心
worker_cpu_affinity 0001 0010 0100 1000;
⑤將Jumpserver全部組件加入Nginx
server {
listen 80; # 代理端口,以後將通過此端口進行訪問,不再通過8080端口
location /luna/ {
try_files $uri / /index.html;
alias /opt/luna/; # luna 路徑,如果修改安裝目錄,此處需要修改
}
location /media/ {
add_header Content-Encoding gzip;
root /opt/jumpserver/data/; # 錄像位置,如果修改安裝目錄,此處需要修改
}
location /static/ {
root /opt/jumpserver/data/; # 靜態資源,如果修改安裝目錄,此處需要修改
}
location /socket.io/ {
proxy_pass http://localhost:5000/socket.io/; # 如果coco安裝在別的服務器,請填寫它的ip
proxy_buffering off;
proxy_http_version 1.1;
proxy_set_header Upgrade $http_upgrade;
proxy_set_header Connection "upgrade";
proxy_set_header X-Real-IP $remote_addr;
proxy_set_header Host $host;
proxy_set_header X-Forwarded-For $proxy_add_x_forwarded_for;
access_log off;
}
location /guacamole/ {
proxy_pass http://localhost:8081/; # 如果guacamole安裝在別的服務器,請填寫它的ip
proxy_buffering off;
proxy_http_version 1.1;
proxy_set_header Upgrade $http_upgrade;
proxy_set_header Connection $http_connection;
proxy_set_header X-Real-IP $remote_addr;
proxy_set_header Host $host;
proxy_set_header X-Forwarded-For $proxy_add_x_forwarded_for;
access_log off;
client_max_body_size 100m; # Windows 文件上傳大小限制
}
location / {
proxy_pass http://localhost:8080; # 如果jumpserver安裝在別的服務器,請填寫它的ip
proxy_set_header X-Real-IP $remote_addr;
proxy_set_header Host $host;
proxy_set_header X-Forwarded-For $proxy_add_x_forwarded_for;
}
}
⑤防爬蟲優化
vi /usr/local/nginx/conf/nginx.conf
在server標籤中加:
server
{
……
## Block spider agents ##
if ($http_user_agent ~* "qihoobot|Baiduspider|Googlebot|Googlebot-Mobile|Googlebot-Image|Mediapartners-Google|Adsbot-Google|Feedfetcher-Google|Yahoo! Slurp|Yahoo! Slurp China|YoudaoBot|Sosospider|Sogou spider|Sogou web spider|MSNBot|ia_archiver|Tomato Bot")
{
return 403;
}
……
}
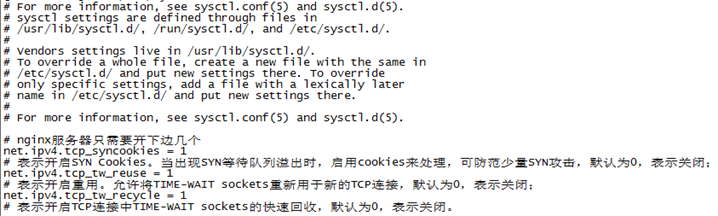
⑥TCP優化
vi /etc/sysctl.conf
加入下邊幾行語句:
# nginx服務器只需要開下邊幾個
net.ipv4.tcp_syncookies = 1
# 表示開啓SYN Cookies。當出現SYN等待隊列溢出時,啓用cookies來處理,可防範少量SYN***,默認爲0,表示關閉;
net.ipv4.tcp_tw_reuse = 1
# 表示開啓重用。允許將TIME-WAIT sockets重新用於新的TCP連接,默認爲0,表示關閉;
net.ipv4.tcp_tw_recycle = 1
# 表示開啓TCP連接中TIME-WAIT sockets的快速回收,默認爲0,表示關閉。
使上述內核配置生效
/sbin/sysctl -p
nginx -t # 確保配置沒有問題, 有問題請先解決
systemctl restart nginx
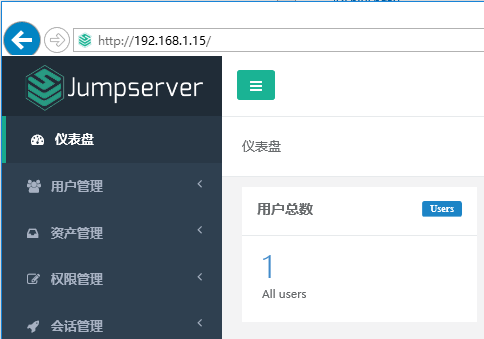
然後瀏覽器打開頁面看一下,OK了
九:關於開機自啓動所有程序的說明
MySQL啓動:
systemctl start mysqld
MySQL開機自啓動:
systemctl enable mysqld
Redis啓動:
systemctl start redis
Redis開機自啓動:
systemctl enable redis
Python
Jumpserver啓動:
source /opt/py3/bin/activate
cd /opt/jumpserver
./jms start all # 後臺運行使用 -d 參數./jms start all -d
Coco啓動:
source /opt/py3/bin/activate
cd /opt/coco
./cocod start # 後臺運行使用 -d 參數./cocod start -d
docker啓動:
systemctl start docker
docker開機自啓動:
systemctl enable docker
jms_guacamole啓動:
docker start jms_guacamole
Nginx啓動:
systemctl start nginx
Nginx開機自啓動:
systemctl enable nginx
開機自啓動腳本jumpserverstart.sh
#!/bin/bash
sleep 5
source /opt/py3/bin/activate || true
cd /opt/jumpserver || true
./jms start all -d || true
sleep 30
cd /opt/coco || true
./cocod start -d || true
sleep 10
docker start jms_guacamole || true
exit
在/etc/rc.d/rc.local加一行,不要講腳本放到jumpserver目錄下,以免影響後期升級。注意CentOS7默認不執行/etc/rc.d/rc.local,需要chmod +x /etc/rc.d/rc.local命令修改權限纔可以
bash /opt/jumpserverstart.sh
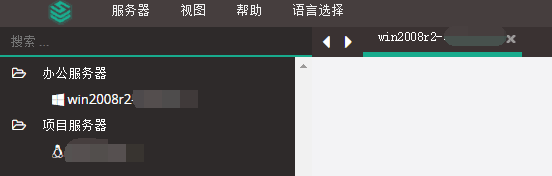
重啓測試是否部署成功:
如果登錄客戶端是 Windows,Xshell Terminal 登錄語法如下
ssh [email protected] 2222
sftp [email protected] 2222
# sftp默認上傳的位置在資產的 /tmp 目錄下
# windows拖拽上傳的位置在資產的 Guacamole RDP上的 G 目錄下
密碼: admin
如果能登陸代表部署成功