


安裝mysql數據庫
我使用的系統是最小化安裝,可能會有不同的地方,如果有差異就需要自己百度咯,普通用戶加sudo就可以了,下面sudo全部省略了。
cd /usr/local/src
yum install mysql  mysql-devel -y
wget http://dev.mysql.com/get/mysql-community-release-el7-5.noarch.rpm
rpm -ivh mysql-community-release-el7-5.noarch.rpm
yum install mysql-community-server

#啓動數據庫,設置密碼,先創建wordpress庫,授權wordpress用戶連接wordpress庫
systemctl start mysqld
mysql -uroot

#進入數據庫操作,當然這些也可以變成腳本
>set password for 'root'@'localhost' = password('awk123sed456grep');
>flush privileges;
>create database wordpress;
>grant all privileges on wordpress.* to wordpress@'localhost' identified by 'awk123sed456grep';
>flush privileges;
安裝php php-fpm php-mysql
yum install php php-fpm php-mysql安裝nginx
yum install nginx -y

#如果安裝不了,可以去找源下載,或者嘗試下方的編譯安裝,下面是一個部署nginx的腳本。
#!/bin/bash

useradd nginx -s /sbin/nologin -M

yum -y install gcc gcc-c++ autoconf automake
yum -y install pcre pcre-devel
yum -y install openssl openssl-devel
yum -y install  zlib-devel
yum -y install libxml2 libxml2-dev
yum -y install libxslt-devel
yum -y install gd-devel
yum -y install perl-devel perl-ExtUtils-Embed
yum -y install GeoIP GeoIP-devel GeoIP-data

cd /usr/local/src
wget http://tengine.taobao.org/download/tengine-2.2.1.tar.gz
wget http://www.openssl.org/source/openssl-1.0.2.tar.gz
wget ftp://ftp.csx.cam.ac.uk/pub/software/programming/pcre/pcre-8.38.tar.gz
tar xf tengine-2.2.1.tar.gz
tar xf openssl-1.0.2.tar.gz
tar xf pcre-8.38.tar.gz

cd pcre-8.38
./configure --prefix=/usr/local/pcre
make && make install

cd ../openssl-1.0.2
./config --prefix=/usr/local/openssl
make && make install

mkdir /usr/local/nginx-stable/conf -p
cd ../tengine-2.2.1

./configure \
                --user=nginx \
                --group=nginx \
                --prefix=/usr/local/nginx-stable \
                --conf-path=/usr/local/nginx-stable/conf/nginx.conf \
                --pid-path=/usr/local/nginx-stable/nginx.pid \
                --with-openssl=/usr/local/src/openssl-1.0.2 \
                --with-pcre=/usr/local/src/pcre-8.38 \
                --with-file-aio \
                --with-http_v2_module \
                --with-http_ssl_module \
                --with-http_upstream_check_module \
                --with-http_realip_module \
                --with-http_stub_status_module \
                --with-http_sub_module \
                --with-http_gzip_static_module \
                --with-http_addition_module \
                --with-http_xslt_module \
                --with-http_image_filter_module \
                --with-http_geoip_module \
                --with-http_dav_module \
                --with-http_flv_module \
                --with-http_mp4_module \
                --with-http_gunzip_module \
                --with-http_random_index_module \
                --with-http_secure_link_module \
                --with-http_degradation_module \
                --with-http_auth_request_module \
                --with-http_perl_module \
                --with-http_slice_module \
                --with-select_module \
                --with-poll_module \
                --with-mail \
                --with-mail_ssl_module \
                --with-pcre \
                --with-pcre-jit \

make && make install

ln -s /usr/local/nginx-stable /usr/local/nginx
php-fpm配置
#備份一份php-fpm配置文件
mv /etc/php-fpm.d/www.conf /etc/php-fpm.d/www.conf.bak

#注意下面的用戶和用戶組,我使用的是普通用戶

cat >>/etc/php-fpm.d/wordpress.conf<<EOF
; Start a new pool named 'www'.
[global]
pid = /var/log/php-fpm.pid
error_log = /var/log/php-fpm.log
log_level = error
rlimit_files = 32768
events.mechanism = epoll
[www]
user = web
group = web
#listen = 127.0.0.1:9001
listen = /run/php-fpm/php-fpm.sock
listen.owner = web
listen.group = web
pm = dynamic
pm.max_children = 1024
pm.start_servers = 16
pm.min_spare_servers = 5
pm.max_spare_servers = 20

pm.process_idle_timeout = 15s;
pm.max_requests = 2048
slowlog = /var/log/$pool.log.slow
request_slowlog_timeout = 10

EOF
啓動php-fpm
#檢測語法php-fpm的語法
php-fpm -t

#如果語法成功,那我們就嘿啓動吧
systemctl start php-fpm
下載一個wordpress吧
cd /usr/local/src
wget  https://wordpress.org/latest.tar.gz

#版本,複製粘貼的時候多少看一眼
tar xf wordpress-5.1.1.tar.gz

cp -rp wordpress /usr/local/nginx/html/
修改wp-config.php文件
cd /usr/local/nginx/html/wordpress

#備份一份wp-config-sample.php
cp wp-config-sample.php wp-config.php

#修改wp-config.php文件,連接數據庫用的,就幾行
vim wp-config.php

/** WordPress數據庫的名稱 */
define('DB_NAME', 'wordpress');

/** MySQL數據庫用戶名 */
define('DB_USER', 'wordpress');

/** MySQL數據庫密碼 */
define('DB_PASSWORD', 'awk123sed456grep');

/** MySQL主機 */
define('DB_HOST', 'localhost');
修改nginx配置文件
cd /usr/local/nginx/conf
#直接就是清空,因爲nginx.conf帶default備份
>nginx.conf
cat >>nginx.conf<<EOF
user nginx;
worker_processes 4;
events {
use epoll;
worker_connections 1024;
}
http {
include mime.types;
default_type application/octet-stream;
#log_format main '$remote_addr - $remote_user [$time_local] "$request" '
#'$status $body_bytes_sent "$http_referer" '
#'"$http_user_agent" $http_x_forwarded_for';
server_names_hash_bucket_size 128;
client_header_buffer_size 512k;
large_client_header_buffers 4 512k;
client_max_body_size 100m;
sendfile on;
tcp_nopush on;
tcp_nodelay on;
keepalive_timeout 60;
fastcgi_connect_timeout 300;
fastcgi_send_timeout 300;
fastcgi_read_timeout 300;
fastcgi_buffer_size 64k;
fastcgi_buffers 4 64k;
fastcgi_busy_buffers_size 128k;
fastcgi_temp_file_write_size 128k;
gzip on;
gzip_min_length 1k;
gzip_buffers 4 16k;
gzip_http_version 1.0;
gzip_comp_level 2;
#gzip_types text/plain application/x-javascript text/css application/xml;
gzip_vary on;
include /usr/local/nginx/conf/vhosts/*.conf;
}
EOF
#創建一個vhosts目錄,裏面都是nginx的一些虛擬主機,裏面的域名根據自己的定義吧。
sudo mkdir vhosts
cd vhosts
cat >>blog.conf<<EOF
server {
listen 80;
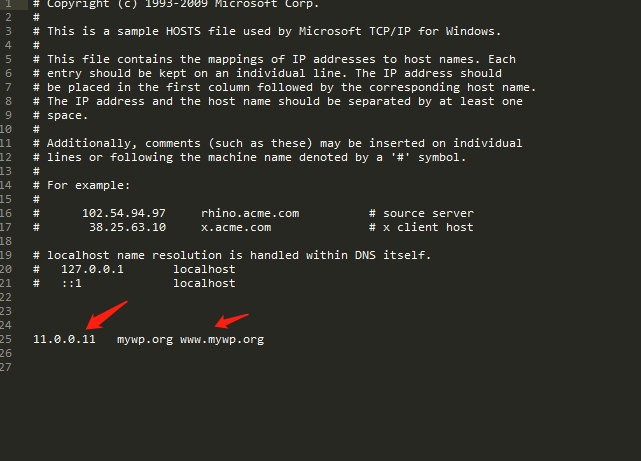
server_name mywp.org www.mywp.org;
access_log logs/mywp.access.log;
error_log logs/mywp.error.log;
root /usr/local/nginx/html/wordpress;
location / {
index index.php index.html index.htm;
}
location ~ \.php\$ {
fastcgi_pass unix:/run/php-fpm/php-fpm.sock;
fastcgi_index index.php;
fastcgi_param SCRIPT_FILENAME \$document_root\$fastcgi_script_name;
include fastcgi_params;
}
}
EOF啓動nginx
#檢測語法
/usr/local/nginx/sbin/nginx -t
#如果成功,我們就嘿咻啓動吧
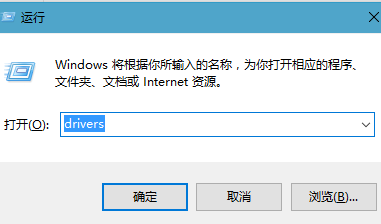
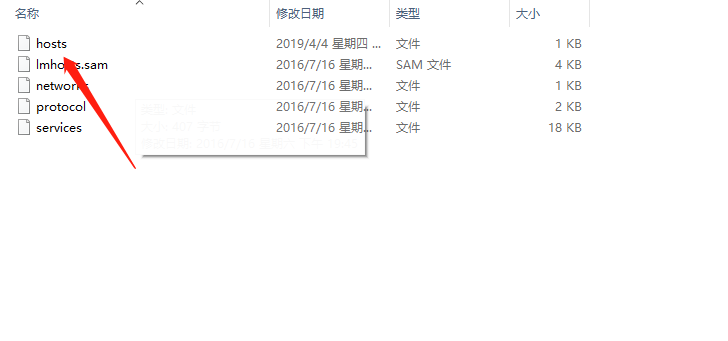
/usr/local/nginx/sbin/nginx解析,如果有的同學是本地虛擬機玩的,需要在hosts文件解析一下ip和域名
進到頁面就可以訪問wordpress-admin配置界面了
輸入自己定義的域名即可