


鏈接:https://pan.baidu.com/s/1HfbxzSQpYCyuwL2audiU6A
提取碼:znwj
軟件連接
首先準備環境:

上傳軟解包和依賴包:
libedit-devel-3.0-12.20121213cvs.el7.x86_64.rpm
python-docutils-0.11-0.2.20130715svn7687.el7.noarch.rpm
varnish-5.2.1.tgz

Varnish服務器ip 192.168.80.102

web服務器 ip 192.168.80.103
安裝服務:
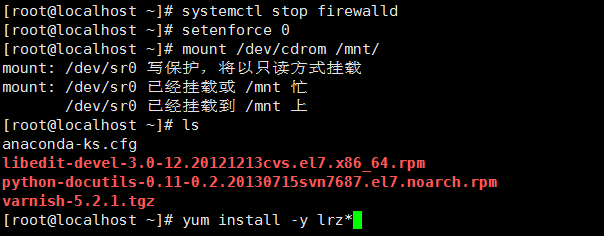
systemctl stop firewalld
setenforce 0
mount /dev/cdrom /mnt
yum install lrz* -y //安裝下載工具
(安裝上一個軟件可以從真機中拖入安裝包)
yum install -y gcc gcc-c++ make //安裝編譯器和環境安裝依賴關係包和所需要的插件:
yum install -y \
libtool \
ncourses-devel \
pcre-devel \
libedit-devel \
libxslt \
groff \
pkgconfig \
ncurses-devel \
python-*
.
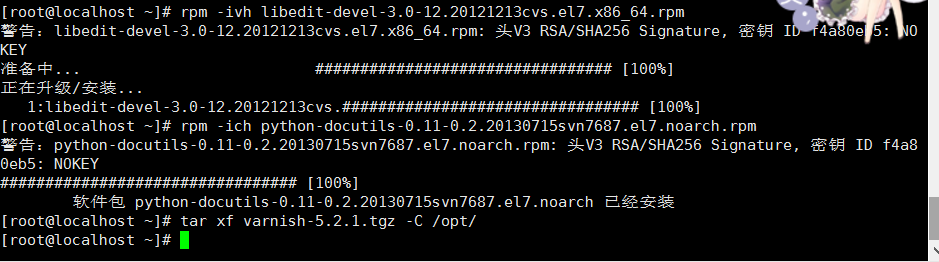
rpm -ivh libedit-devel-3.0-12.20121213cvs.el7.x86_64.rpm
rpm -ivh python-docutils-0.11-0.2.20130715svn7687.el7.noarch.rpmtar xf varnish-5.2.1.tgz -C /opt
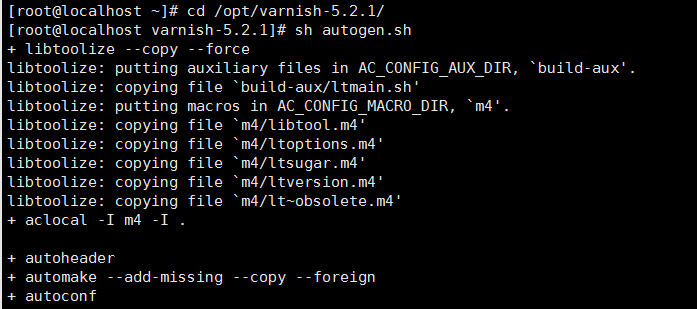
cd /opt/varnish-5.2.1/ //進入解壓後的文件夾中定義需要的模塊sh autogen.sh //檢查系統環境
![varnish1 服務安裝及單臺代理服務]()
./configure \
--prefix=/usr/local/varnish \
--enable-debugging-symbols \
--enable-developer-warnings
.
make && make install
cd /usr/local/varnish/
ln -s /usr/local/varnish/sbin/varnishd /usr/sbin/
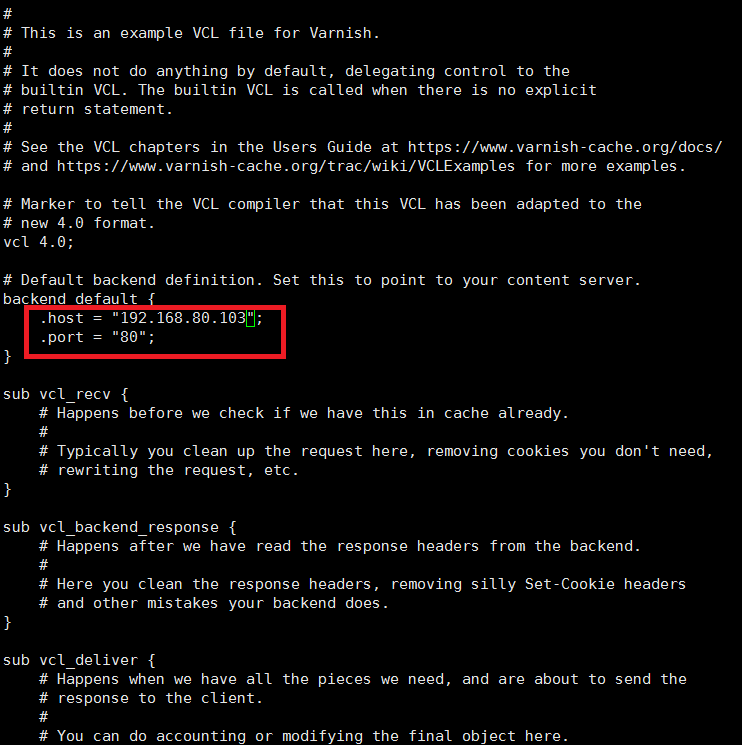
ln -s /usr/local/varnish/bin/* /usr/local/bin/cp /usr/local/varnish/share/doc/varnish/example.vcl /usr/local/varnish/default.vcl
//配置文件模板拷貝出來用修改配置文件
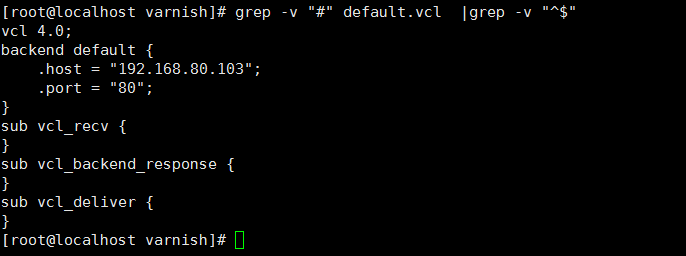
vi default.vcl.host = "192.168.80.103"; .port = "80";
grep -v "#" default.vcl |grep -v "^$" //過濾空白行和註釋
.
啓動服務:
varnishd -f /usr/local/varnish/default.vcl -a 0.0.0.0:80
//#指定監聽的ip和端口啓動varnishnetstat -anpt | grep varnishd
到此,Varnish服務器基本配置完成

在一臺80.103虛擬機上搭建一個web服務器:
systemctl stop firewalld
setenforce 0
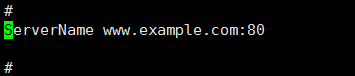
yum install -y httpdvi /etc/httpd/conf/httpd.conf
#去掉註釋符號
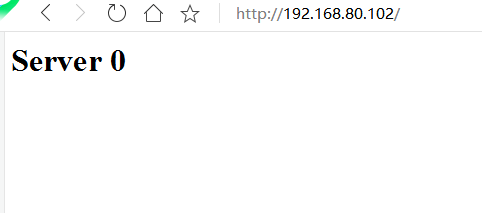
systemctl start httpd //啓動服務cd /var/www/html/
<h1>Server 0</h1>
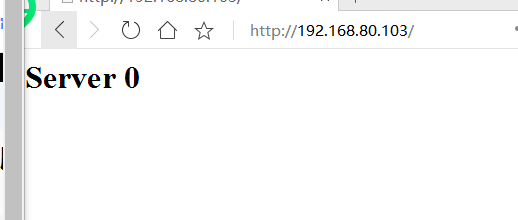
測試,在windows瀏覽器中輸入http://192.168.80.102(varnish服務器的ip地址)