環境說明:
| 主機名 | 操作系統版本 | IP地址 | docker版本 | Vmware版本 |
|---|---|---|---|---|
| docker01 | Ubuntu 16.04.5 | 172.27.9.71 | 18.09.2 | 12.5.2 |
ubuntu安裝詳見:Ubuntu16.04.5以lvm方式安裝全記錄
docker安裝詳見:Ubuntu16.04安裝Docker
docker-compose安裝詳見:Docker Compose實踐
一、ELK
在介紹EFK之前先介紹下ELK
1. ELK簡介
Logstash
Logstash: 是一個靈活的數據傳輸和處理系統,Logstash的任務讀取原始日誌,並對其進行分析和過濾,然後將其轉發給其他組件(比如 Elasticsearch)進行索引或存儲。在beats出來之前,還負責進行數據收集。logstash基於JRuby實現,可以跨平臺運行在JVM上。模塊化設計,有很強的擴展性和互操作性,不過性能一直是被詬病的問題。
Elasticsearch
Elasticsearch是個開源分佈式搜索引擎,提供蒐集、分析、存儲數據三大功能。它的特點有:分佈式,零配置,自動發現,索引自動分片,索引副本機制,restful風格接口,多數據源,自動搜索負載等。
Kibana
Kibana可以爲 Logstash、Beats和ElasticSearch提供的日誌分析友好的Web界面,可以幫助彙總、分析和搜索重要數據日誌。
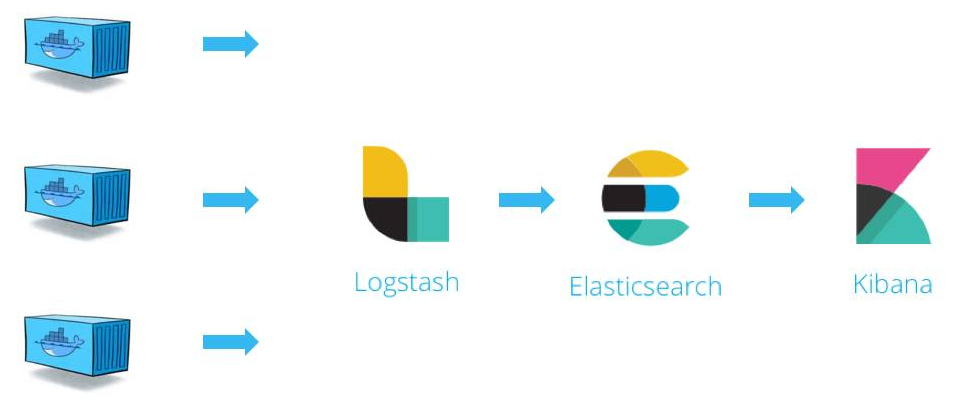
2. ELK日誌處理流程
二、Fluentd
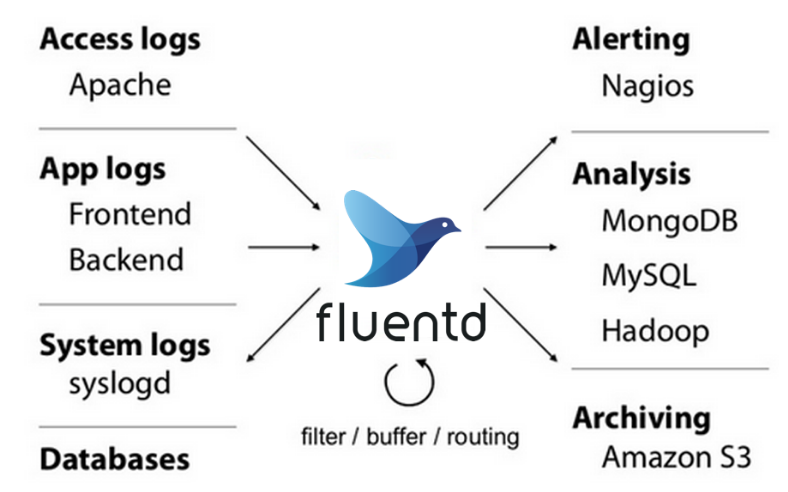
1. Fluentd簡介
Fluentd是一個免費和開源的日誌收集器,目前支持超過600種輸入源,可以連接各種數據源和數據輸出組件。fluentd基於CRuby實現,並對性能表現關鍵的一些組件用C語言重新實現,整體性能不錯。Fluentd有很強的的擴展性,最大支持超過500000臺服務器。
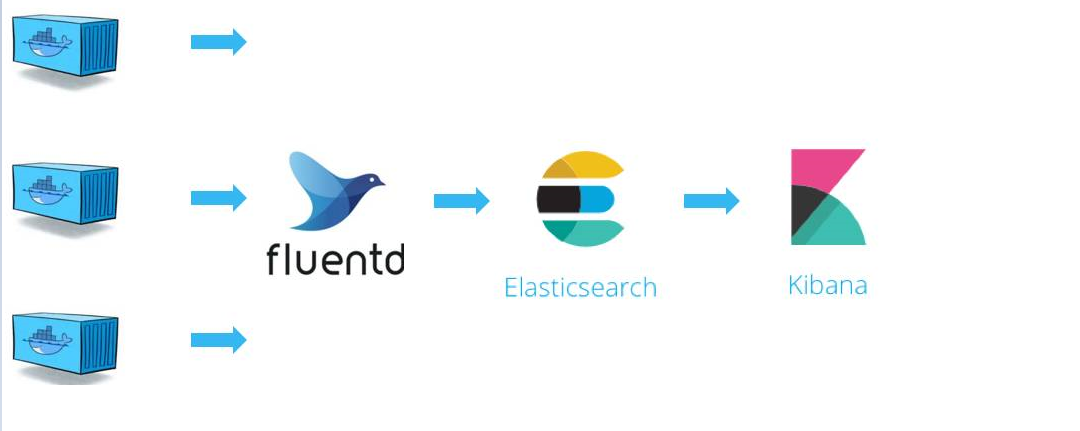
本文使用Fluentd替換Logstash搭建EFK日誌管理系統。
Fluentd特點:
- 安裝方便
- 佔用空間小
- 半結構化數據日誌記錄
- 靈活的插件機制
- 可靠的緩衝
- 日誌轉發
2. Fluentd日誌處理流程
三、日誌管理系統搭建
本文采用Docker Compose方式搭建EFK Stack
1. 目錄結構
root@docker01:~# tree efk/
efk/
├── docker-compose.yml
└── fluentd
    ├── conf
    │   └── fluent.conf
    └── Dockerfile

2 directories, 3 files
新建項目目錄efk
2. docker-compose.yml
root@docker01:~/efk# more docker-compose.yml
version: '2'
services:
  web:
    image: httpd
    ports:
      - "80:80"
    links:
      - fluentd
    logging:
      driver: "fluentd"
      options:
        fluentd-address: localhost:24224
        tag: httpd.access

  fluentd:
    build: ./fluentd
    volumes:
      - ./fluentd/conf:/fluentd/etc
    links:
      - "elasticsearch"
    ports:
      - "24224:24224"
      - "24224:24224/udp"

  elasticsearch:
    image: elasticsearch:5.3.0
    expose:
      - 9200
    ports:
      - "9200:9200"

  kibana:
    image: kibana:5.3.0
    links:
      - "elasticsearch"
    ports:
      - "5601:5601"
該yml用於創建服務Apache、Fluentd、Elasticsearch和Kibana,創建的web容器指定的Logging Driver爲fluentd
注意, 鏡像Elasticsearch和Kibana版本需保持一致
3. Fluentd鏡像
root@docker01:~/efk/fluentd# more Dockerfile
# fluentd/Dockerfile
FROM fluent/fluentd:v0.12-debian
RUN ["gem", "install", "fluent-plugin-elasticsearch", "--no-rdoc", "--no-ri", "--version", "1.9.7"]
準備Fluentd鏡像,安裝Elasticsearch plugin,通過插件fluent-plugin-elasticsearch可以直接將日誌發送給 Elasticsearch
4. fluent.conf
root@docker01:~/efk/fluentd/conf# more fluent.conf
# fluentd/conf/fluent.conf
<source>
  @type forward
  port 24224
  bind 0.0.0.0
</source>
<match *.**>
  @type copy
  <store>
    @type elasticsearch
    host elasticsearch
    port 9200
    logstash_format true
    logstash_prefix fluentd
    logstash_dateformat %Y%m%d
    include_tag_key true
    type_name access_log
    tag_key @log_name
    flush_interval 1s
  </store>
  <store>
    @type stdout
  </store>
</match>
在Fluentd中,配置文件非常重要,它定義了Fluentd應該執行的操作。
source:定義輸入。type指定使用的input plugin,這裏是in_forward,用於接收來自Docker logging driver即fluentd的日誌。
match:定義輸出的目標,如寫入文件,或者發送到指定地點。out_elasticsearch插件用於將日誌轉發到elasticsearch。
Fluentd有6種插件: Input, Parser, Filter, Output, Formatter and Buffer。具體可參考:https://docs.fluentd.org/v0.12/articles/input-plugin-overview
5. 啓動容器
root@docker01:~/efk# docker-compose up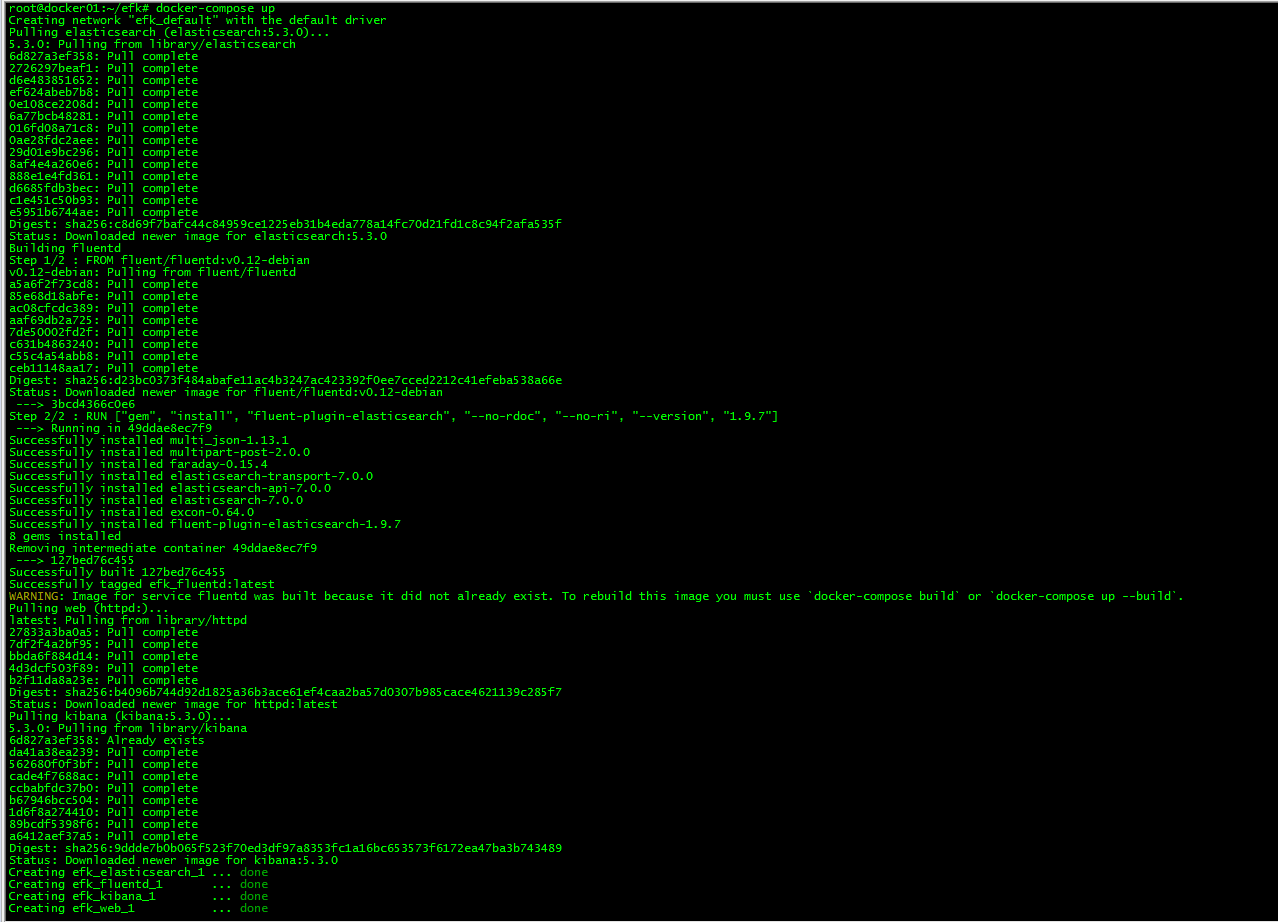
6. 查看容器

7. 產生httpd Access Logs
root@docker01:~# for i in {1..10};do sleep 1; curl http://172.27.9.71:80; done
<html><body><h1>It works!</h1></body></html>
<html><body><h1>It works!</h1></body></html>
<html><body><h1>It works!</h1></body></html>
<html><body><h1>It works!</h1></body></html>
<html><body><h1>It works!</h1></body></html>
<html><body><h1>It works!</h1></body></html>
<html><body><h1>It works!</h1></body></html>
<html><body><h1>It works!</h1></body></html>
<html><body><h1>It works!</h1></body></html>
<html><body><h1>It works!</h1></body></html>
8. 配置Kibana
8.1 訪問Kibana
http://172.27.9.71:5601/app/kibana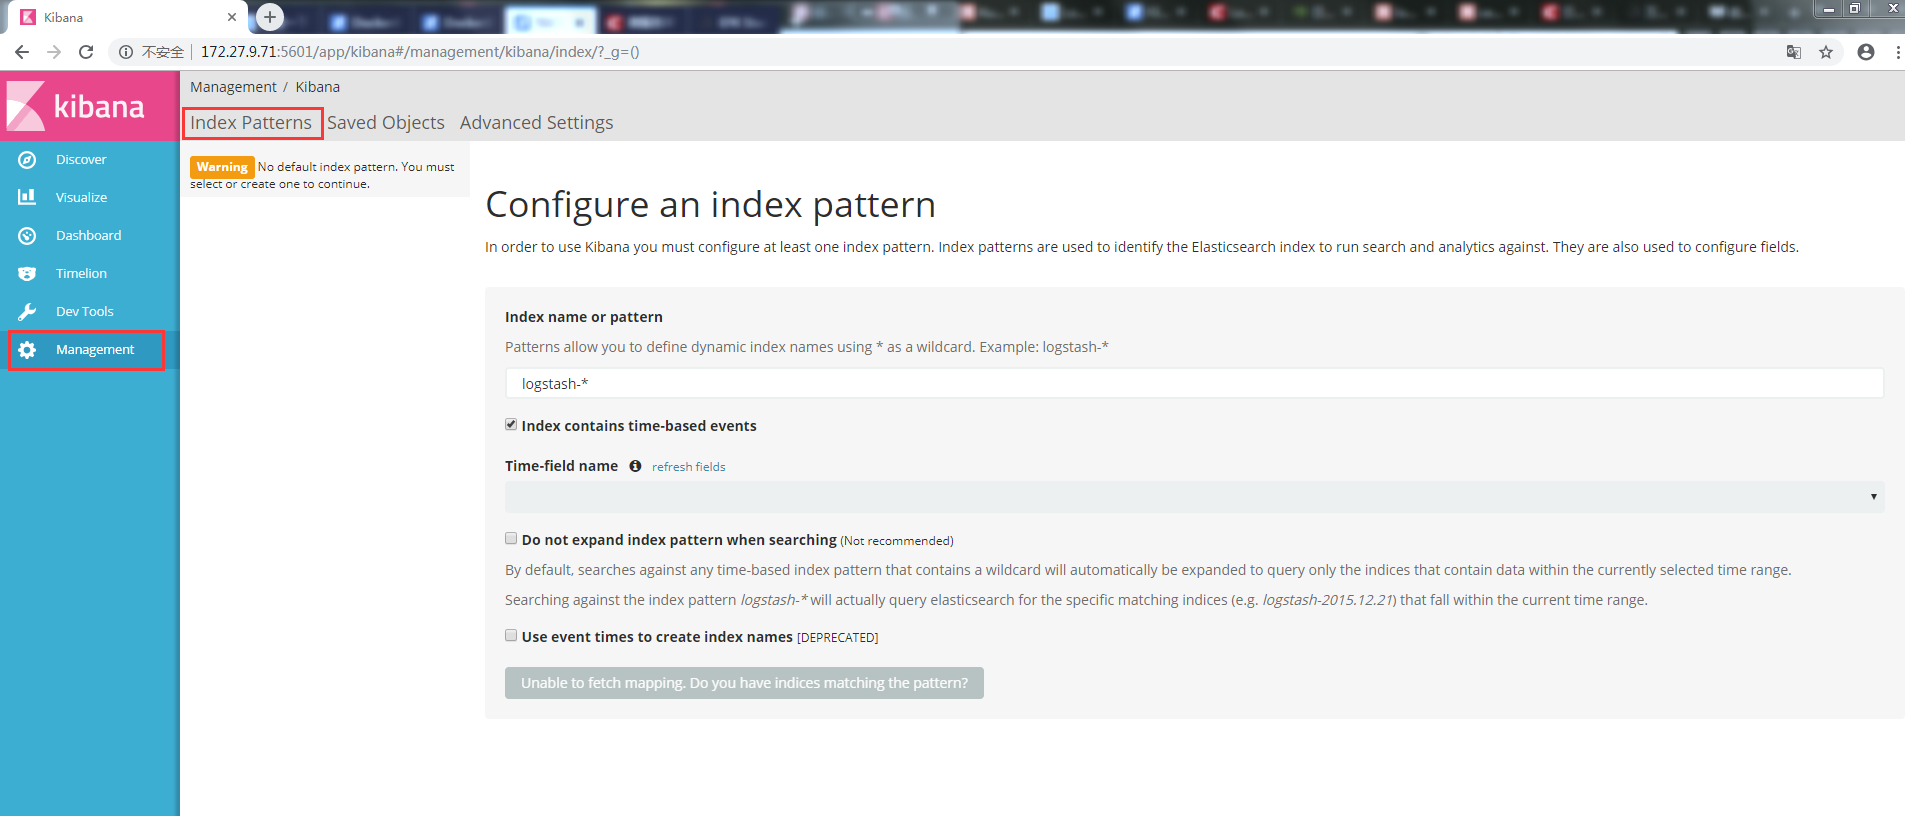
8.2 查看日誌索引
http://172.27.9.71:9200/_search?pretty
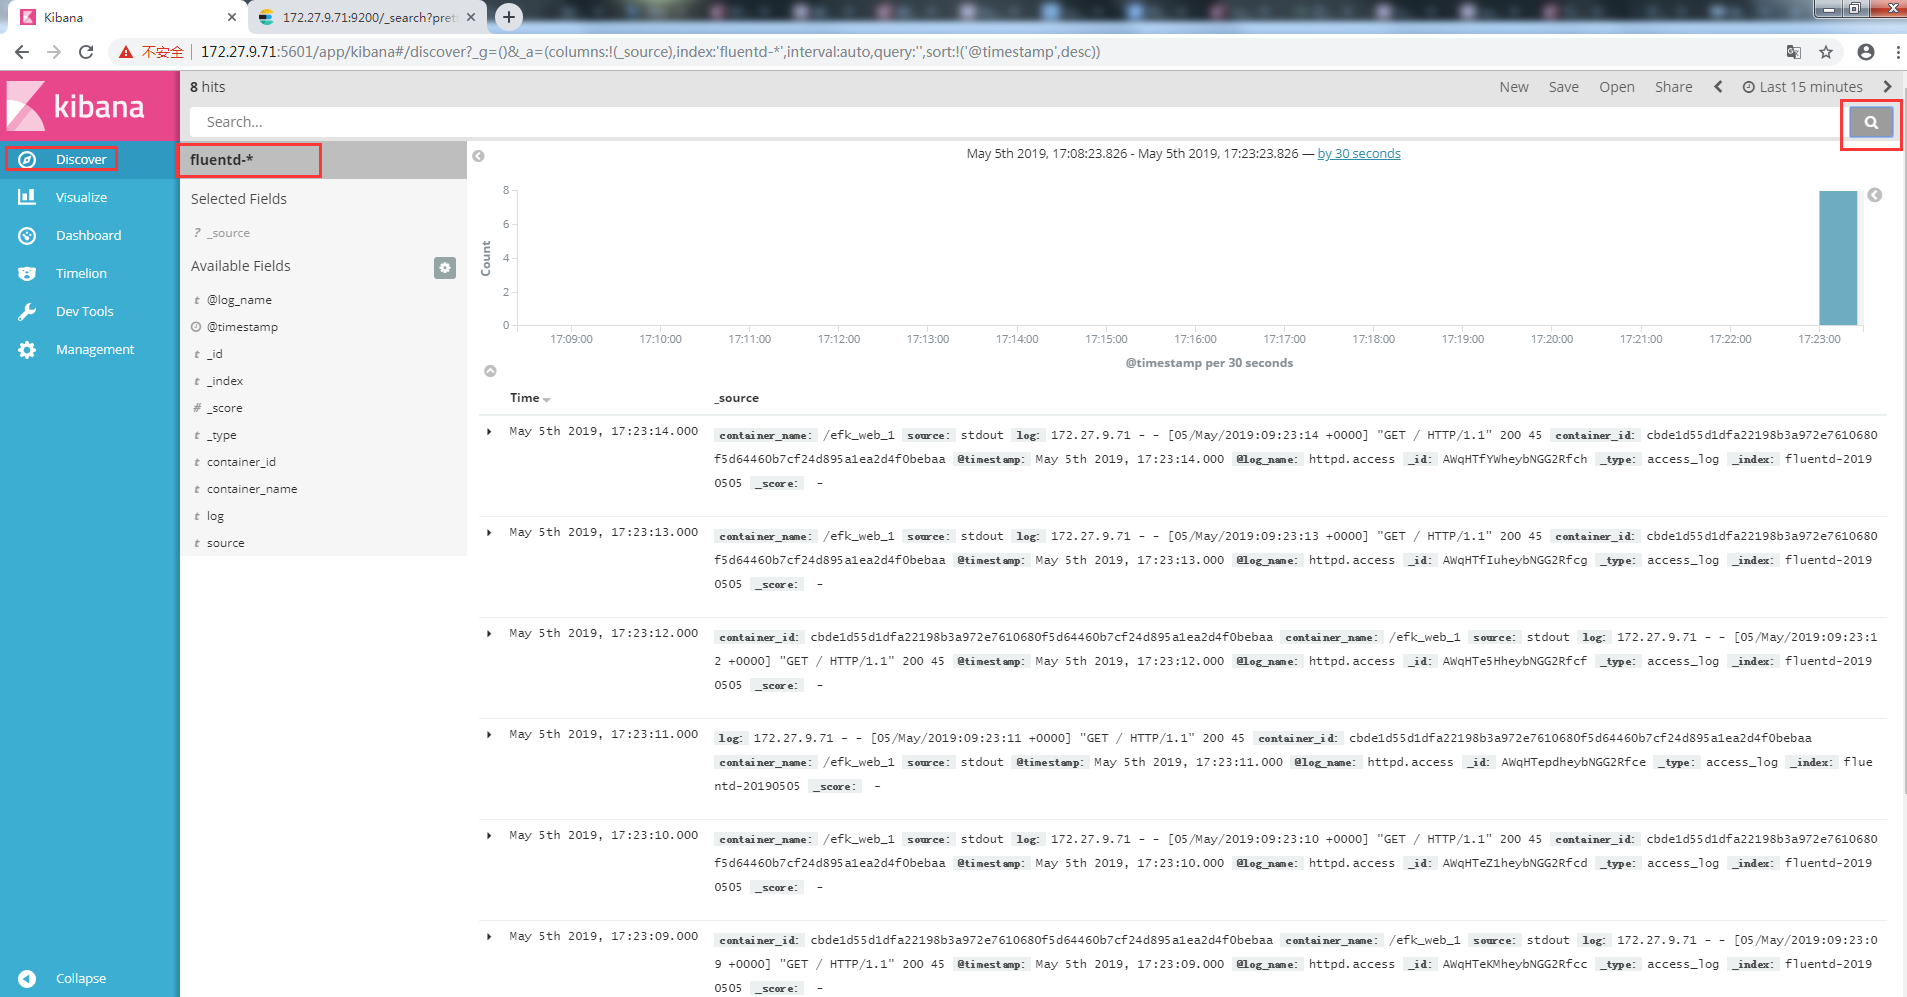
8.3 配置index pattern
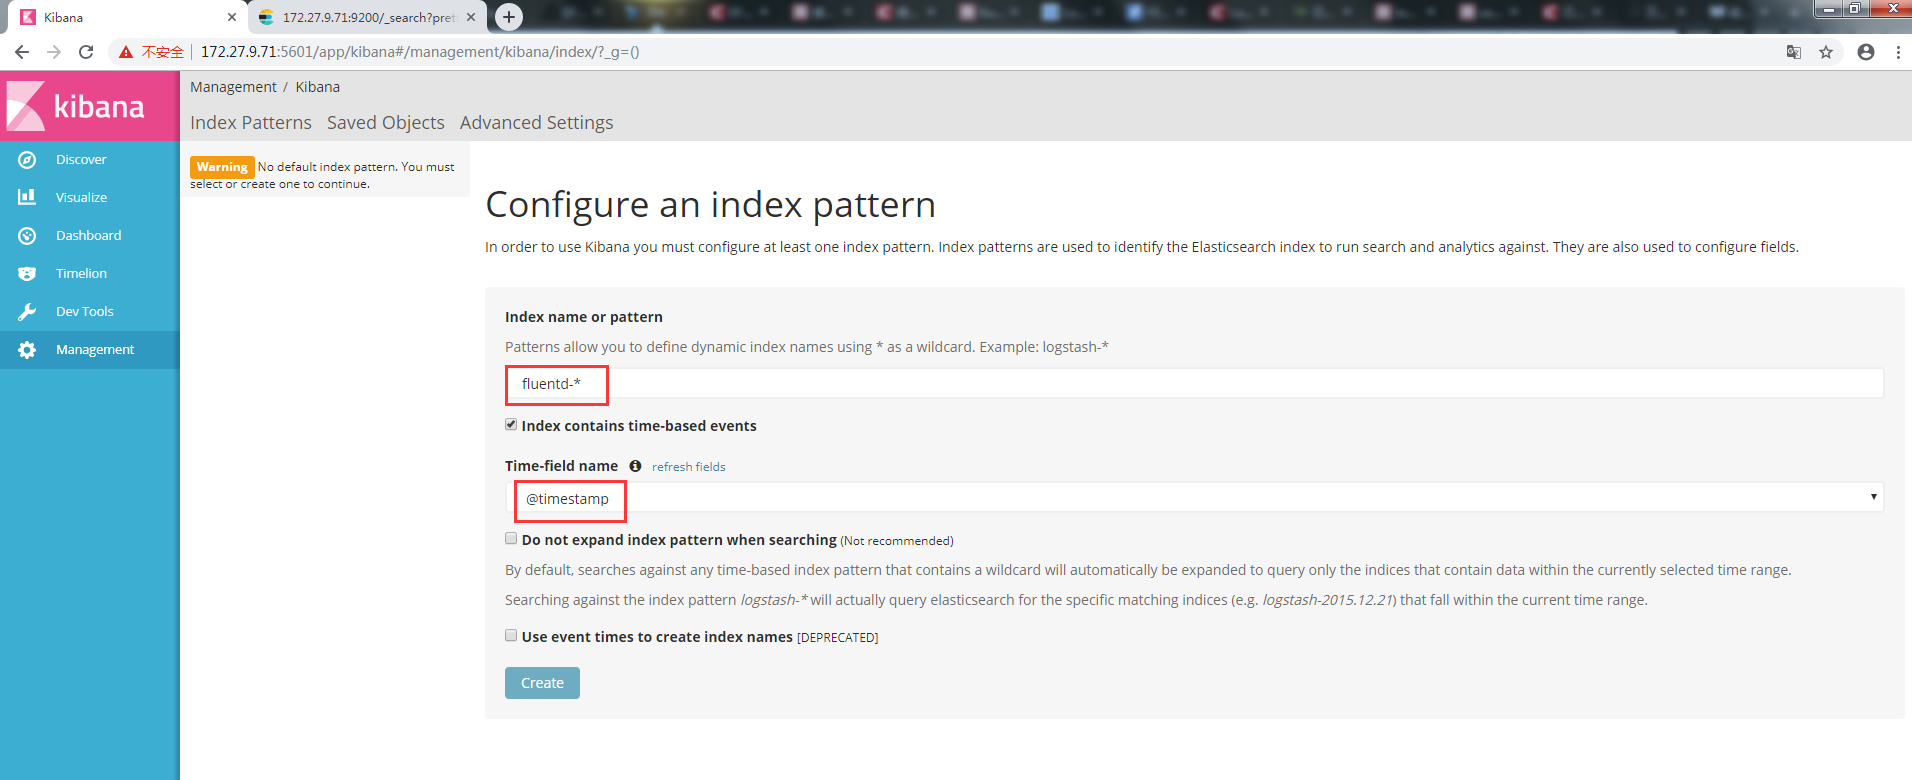
指定index pattern爲fluentd-*,這與Elasticsearch中的index一致,Time-field name選擇 @timestamp,點擊Create創建index pattern。
8.4 日誌發現