


Nginx 是俄羅斯人編寫的十分輕量級的 HTTP 服務器,Nginx, 它的發音爲“engine X”, 是一個高
性能的 HTTP 和反向代理服務器,同時也是一個 IMAP/POP3/SMTP 代理服務器. Nginx 是由
俄羅斯人 Igor Sysoev 爲俄羅斯訪問量第二的 Rambler.ru 站點開發.
Nginx 以事件驅動(epoll) 的方式編寫,所以有非常好的性能,同時也是一個非常高效的反
向代理、負載平衡。 但是 Nginx 並不支持 cgi 方式運行,原因是可以減少因此帶來的一些程
序上的漏洞。所以必須使用 FastCGI 方式來執行 PHP 程序。
由於 Nginx 本身的一些優點, 輕量,開源,易用,越來越多的公司使用 nginx 作爲自己公司
的 web 應用服務器,本文詳細介紹 nginx 源碼安裝的同時並對 nginx 進行優化配置。
一、 Nginx 的優化
1、 編譯安裝前優化
編譯前的優化主要是用來修改程序名等等, 目的更改源碼隱藏軟件名稱和版本號
安裝 zlib-devel、 pcre-devel 等依賴包
[root@bogon ~]#
[root@bogon ~]# tar zxf nginx-1.14.0.tar.gz
[root@bogon ~]# cd nginx-1.14.0/
[root@bogon nginx-1.14.0]# yum -y install openssl-devel pcre-devel
2.編譯安裝nginx
./configure --prefix=/usr/local/nginx1.14 --with-http_dav_module --with-http_stub_status_module --with-http_addition_module --with-http_sub_module --with-http_flv_module --with-http_mp4_module --with-pcre --with-http_ssl_module --with-http_gzip_static_module --user=nginx --group=nginx
make && make install
3.創建所需的用戶
[root@bogon nginx-1.14.0]# useradd nginx -s /sbin/nologin -M
4.鏈接命令目錄
[root@bogon nginx-1.14.0]#ln -s /usr/local/nginx1.14/sbin/nginx /usr/local/sbin/
5.開啓nginx,查看端口
nginx
[root@bogon nginx-1.14.0]# netstat -anpt | grep 80
tcp 0 0 0.0.0.0:80 0.0.0.0:* LISTEN 5671/nginx: master
6.修改/usr/local/nginx1.14/conf/nginx.conf
7.修改/etc/security/limits.conf
8.查看現在是否沒變
9.註銷一下,重新查看一下,是否變化
10.開啓nginx,查看nginx變化


11.頁面訪問一下nginx
二、部署 LNMP (部署環境需求:nginx和php在一臺,再開啓一臺apache做防盜鏈)
1.安裝php
首先安裝libmcrypt 和依賴包

編譯安裝php
./configure --prefix=/usr/local/php5.6 --with-mysql=mysqlnd --with-pdo-mysql=mysqlnd --with-mysqli=mysqlnd --with-openssl --enable-fpm --enable-sockets --enable-sysvshm --enable-mbstring --with-freetype-dir --with-jpeg-dir --with-png-dir --with-zlib --with-libxml-dir=/usr --enable-xml --with-mhash --with-mcrypt=/usr/local/libmcrypt --with-config-file-path=/etc --with-config-file-scan-dir=/etc/php.d --with-bz2 --enable-maintainer-zts
make && make intall
提供 php 配置文件
[root@bogon php-5.6.27]# cp php.ini-production /etc/php.ini
爲 php-fpm 提供腳本
提供 php-fpm 配置文件並編輯
修改/usr/local/php5.6/etc/php-fpm.conf
啓動php 查看9000端口
/etc/init.d/php-fpm start
[root@bogon etc]# netstat -anpt | grep 9000
tcp 0 0 0.0.0.0:9000 0.0.0.0:* LISTEN
修改/usr/local/nginx1.14/conf/nginx.conf

創建/usr/local/nginx1.14/html/index.php

測試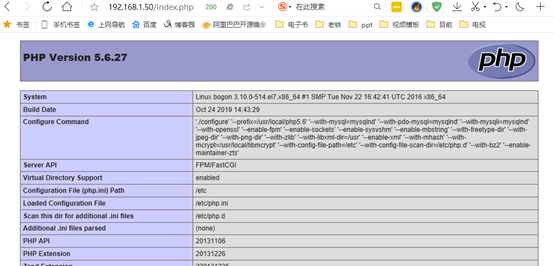
內核參數優化 添加 /etc//sysctl.conf
fs.file-max = 999999
net.ipv4.ip_forward = 0
net.ipv4.conf.default.rp_filter = 1
net.ipv4.conf.default.accept_source_route = 0
kernel.sysrq = 0
kernel.core_uses_pid = 1
net.ipv4.tcp_syncookies = 1
kernel.msgmnb = 65536
kernel.msgmax = 65536
kernel.shmmax = 68719476736
kernel.shmall = 4294967296
net.ipv4.tcp_max_tw_buckets = 6000
net.ipv4.tcp_sack = 1
net.ipv4.tcp_window_scaling = 1
net.ipv4.tcp_rmem = 10240 87380 12582912
net.ipv4.tcp_wmem = 10240 87380 12582912
net.core.wmem_default = 8388608
net.core.rmem_default = 8388608
net.core.rmem_max = 16777216
net.core.wmem_max = 16777216
net.core.netdev_max_backlog = 262144
net.core.somaxconn = 40960
net.ipv4.tcp_max_orphans = 3276800
net.ipv4.tcp_max_syn_backlog = 262144
net.ipv4.tcp_timestamps = 0
net.ipv4.tcp_synack_retries = 1
net.ipv4.tcp_syn_retries = 1
net.ipv4.tcp_tw_recycle = 1
net.ipv4.tcp_tw_reuse = 1
net.ipv4.tcp_mem = 94500000 915000000 927000000
net.ipv4.tcp_fin_timeout = 1
net.ipv4.tcp_keepalive_time = 30
net.ipv4.ip_local_port_range = 1024 65000
執行 sysctl -p 使內核修改生效
查看更新值
修改/usr/local/nginx1.14/conf/nginx.conf
sendfile on;
tcp_nopush on;
keepalive_timeout 65;
tcp_nodelay on;
client_header_buffer_size 4k;
open_file_cache max=102400 inactive=20s;
open_file_cache_valid 30s;
open_file_cache_min_uses 1;
client_header_timeout 15;
client_body_timeout 15;
reset_timedout_connection on;
send_timeout 15;
server_tokens off;
client_max_body_size 10m;
fastcgi_connect_timeout 600;
fastcgi_send_timeout 600;
fastcgi_read_timeout 600;
fastcgi_buffer_size 64k;
fastcgi_buffers 4 64k;
fastcgi_busy_buffers_size 128k;
fastcgi_temp_file_write_size 128k;
fastcgi_temp_path /usr/local/nginx1.10/nginx_tmp;
fastcgi_intercept_errors on;
fastcgi_cache_path /usr/local/nginx1.10/fastcgi_cache levels=1:2
keys_zone=cache_fastcgi:128m inactive=1d max_size=10g;
gzip on;
gzip_min_length 2k;
gzip_buffers 4 32k;
gzip_http_version 1.1;
gzip_comp_level 6;
gzip_types text/plain text/css text/javascript application/json application/javascript
application/x-javascript application/xml;
gzip_vary on;
gzip_proxied any
location ~* ^.+.(jpg|gif|png|swf|flv|wma|wmv|asf|mp3|mmf|zip|rar)$ {
valid_referers none blocked 192.168.1.50;
if ($invalid_referer) {
#return 302 http://www.benet.com/img/nolink.jpg;
return 404;
break;
}
access_log off;
}
location / {
root html;
index index.php index.html index.htm;
}
location /status {
stub_status on;
}
把之前php測試頁註釋掉
location ~ .*.(php|php5)?$ {
root html;
fastcgi_pass 127.0.0.1:9000;
fastcgi_index index.php;
include fastcgi.conf;
fastcgi_cache cache_fastcgi;
fastcgi_cache_valid 200 302 1h;
fastcgi_cache_valid 301 1d;
fastcgi_cache_valid any 1m;
fastcgi_cache_min_uses 1;
fastcgi_cache_use_stale error timeout invalid_header http_500;
fastcgi_cache_key http://$host$request_uri;
}
重啓php
nginx -s reload
測試

三、驗證、壓力測試
查看ab的安裝包
yum provides ab
安裝httpd-tools
yum -y install httpd-tools
壓力測試
ab -c 2000 -n 10000 192.168.1.50/index.html
ab -c 2000 -n 10000 192.168.1.50/index.php
兩次壓力測試做對比
驗證防盜鏈
使用 apache 做爲一個測試站點,域名爲 www.test.com,在測試頁上做一個超鏈接,鏈接 nginx
在apache主機上創建vim /var/www/html/index.html
開啓httpd
systemctl start httpd
測試


論壇
Php服務器解壓 壓縮包
unzip Discuz_7.0.0_FULL_SC_UTF8.zip
cd Discuz_7.0.0_FULL_SC_UTF8/
ls
ls upload/
修改/etc/php.ini
Mysql服務器
進入MySQL
mysql -u root -p123
創建數據庫
create database bbs;
grant all on . to root@'192.168.1.%' identified by '123.com';
測試