


配置Nginx隱藏版本號
-
在生產環境中,需要隱藏
Nginx的版本號,以避免安全漏洞的泄漏 -
查看方法
- 使用
fiddler工具在Windows客戶端查看Nginx版本號 - 在
CentOS系統中使用"curl -I 網址”命令查看
- 使用
- Nginx隱藏版本號的方法
- 修改配置文件法
- 修改源碼法
修改配置文件法
Nginx的配置文件中的server_ tokens選項的值設置爲off
[root@www conf]# vi nginx.conf
.....
server_ tokens off;              //關閉版本號
.....
[root@www conf]# nginx -t- 重啓服務,訪問網站使用
curl -I命令檢測
[root@www conf]# service nginx restart
[root@www conf]# curl -| http://192.168.9.209/
HTTP/1.1 200 OK
Server: nginx- 若
php配置文件中配置了fastcgi_param SERVER_ SOFTWARE選項. - 則編輯
php-fpm配置文件,將fastcgi_param SERVER_ SOFTWARE對應的值修改爲fastcgi_param SERVER_ SOFTWARE nginx;
配置實例
[root@localhost nginx]# curl -I http://192.168.144.133/    //使用命令查看版本號
HTTP/1.1 200 OK
Server: nginx/1.12.2      //顯示版本號
Date: Thu, 14 Nov 2019 06:52:14 GMT
Content-Type: text/html
Content-Length: 634
Last-Modified: Thu, 14 Nov 2019 06:24:32 GMT
Connection: keep-alive
ETag: "5dccf320-27a"
Accept-Ranges: bytes
[root@localhost nginx]# vim conf/nginx.conf        //進入編輯配置文件
...//省略部分內容...
http {
    include       mime.types;
    default_type  application/octet-stream;
    server_tokens off;          //添加條目關閉版本號
...//省略部分內容...
:wq
[root@localhost nginx]# systemctl restart nginx.service
[root@localhost nginx]# curl -I http://192.168.144.133
HTTP/1.1 200 OK
Server: nginx                 //版本號隱藏
Date: Thu, 14 Nov 2019 06:56:51 GMT
Content-Type: text/html
Content-Length: 634
Last-Modified: Thu, 14 Nov 2019 06:24:32 GMT
Connection: keep-alive
ETag: "5dccf320-27a"
Accept-Ranges: bytes
修改源碼法
Nginx源碼文件/usr/src/nginx-1.12.0/src/core/nginx.h包含了版本信息,可以隨意設置-
重新編譯安裝,隱藏版本信息
-
示例:
#define NGINX_ VERSION“1.1.1" 修改版本號爲1.1.1 #define NGINX VER "IIS/" 修改軟件類型爲IIS - 重啓服務,訪問網站使用
curl -I命令檢測
配置實例
[root@localhost ~]# vim /usr/local/nginx/conf/nginx.conf     //編輯nginx配置文件
...//省略部分內容...
http {
    include       mime.types;
    default_type  application/octet-stream;
    server_tokens on;                           //打開上面設置的隱藏版本號條目
...//省略部分內容...
:wq
[root@localhost ~]# cd /opt/nginx-1.12.2/src/core/    //到解壓的源碼包中更改版本號信息
[root@localhost core]# vim nginx.h
#define nginx_version      1012002
#define NGINX_VERSION      "1.1.1"                   //更改版本號
#define NGINX_VER          "nginx/" NGINX_VERSION
:wq
[root@localhost core]# cd /optnginx-1.12.2/
[root@localhost nginx-1.12.2]# ./configure --prefix=/usr/local/nginx --user=nginx --group=nginx --with-http_stub_status_module                          //重新配置nginx
checking for OS
 + Linux 3.10.0-693.el7.x86_64 x86_64
checking for C compiler ... found
 + using GNU C compiler
 + gcc version: 4.8.5 20150623 (Red Hat 4.8.5-39) (GCC)
...//省略部分內容...
  nginx http fastcgi temporary files: "fastcgi_temp"
  nginx http uwsgi temporary files: "uwsgi_temp"
  nginx http scgi temporary files: "scgi_temp"
[root@localhost nginx-1.12.2]# make && make install     //重新制作安裝nginx
[root@localhost nginx-1.12.2]# systemctl restart nginx.service     //重新啓動nginx服務
[root@localhost nginx-1.12.2]# curl -I http://192.168.144.133    //查看版本號
HTTP/1.1 200 OK
Server: nginx/1.1.1             //版本號變更
Date: Thu, 14 Nov 2019 07:11:08 GMT
Content-Type: text/html
Content-Length: 634
Last-Modified: Thu, 14 Nov 2019 06:24:32 GMT
Connection: keep-alive
ETag: "5dccf320-27a"
Accept-Ranges: bytes
修改Nginx用戶與組
Nginx運行時進程需要有用戶與組的支持,以實現對網站文件讀取時進行訪問控制Nginx默認使用nobody用戶賬號與組賬號,一般也要進行修改- 修改的方法
- 編譯安裝時指定用戶與組
- 修改配置文件指定用戶與組
編譯安裝時指定
-
創建用戶賬號與組賬號,如
nginx - 在編譯安裝時
--user與--group指定Nginx服務的運行用戶與組賬號
修改配置文件法指定
- 新建用戶賬號,如
nginx - 修改主配置文件
user選項,指定用戶賬號 - 重啓
nginx服務, 使配置生效 - 使用
ps aux命令查看nginx的進程信息,驗證運行用戶賬號改變效果
[root@www conf]# vi nginx.conf
user nginx nginx;
[root@www conf]# service nginx restart
[root@www conf]# ps aux | grep nginx
root     130034 0.0 0.0 20220 620 ?        Ss 19:41 0:00 nginx: master process
/usr/local/sbin/nginx
nginx       130035 0.0 0.0 20664 1512 ?     S 19:41 0:00 nginx: worker process
配置Nginx網頁緩存時間
- 當
Nginx將網頁數據返回給客戶端後,可設置緩存的時間,以方便在日後進行相同內容的請求時直接返回,避免重複請求,加快了訪問速度 - 般針對靜態網頁設置,對動態網頁不設置緩存時間
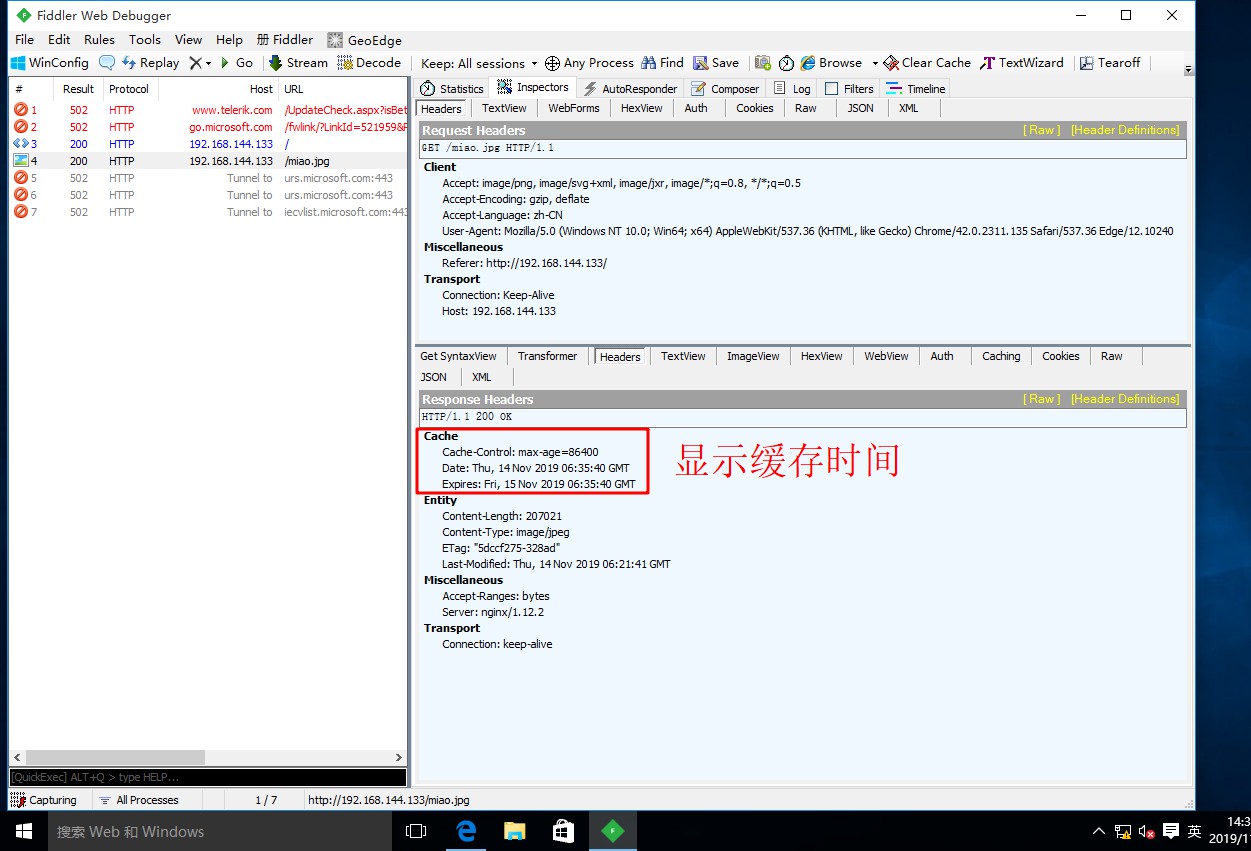
- 可在
Windows客戶端中使用fiddler查看網頁緩存時間
設置方法
- 可修改配置文件,在
http段、 或者server段、 或者location段加入對特定內容的過期參數
示例
- 修改Nginx的配置文件,在location段加入expires參數
location ~\.(gif|ipg|jepg|png|bmp|ico)$ {
       root  html;
       expires 1d;
}
配置實例
[root@localhost ~]# systemctl stop firewalld.service //關閉防火牆
[root@localhost ~]# setenforce 0 //關閉增強性安全功能
[root@localhost ~]# systemctl start nginx.service //啓動nginx服務
[root@localhost ~]# netstat -ntap | grep 80 //查看服務端口是否開啓
tcp 0 0 0.0.0.0:80 0.0.0.0:* LISTEN 1684/nginx: master
[root@localhost ~]# mkdir abc
[root@localhost ~]# mount.cifs //192.168.100.10/lamp-c7 abc/ //將宿主機圖片文件夾掛載到abc目錄
Password for root@//192.168.100.10/lamp-c7:
[root@localhost ~]# cd abc/ //進入abc目錄
[root@localhost abc]# ls
apr-1.6.2.tar.gz Discuz_X2.5_SC_UTF8.zip miao.jpg
apr-util-1.6.0.tar.gz error.png mysql-5.6.26.tar.gz
awstats-7.6.tar.gz httpd-2.4.29.tar.bz2 nginx-1.12.0.tar.gz
cronolog-1.6.2-14.el7.x86_64.rpm LAMP-php5.6.txt php-5.6.11.tar.bz2
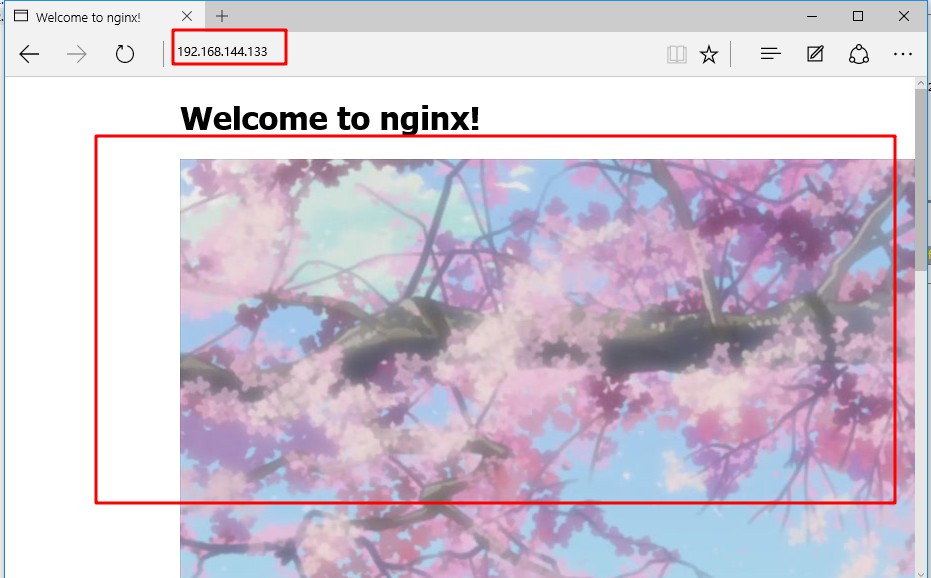
[root@localhost abc]# cp miao.jpg /usr/local/nginx/html/ //將圖片複製到nginx服務站點
[root@localhost abc]# cd /usr/local/nginx/html/ //進入站點目錄
[root@localhost html]# ls
50x.html index.html miao.jpg
[root@localhost html]# vim index.html //編輯網頁內容
<!DOCTYPE html>
<html>
<head>
<title>Welcome to nginx!</title>
<style>
body {
width: 35em;
margin: 0 auto;
font-family: Tahoma, Verdana, Arial, sans-serif;
}
</style>
</head>
<body>
<h1>Welcome to nginx!</h1>
<img src="miao.jpg"/> //添加圖片
<p>If you see this page, the nginx web server is successfully installed and
working. Further configuration is required.</p>
<p>For online documentation and support please refer to
<a href="http://nginx.org/">nginx.org</a>.<br/>
Commercial support is available at
<a href="http://nginx.com/">nginx.com</a>.</p>
<p><em>Thank you for using nginx.</em></p>
</body>
</html>
:wq
[root@localhost nginx]# vim conf/nginx.conf //編輯配置
..//省略部分內容...
events {
worker_connections 1024;
}
http {
include mime.types;
default_type application/octet-stream;
..//省略部分內容...
# deny access to .htaccess files, if Apache's document root
# concurs with nginx's one
#
location ~\.(gif|jepg|jpg|ico|bmp|png)$ { //編輯緩存條目
root html;
expires 1d;
}
}
..//省略部分內容...
:wq
[root@localhost nginx]# systemctl restart nginx.service //重啓nginx服務- 在客戶機中訪問網頁,並使用抓包工具查看緩存時間是否開啓
配置Nginx實現連接超時
- 在企業網站中,爲了避免同一個客戶長時間佔用連接,造成資源浪費,可設置相應的連接超時參數,實現控制連接訪問時間
- 使用Fiddler工具查看connection參數
超時參數講解
-
Keepalive_ timeout
- 設置連接保持超時時間,-般可只設置該參數,默認爲75秒,可根據網站的情況設置,或者關閉,可在http段、 server段、 或者location段設置
-
Client header_ timeout
- 指定等待客戶端發送請求頭的超時時間
- Client body _timeout
- 設置請求體讀超時時間
配置實例
[root@localhost nginx-1.12.2]# cd /usr/local/nginx/conf/     //進入nginx配置文件目錄
[root@localhost conf]# vim nginx.conf      //編輯配置文件
...//省略部分內容...
http {
    include       mime.types;
    default_type  application/octet-stream;
    server_tokens on;

    #log_format  main  '$remote_addr - $remote_user [$time_local] "$request" '
    #                  '$status $body_bytes_sent "$http_referer" '
    #                  '"$http_user_agent" "$http_x_forwarded_for"';

    #access_log  logs/access.log  main;

    sendfile        on;
    #tcp_nopush     on;

    #keepalive_timeout  0;
    keepalive_timeout  65 180;     //添加客戶端超時時間180秒
    client_header_timeout 80;      //設置客戶端頭部超時時間
    client_body_timeout 80;        //設置客戶端主題內容超時時間

    #gzip  on;

    server {
        listen       80;
        server_name  localhost;
...//省略部分內容...
:wq
[root@localhost conf]# systemctl restart nginx.service      //重啓服務