


Rabbit MQ消息隊列
@[toc]
簡介
優點
erlang開發,併發能力強。
社區活躍,使用的人多,穩定性較強。
延時低
缺點
erlang語言開發的,國內精通的不多,日後定製開發困難。
Rabbit MQ工作模式
1,"Hello World!"模式

簡單模式是Rabbit MQ最簡單入門的案例,其中一個生產者,一個消費者。無需聲明交換機(其實是有個默認的交換機),聲明完一個隊列以後,生產者往這裏發送,消費者則監聽該隊列,對消息做出響應。
應用場景:如兩個用戶之間的聊天。
2,Work queues 模式

工作隊列模式在工人之間分配任務(競爭的消費者模式),就是有多個消費者的簡單模式,多個消費者一起監聽該隊列,Rabbit MQ 會確保隊列中的某一條消息只會被某一個消費者消費。
應用場景:如多個用戶搶某個訂單(高併發下爭搶同一個資源的記得考慮加鎖)
3,Publish/Subscribe 模式

發佈/訂閱模式一次向許多消費者發送消息,還是一個生產者多個消費者,但是該模式需要顯示聲明交換機了,將創建的多個隊列與該交換機進行綁定,生產者將消息發給交換機,由交換機發給已經綁定好的隊列,對應的某隊列的消費者消費該隊列中的信息。
應用場景:羣發某個郵件,推送某條廣告
4,Routing 模式

路由模式是有選擇地接收消息,還是顯示聲明交換機,將隊列與交換機綁定,由生產者將消息發給交換機,由交換機發給對應的隊列,由對應的消費者消費信息。但是隊列綁定交換機時需要指定一個routingkey ,這樣的話,生產者再向生產者發消息的時候,會判斷具體的 routingkey 值,並將符合對應 routingkey 值的消息發送給對應的隊列。
應用場景:封裝若干類錯誤類型通知
5,Topics 模式

主題模式根據模式(主題)接收消息,同路由模式一樣,只不過不再是根據具體的 routingkey 值做判斷,是根據 routingkey 值模糊匹配的。其中,星號代表多個單詞 , 井號代表一個單詞。
更加詳細的資料可訪問官網 : RabbitMQ官網
交換機模式
fanout模式:不處理路由鍵,即沒有 routingkey 值,很像子網廣播,每臺子網內的主機都獲得了一份複製的消息。
direct模式:處理路由鍵,需要路由鍵匹配才能轉發,即完全匹配上 routingkey 值。
topic模式:處理路由鍵,需要路由鍵模糊匹配才能轉發,即模糊匹配上 routingkey 值。
引入RabbitMQ隊列
RabbitMQ 依賴與 erlang 語言,點擊 官網下載鏈接 下載 erlang。
點擊 官網下載鏈接 下載RabbitMQ。
安裝兩者的時候,一路默認設置即可。
啓動 RabbitMQ 服務,cmd模式下輸入,進入默認安裝路徑
C:\Program Files (x86)\RabbitMQ Server\rabbitmq_server-3.6.10\sbin輸入命令
rabbitmq-plugins enable rabbitmq_management服務啓動成功,如圖所示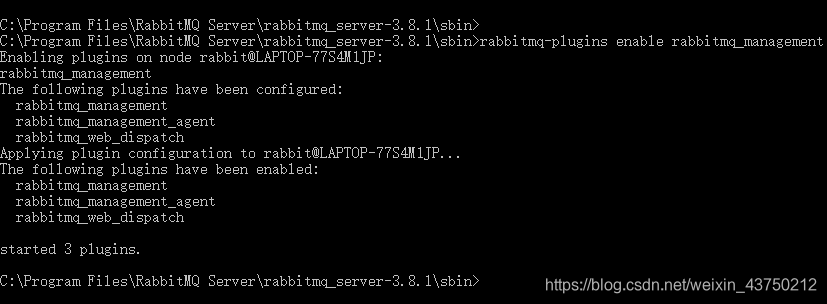
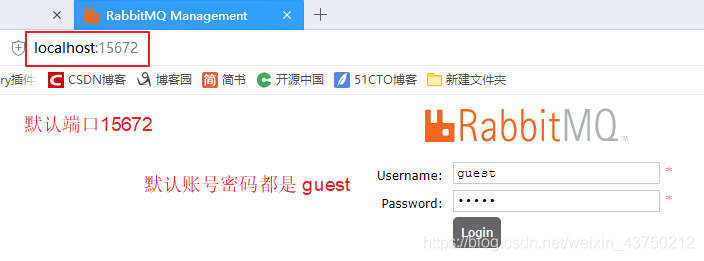
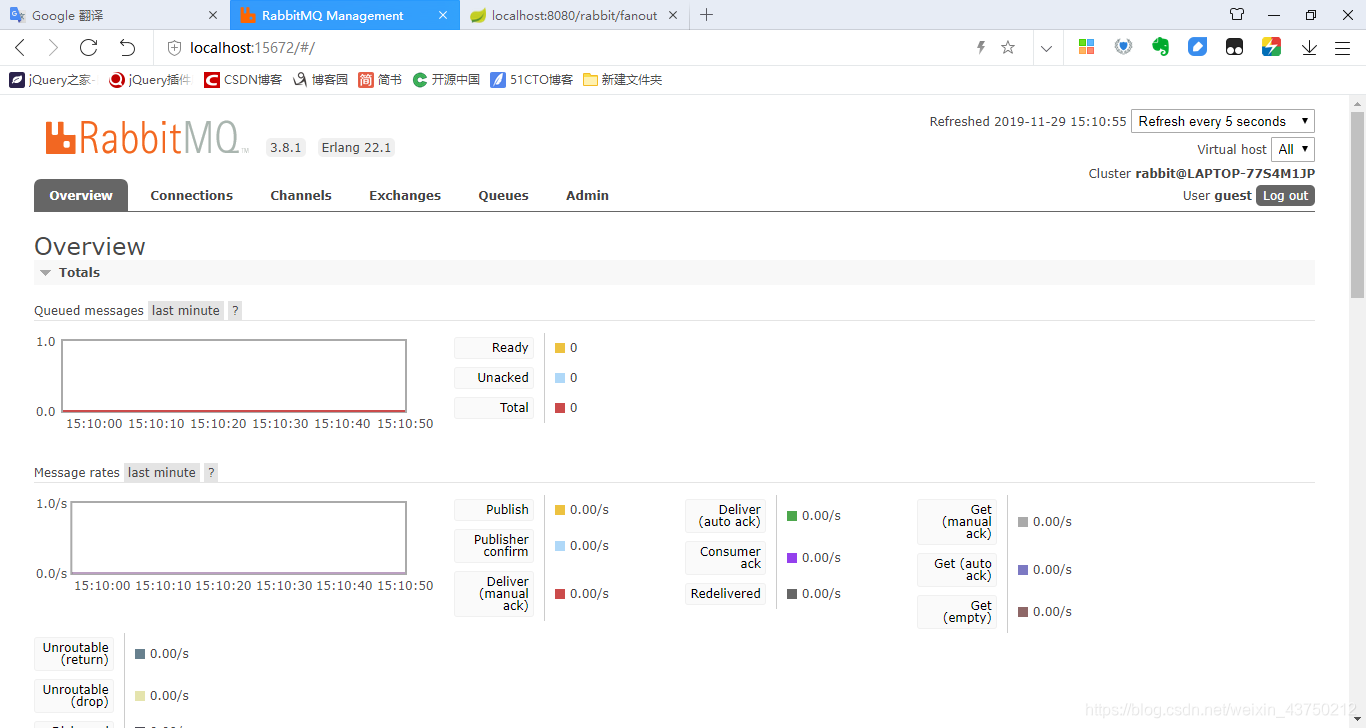
點擊 http://localhost:15672/ ,如下圖所示
pom.xml中新增
<dependency>
    <groupId>org.springframework.boot</groupId>
    <artifactId>spring-boot-starter-amqp</artifactId>
</dependency>
application.properties中加入
# RabbitMQ
spring.rabbitmq.host=127.0.0.1
spring.rabbitmq.port=5672
spring.rabbitmq.username=guest
spring.rabbitmq.password=guest
# 併發消費者的初始化值
spring.rabbitmq.listener.concurrency=10
# 併發消費者的最大值
spring.rabbitmq.listener.max-concurrency=20
# 每個消費者每次監聽時可拉取處理的消息數量
spring.rabbitmq.listener.prefetch=5
代碼實戰
簡單模式和工作隊列模式沒有指定交換機,rabbitMQ的精妙之處不能體現出來,而路由模式和主體模式都有 routingkey 值,故挑其一,本文以發佈/訂閱模式和路由模式爲例,其餘的都可類比。不全寫,是因爲這是快速上手使用系列,最短的時間精力明白來龍去脈,纔是該系列的宗旨,人類畏懼晦澀冗長的,喜歡簡短直接的。
新增代碼後的目錄如下所示

RabbitConfig.java
package com.example.config;

import org.springframework.amqp.core.*;
import org.springframework.context.annotation.Bean;
import org.springframework.context.annotation.Configuration;

@Configuration
public class RabbitConfig {

    //==============發佈/訂閱模式==============

    //隊列A
    @Bean()
    public Queue queueA() {
        return new Queue("fanoutQueueA");
    }

    //隊列B
    @Bean()
    public Queue queueB() {
        return new Queue("fanoutQueueB");
    }

    //發佈訂閱模式下的 fanout 交換機
    @Bean
    public FanoutExchange fanoutExchange() {
        return new FanoutExchange("fanoutExchange");
    }

    // 把 隊列A 和 fanout交換機 綁定在一起
    @Bean
    public Binding bindingWithQueueA() {
        return BindingBuilder.bind(queueA()).to(fanoutExchange());
    }

    // 把 隊列B 和 fanout交換機 綁定在一起
    @Bean
    public Binding bindingWithQueueB() {
        return BindingBuilder.bind(queueB()).to(fanoutExchange());
    }

    //==============路由模式==============
    //隊列C
    @Bean()
    public Queue queueC() {
        return new Queue("directQueueC");
    }

    //隊列D
    @Bean()
    public Queue queueD() {
        return new Queue("directQueueD");
    }

    //發佈訂閱模式下的 direct 交換機
    @Bean
    public DirectExchange directExchange() {
        return new DirectExchange("directExchange");
    }

    // 把 隊列C 和 direct交換機 綁定在一起
    @Bean
    public Binding bindingWithQueueC() {
        return BindingBuilder.bind(queueC()).to(directExchange()).with("directRoutingkey");
    }

    // 把 隊列B 和 direct交換機 綁定在一起
    @Bean
    public Binding bindingWithQueueD() {
        return BindingBuilder.bind(queueD()).to(directExchange()).with("directRoutingkey");
    }

}
RabbitController.java
package com.example.controller;

import com.example.service.IRabbitProducerService;
import org.springframework.beans.factory.annotation.Autowired;
import org.springframework.stereotype.Controller;
import org.springframework.web.bind.annotation.RequestMapping;

@Controller
@RequestMapping("rabbit")
public class RabbitController {

    @Autowired
    private IRabbitProducerService rabbitProducerService;

    @RequestMapping("/fanout")
    public void fanout() {
        for (int i = 0; i < 5; i++) {
            this.rabbitProducerService.producerFanout("發佈訂閱模式下的第" + i + "條信息");
        }
    }

    @RequestMapping("/direct")
    public void direct() {
        for (int i = 0; i < 5; i++) {
            this.rabbitProducerService.producerDirect("路由模式下的第" + i + "條信息");
        }
    }

}
IRabbitProducerService.java
package com.example.service;

public interface IRabbitProducerService {

    void producerFanout(String message);

    void producerDirect(String message);

}
RabbitProducerServiceIml.java
package com.example.service;

import org.springframework.amqp.rabbit.core.RabbitTemplate;
import org.springframework.beans.factory.annotation.Autowired;
import org.springframework.stereotype.Service;

@Service("rabbitProducerService")
public class RabbitProducerServiceIml implements IRabbitProducerService {

    @Autowired
    RabbitTemplate rabbitTemplate;

    public void producerFanout(String message) {
        rabbitTemplate.convertAndSend("fanoutExchange", null, message);
    }

    public void producerDirect(String message) {
        rabbitTemplate.convertAndSend("directExchange", "directRoutingkey", message);
    }

}
IRabbitConsumerService.java
package com.example.service;

public interface IRabbitConsumerService {

    void consumerFanoutA(String message);

    void consumerFanoutB(String message);

    void consumerDirectC(String message);

    void consumerDirectD(String message);

}
RabbitConsumerServiceIml.java
package com.example.service;
import org.springframework.amqp.rabbit.annotation.RabbitListener;
import org.springframework.stereotype.Component;
@Component
public class RabbitConsumerServiceIml implements IRabbitConsumerService {
@RabbitListener(queues = "fanoutQueueA")
public void consumerFanoutA(String message) {
System.out.println("消費者收到隊列A中的消息:" + message);
}
@RabbitListener(queues = "fanoutQueueB")
public void consumerFanoutB(String message) {
System.out.println("消費者收到隊列B中的消息:" + message);
}
@RabbitListener(queues = "routingQueueC")
public void consumerDirectC(String message) {
System.out.println("消費者收到隊列C中的消息:" + message);
}
@RabbitListener(queues = "routingQueueD")
public void consumerDirectD(String message) {
System.out.println("消費者收到隊列D中的消息:" + message);
}
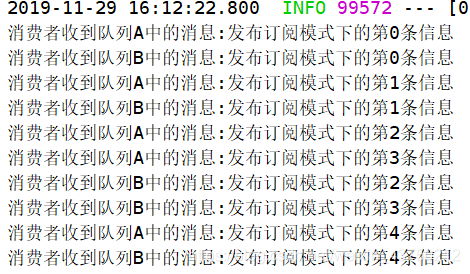
}啓動項目後,瀏覽器輸入 http://localhost:8080/rabbit/fanout ,(雖然前臺會報錯,因爲這個請求只是觸發消息的生產,並沒有對應的界面展示。生產出來的消息經過交換機傳給隊列,消費者則監聽隊列,做出對應的響應。)發佈/訂閱模式下使用 fanout 交換機生產消費消息的效果圖如下所示;
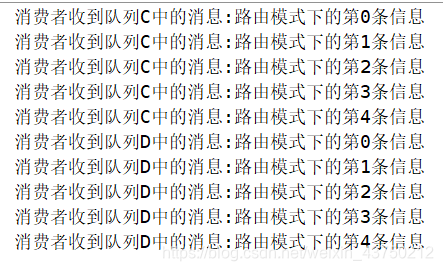
瀏覽器輸入 http://localhost:8080/rabbit/direct ,發路由模式下使用 direct 交換機生產消費消息的效果圖如下所示;
注:如果是根據本文系列文章來的,因爲一開始就配置好了spring security,所以記得將該地址配給所登錄的用戶。或者開一個超級管理員賬號,可以訪問項目的任意目錄,使用該管理員賬號訪問這些地址。
到這裏,篇幅已經很長了,本來想準備寫完死信隊列,和消息確認機制。想想這是快速整合上手系列,就把深入的內容放到踩坑深入系列,盡情期待後續開闢新的系列文章吧。