


前言:今天介紹一SpringBoot的Starter,並手寫一個自己的Starter,在SpringBoot項目中,有各種的Starter提供給開發者使用,Starter則提供各種API,這樣使開發SpringBoot項目變得簡單。實際上Starter簡單來說就是Spring+SpringMVC開發的。話不多說開始擼代碼
1.創建項目
首先在idea中創建SpringBoot項目,並首先創建一個BeautyProperties類,代碼代碼如下:
package com.mystarter;

import org.springframework.boot.context.properties.ConfigurationProperties;

@ConfigurationProperties(prefix = "beauty")
public class BeautyProperties {
    private String name;
    private Integer age;
    public String getName() {
        return name;
    }
    public void setName(String name) {
        this.name = name;
    }
    public Integer getAge() {
        return age;
    }
    public void setAge(Integer age) {
        this.age = age;
    }
}- @ConfigurationProperties(prefix = "beauty")註解表示,在resource目錄下的application.properties文件中定義的變量的以beauty前綴的變量值映射到這個類中,給這個對象賦值
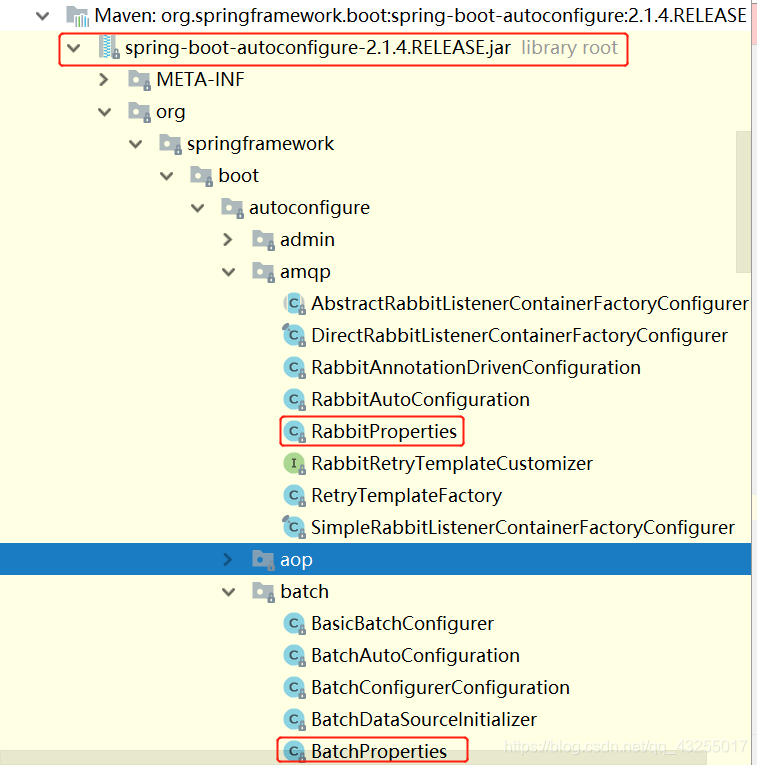
- 其中這個XXProperties類,若是由閱讀過SpringBoot源碼的程序員都知道,在SpringBooot的源碼中Starter有各種的XXProperties類與.properties文件相對應
- 如圖所示所有的自動配置相關的都在spring-boot-autoconfigure這個jar包下。其中就列舉了兩個RabbitProperties、BatchProperties等的配置類
![在這裏插入圖片描述]()
- 點進RabbitProperties這個類中去看,代碼如下,只粘貼一部分,這個類中也是使用@ConfigurationProperties註解將配置文件中的值與此類中的屬性值相映射,目的就是爲了給這些屬性賦值
- 這裏留一個問題,大佬們就自己去尋找答案吧?就是那些與這些類相映射的文件在哪裏呢?自行百度哈
@ConfigurationProperties( prefix = "spring.rabbitmq" ) public class RabbitProperties { private String host = "localhost"; private int port = 5672; private String username = "guest"; private String password = "guest"; private final RabbitProperties.Ssl ssl = new RabbitProperties.Ssl(); private String virtualHost; private String addresses; - 然後再創建一個ActionService類,這個類沒什麼好說的了,代碼如下:
package com.mystarter;
public class ActionService {
private String name;

private Integer age;

public String sayHello() {
    return "my name is "+ name +",I am "+ age +" years old";
}

public Integer getAge() {
    return age;
}

public void setAge(Integer age) {
    this.age = age;
}

public String getName() {
    return name;
}

public void setName(String name) {
    this.name = name;
}
}
 - 最後再創建一個類ActionServiceAutoConfiguration,這個類是重點,代碼如下:
 - @Configuration註解表明這是一個配置類
 - @EnableConfigurationProperties(BeautyProperties.class)表明開啓@ConfigurationProperties這個註解,使這個註解生效
 - @ConditionalOnClass(ActionService.class)條件判斷註解,表明有這個類ActionService,條件才生效,即配置才生效。
 - 通過@Autowired將BeautyProperties 類自動注入IOC容器中
 - @Bean將返回的值注入到容器中
package com.mystarter;
import org.springframework.beans.factory.annotation.Autowired;
import org.springframework.boot.autoconfigure.condition.ConditionalOnClass;
import org.springframework.boot.context.properties.EnableConfigurationProperties;
import org.springframework.context.annotation.Bean;
import org.springframework.context.annotation.Configuration;
@Autowired
BeautyProperties beautyProperties;

@Bean
ActionService helloService() {
    ActionService helloService = new ActionService();
    helloService.setName(beautyProperties.getName());
    helloService.setAge(beautyProperties.getAge());
    return helloService;
}
}
- 然後再resources文件夾下的application.properties文件中,加入如下配置,作爲使用這個Starter時候,沒有設置相關值的時候作爲默認值注入到配置類中
beauty.name=李依依默認
beauty.age=18
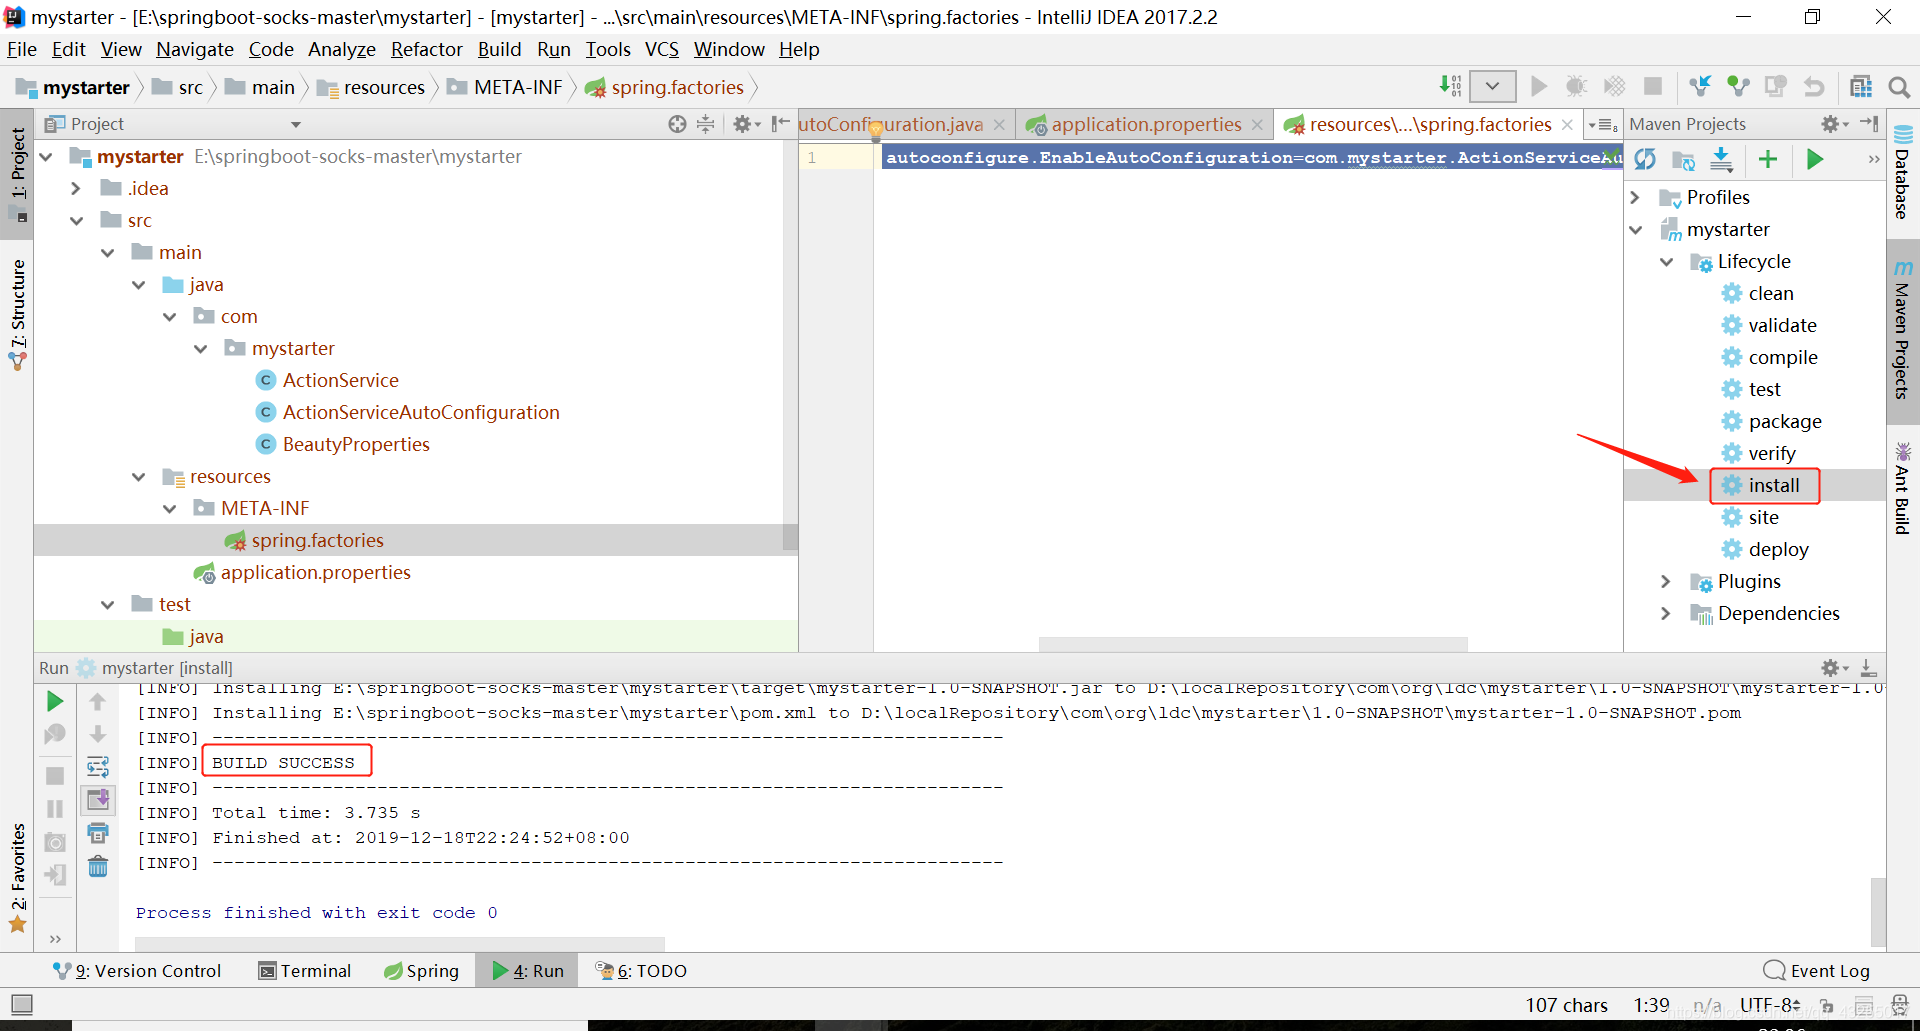
- 最後再resources中新建一個META-INF文件夾,然後在新建一個文件spring.factories,這個名字和文件夾的名字不能改,加入配置如下,這個表明指定自動配置的類的全路徑,自動配置的時候就找到這個全路徑,實例化這個對象到容器中
org.springframework.boot.autoconfigure.EnableAutoConfiguration=com.mystarter.ActionServiceAutoConfiguration
- 最後一步點擊install,出現Build Success說明這個Starter已經安裝到本地maven倉庫中,可以被別人引用
## 2.測試Starter
新建一個SpringBoot工程,在application.properties的文件中加入如下配置:
beauty.name=李依依
beauty.age=24
在pom文件中引入依賴,如下:
<dependency>
<groupId>com.org.ldc</groupId>
<artifactId>mystarter</artifactId>
<version>1.0-SNAPSHOT</version>
</dependency>
然後測試,如下代碼
package com.org.ldc.mystarter;
import com.mystarter.HelloService;
import org.junit.jupiter.api.Test;
import org.springframework.beans.factory.annotation.Autowired;
import org.springframework.boot.test.context.SpringBootTest;
import org.springframework.test.context.junit4.SpringRunner;
@SpringBootTest
class TestmystarterApplicationTests {
@Autowired
HelloService helloService;

@Test
public void contextLoads() {
    System.out.println(helloService.sayHello());
}
}
執行測試,出現如下,說明創建成功

>更多的教程請關注:非科班的科班,路過有空的大佬們點個贊,謝謝大家