Azure IoT Edge入門(2)部署一臺Edge Device
Azure IoT Edge入門(2)部署一臺Edge Device
案例:部署一臺Edge Device(Windows 系統)
通常情況下,部署一臺Edge設備有如下四個步驟:
1. 創建Azure IoT Hub;
2.準備Edge Device(windows/linux),1.準備操作系統,2.在IoT Hub裏創建IoT Edge Device;
3.安裝並配置 Azure IoT Edge Runtime(離線或在線安裝);
4. 從Azure Container Registry 下載業務容器,由業務容器開始發送遙測消息給Azure IoT Hub;
今天這一小節,介紹前三個步驟。
關於Azure Container Regisgtry,請參見《Azure Container Registry》

本文主要介紹:
1. IoT Edge Runtime 對操作系統的要求
2. 準備Edge device(在azure 上購買一臺Windows Server 2019)
3.準備Azure IoT Hub並新建IoT Edge Device
4.在Edge Device 上安裝 IoT Edge Runtime
在線安裝;
離線安裝;
視頻講解:
您可以觀看B站視頻:https://www.bilibili.com/video/av91049338/
或在本站觀看視頻:
deploy-iot-dege-on-windows.mp4
圖文步驟:
IoT Edge 對操作系統的要求,請參見:https://docs.azure.cn/zh-cn/iot-edge/support
主要分爲兩種(文檔裏稱爲兩層),簡單理解:
第一層系統是由微軟進行過嚴格的Azure IoT Edge Runtime測試,完全兼容。
下表中列出的系統(不管是公開發布版還是公共預覽版)受 Microsoft 的支持,並在每個新版本中進行了測試。
| 操作系統 | AMD64 | ARM32v7 | ARM64 |
| Raspbian Stretch |  | ||
| Ubuntu Server 16.04 |  | 公共預覽版 | |
| Ubuntu Server 18.04 |  | 公共預覽版 | |
| Windows 10 IoT 核心版內部版本 17763 |  | ||
| Windows 10 IoT 企業版內部版本 17763 |  | ||
| Windows Server 2019 內部版本 17763 |  | ||
| Windows Server IoT 2019 內部版本 17763 |  |
第二層理論上可兼容,或者微軟合作伙伴已經成功運行了的。
| 操作系統 | AMD64 | ARM32v7 | ARM64 |
| CentOS 7.5 |  |  |  |
| Debian 8 |  |  |  |
| Debian 9 |  |  |  |
| Debian 10 1 |  |  |  |
| Mentor Embedded Linux Flex OS |  |  |  |
| Mentor Embedded Linux Omni OS |  |  | |
| RHEL 7.5 |  |  |  |
| Ubuntu 16.04 |  |  |  |
| Ubuntu 18.04 |  |  |  |
| Wind River 8 |  | ||
| Yocto |  |  |  |
| Raspbian Buster 1 |  |  |
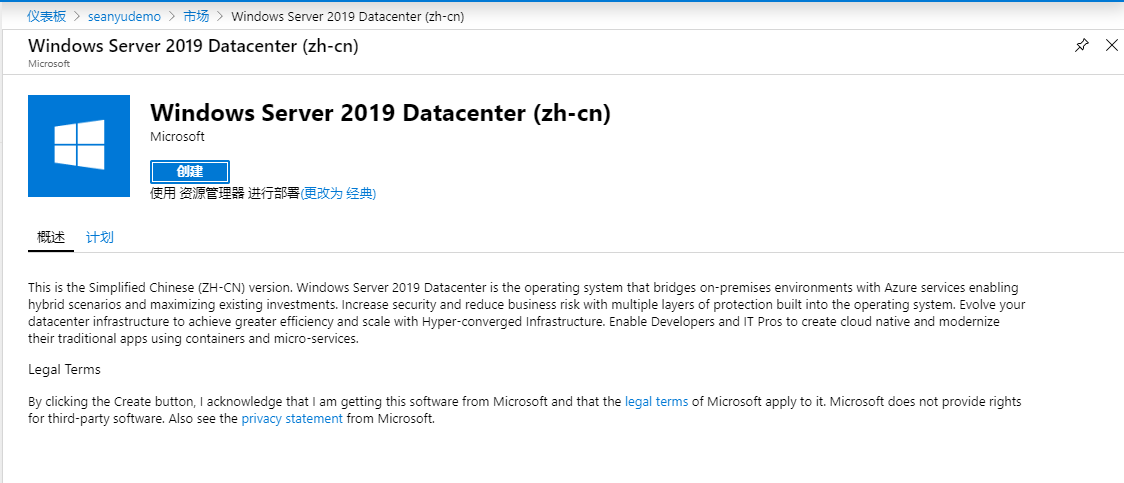
在Azure上準備一臺虛擬機作爲Edge設備使用
本案例中使用的是Windows Server 2019 Datacenter (zh-cn),當然可以選擇其他第一層的操作系統。
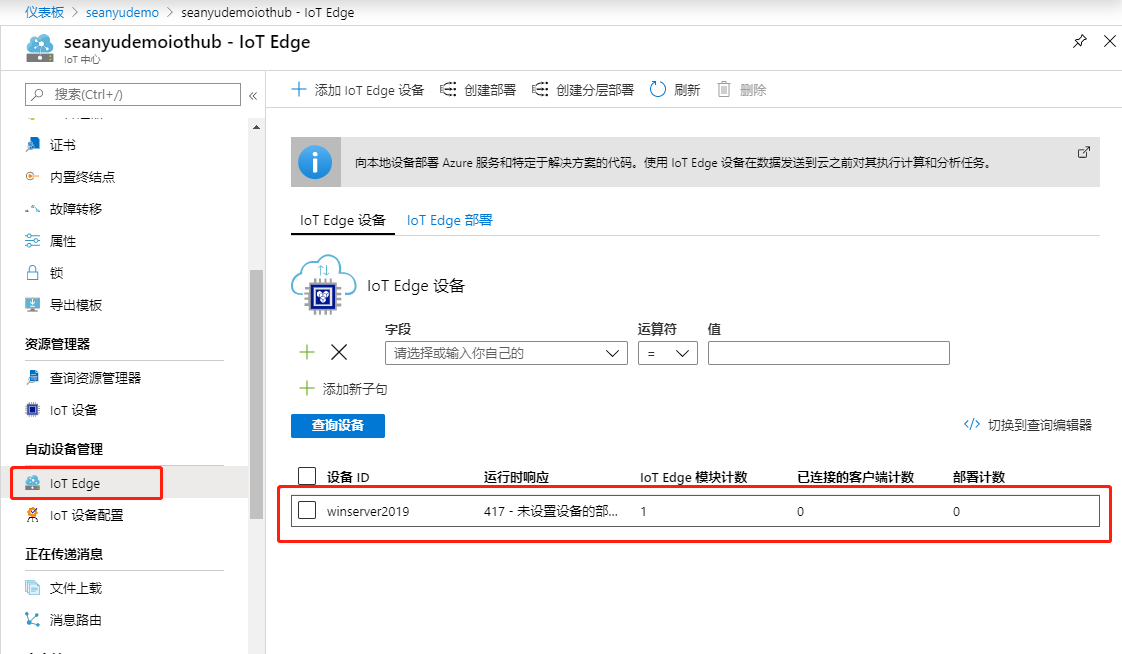
創建Azure IoT Hub,並創建IoT Edge Device
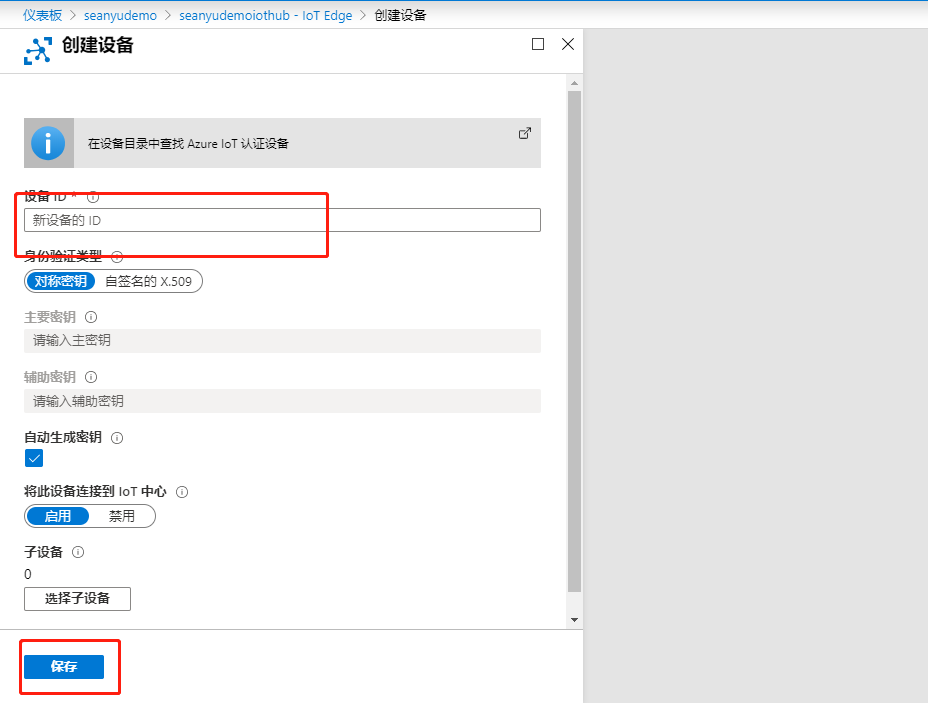
在IoT Hub-IoT Edge中點擊添加IoT Edge設備
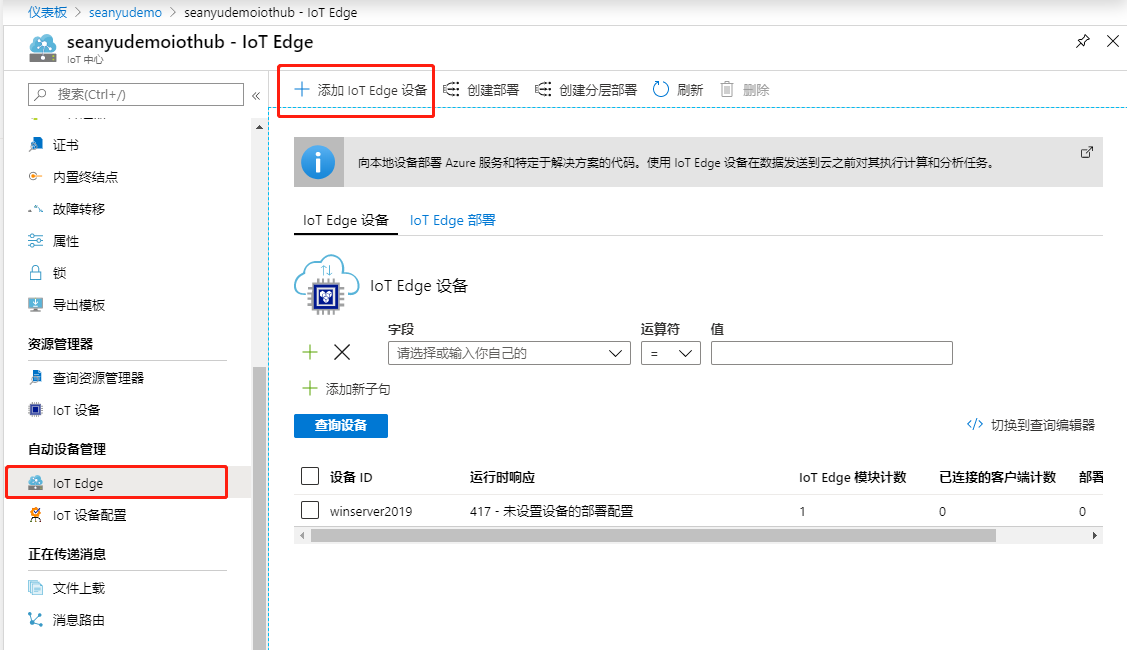
輸入設備ID,其餘保持默認,點擊保存
在Edge 設備上安裝IoT Edge Runtime
在windows 中安裝Edge Runtime,請參見:https://docs.azure.cn/zh-cn/iot-edge/how-to-install-iot-edge-windows
注意,本節中,我們選擇安裝和手動預配,手動預配的意思是,在安裝Runtime過程中,需要手動輸入IoT Edge Device的連接字符串。
1. 在線安裝Azure IoT Edge Runtime:
登錄到Windows Server中,以管理員權限運行如下Power Shell腳本:
. {Invoke-WebRequest -useb https://aka.ms/iotedge-win} | Invoke-Expression; `Deploy-IoTEdge
畫重點,如果此步驟,報網絡錯誤,可以嘗試打開連接 “https://aka.ms/iotedge-win”,如果打不開,可能存在網絡問題,則此時需要使用離線安裝方式。
2.離線安裝Azure IoT Edge Runtime:
在頁面上下載相應的 文件,https://github.com/Azure/azure-iotedge/releases
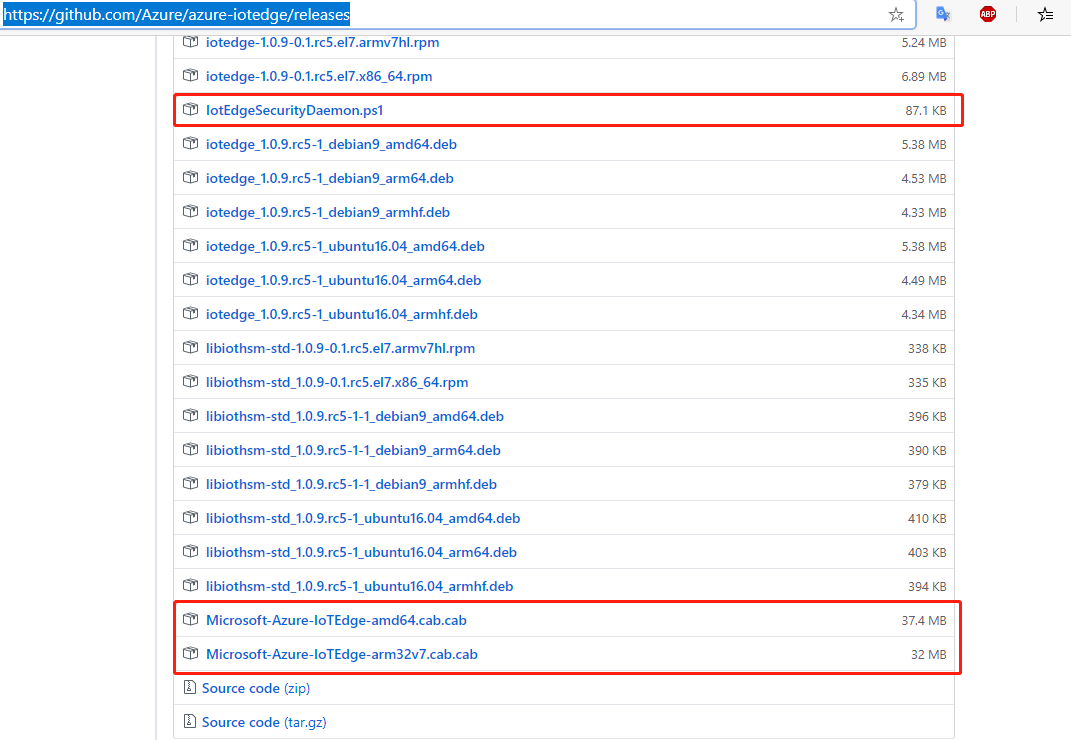
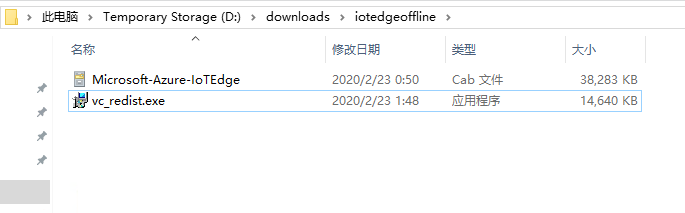
對於Windows 系統,需要根據系統是64/32位下載對應的cab文件和 vc_redist.exe(Visual C++ Redistributable Package)
注意,需要將下載的cab的包重命名爲 Microsoft-Azure-IoTEdge.cab
vc_redist.exe 下載地址:vc_redist.exe
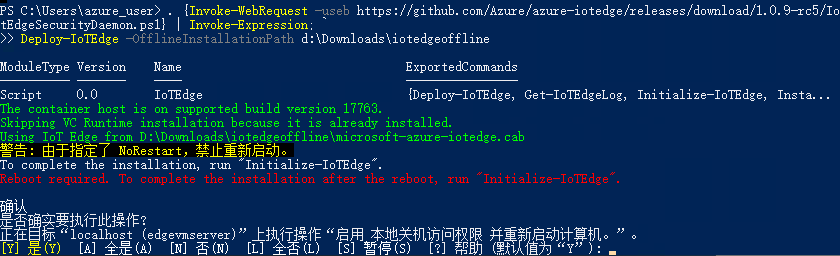
然後右鍵拷貝.ps1的路徑,修改如如下的腳本中:
將https://aka.ms/iotedge-win改爲https://github.com/Azure/azure-iotedge/releases/download/1.0.9-rc5/IotEdgeSecurityDaemon.ps1,意味着按照更改後的腳本安裝對應的runtime 版本。
. {Invoke-WebRequest -useb https://github.com/Azure/azure-iotedge/releases/download/1.0.9-rc5/IotEdgeSecurityDaemon.ps1} | Invoke-Expression; `Deploy-IoTEdge -OfflineInstallationPath D:\Downloads\iotedgeoffline
在PowerShell 管理員權限先運行上述腳本,如提示重啓,則重啓後需執行如下腳本:
. {Invoke-WebRequest -useb https://aka.ms/iotedge-win} | Invoke-Expression; `Initialize-IoTEdge
注意:腳本中的 https://aka.ms/iotedge-win,如果安裝的是指定版本,也需要替換爲指定版本的ps1文件路徑。
執行過程中需要按找提示輸入IoT Edge 的連接字符串
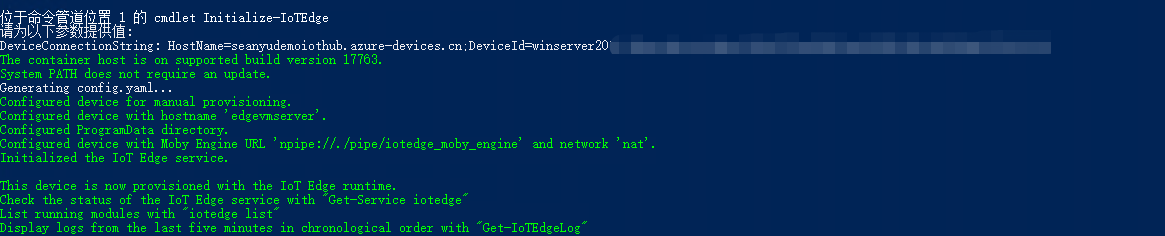
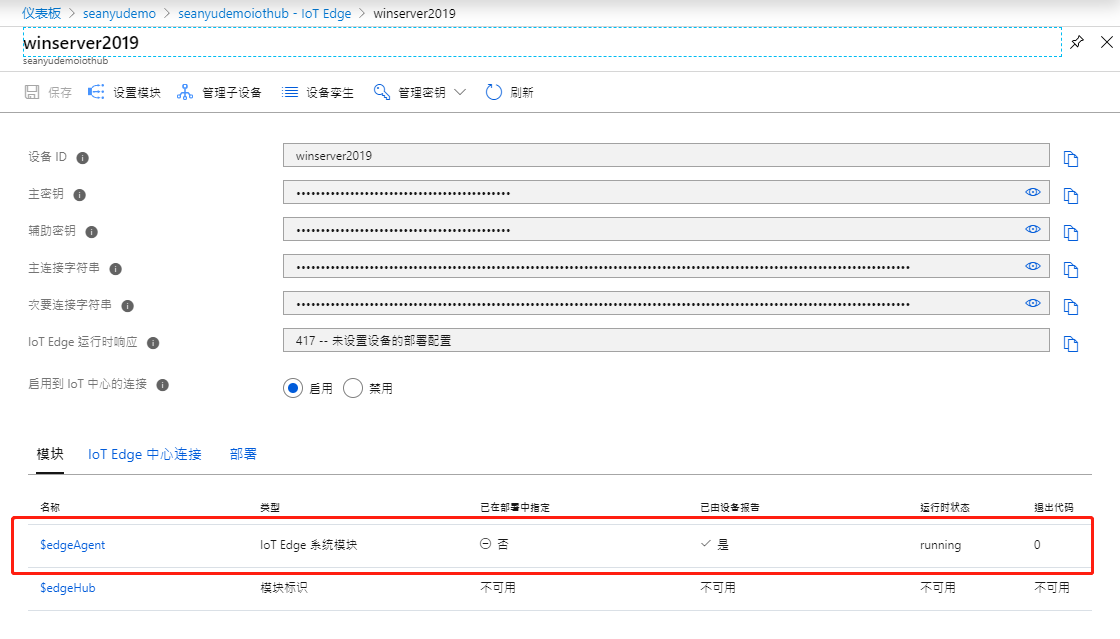
使用 如下命令檢查 IoT Runtime 運行狀態:
Get-Service iotedge

使用如下命令檢查當前運行的模塊:
iotedge list
初次安裝完成,只有一個edgeagent 模塊,此現象是正常的,其他模塊由edge agent 負責安裝,需要時間。

在Portal上可以查看IoT Edge 的運行狀態和模塊狀態: