


charts的四種安裝方式
1、開發自己的chare包
[root@master ~]# helm create mychare
//創建一個名爲mychare的chare包
[root@master ~]# tree -C mychare/
//以樹狀圖查看一下chare包
mychare/
├── charts
├── Chart.yaml
├── templates
│   ├── deployment.yaml
│   ├── _helpers.tpl
│   ├── ingress.yaml
│   ├── NOTES.txt
│   ├── service.yaml
│   └── tests
│       └── test-connection.yaml
└── values.yaml
2、調試chart
[root@master mychare]# cd
[root@master ~]# helm install --dry-run --debug mychare
//檢查這個mychare是否有問題
3、安裝chart
[root@node02 ~]# docker pull nginx:stable(1)通過倉庫安裝
[root@master mychare]# helm search redis
//搜索chare包
[root@master mychare]# helm repo list
//查看是否有能訪問倉庫
[root@master mychare]# helm install stable/redis
//安裝
(2)通過tar包安裝
[root@master ~]# helm fetch stable/redis
//直接下載chare包
[root@master ~]# tar -zxf redis-1.1.15.tgz
//解壓下載的chare包
[root@master ~]# tree -C redis
redis
├── Chart.yaml
├── README.md
├── templates
│   ├── deployment.yaml
│   ├── _helpers.tpl
│   ├── networkpolicy.yaml
│   ├── NOTES.txt
│   ├── pvc.yaml
│   ├── secrets.yaml
│   └── svc.yaml
└── values.yaml
(3)通過chare本地目錄安裝
[root@master ~]# helm fetch stable/redis
//直接下載chare包
[root@master ~]# tar -zxf redis-1.1.15.tgz
//解壓下載的chare包
[root@master ~]# helm install redis
(4)通過URL安裝
[root@master ~]# helm install https://example.com/charts/foo-1.2.3.tgz創建自己的Repo倉庫
1)創建helm的私有倉庫,以自己的名字命名。
1、node01啓動一個httpd的容器
[root@node01 ~]# mkdir /var/xgp
//創建一個目錄
[root@node01 ~]# docker pull httpd
//下載httpd鏡像
[root@node02 ~]# docker run -d -p 8080:80 -v /var/xgp:/usr/local/apache2/htdocs httpd
//啓動一個httpd的容器
3、生成倉庫的index文件。
[root@master ~]# mkdir xgprepo
//創建一個目錄存放打包的chare
[root@master ~]# helm repo index xgprepo/ --url http://192.168.1.22:8080/charts
//生成倉庫的index文件
4、將生成的index.yaml上傳到node01的/var/www/charts目錄下.
node01創建目錄
[root@node01 ~]# mkdir /var/xgp/chartsmaster移動動到
[root@master ~]# scp xgprepo/* node01:/var/xgp/charts/node01查看一下
[root@node01 ~]# ls /var/xgp/charts/
index.yaml
5、添加新的repo倉庫
[root@master ~]# helm repo add xgp http://192.168.1.22:8080/charts
[root@master ~]# helm repo list 
2) 自定義一個chart包,要求這個包運行一個httpd的服務,使用私有鏡像v1版本。3個副本Pod,service類型更改爲NodePort,端口指定爲:30000
自定義一個chart包
[root@master ~]# helm create wsd
//創建一個名爲wsd的chares包
按照要求修改配置文件
[root@master ~]# cd wsd/
//進入這個chart包
[root@master wsd]# vim values.yaml
//修改wsd的配置文件
replicaCount: 3                         #三個副本

image:
  repository: 192.168.1.21:5000/web      #更改鏡像爲私有鏡像
  tag: v1                                #鏡像標籤v1
  pullPolicy: IfNotPresent

imagePullSecrets: []
nameOverride: ""
fullnameOverride: ""

service:
  type: NodePort              #修改模式爲映射端口
  port: 80
  nodePort: 30000             #添加端口

[root@master wsd]# vim templates/service.yaml

apiVersion: v1
kind: Service
metadata:
  name: {{ include "wsd.fullname" . }}
  labels:
{{ include "wsd.labels" . | indent 4 }}
spec:
  type: {{ .Values.service.type }}
  ports:
    - port: {{ .Values.service.port }}
      targetPort: http
      protocol: TCP
      name: http
      nodePort: {{ .Values.service.nodePort }}    #“添加”能讓服務識別到nodePort的端口
  selector:
    app.kubernetes.io/name: {{ include "wsd.name" . }}
    app.kubernetes.io/instance: {{ .Release.Name }}
測試一下
[root@master ~]# helm install -n wsd wsd/ -f wsd/values.yaml 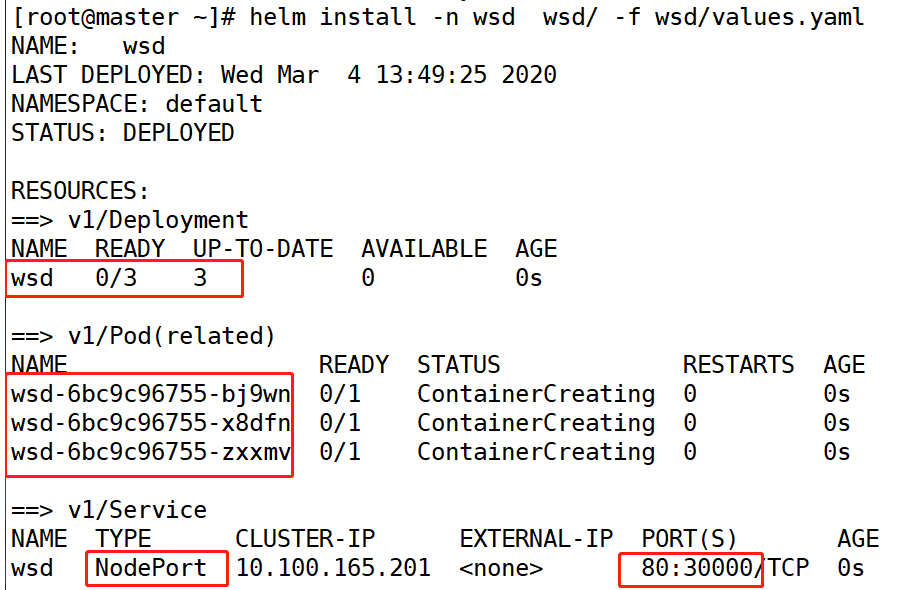
查看一下鏡像版本
[root@master ~]# kubectl get deployments. -o wide
訪問一下
[root@master ~]# curl 127.0.0.1:30000
3) 將實例進行更新,要求鏡像生產v2版本。
私有鏡像和官方鏡像升級有所不同,官方的只需通過 (helm upgrade --set imageTag=“標籤” 服務名稱 charts包名 )進行更改標籤即可,而私有鏡像需通過更改values.yaml中的標籤才行比較麻煩一點。
1、修改values.yaml
[root@master ~]# vim wsd/values.yaml

# Default values for wsd.
# This is a YAML-formatted file.
# Declare variables to be passed into your templates.

replicaCount: 3

image:
  repository: 192.168.1.21:5000/web
  tag: v2                            #修改標籤爲v2
  pullPolicy: IfNotPresent
[root@master ~]# helm upgrade wsd wsd/ -f wsd/values.yaml
//基於配置文件刷新一下wsd服務
查看一下
[root@master ~]# kubectl get deployments. -o wide
訪問一下
[root@master ~]# curl 127.0.0.1:30000
2、使用edit進行版本更新
確定wsd這個服務開啓
[root@master ~]# kubectl edit deployments. wsd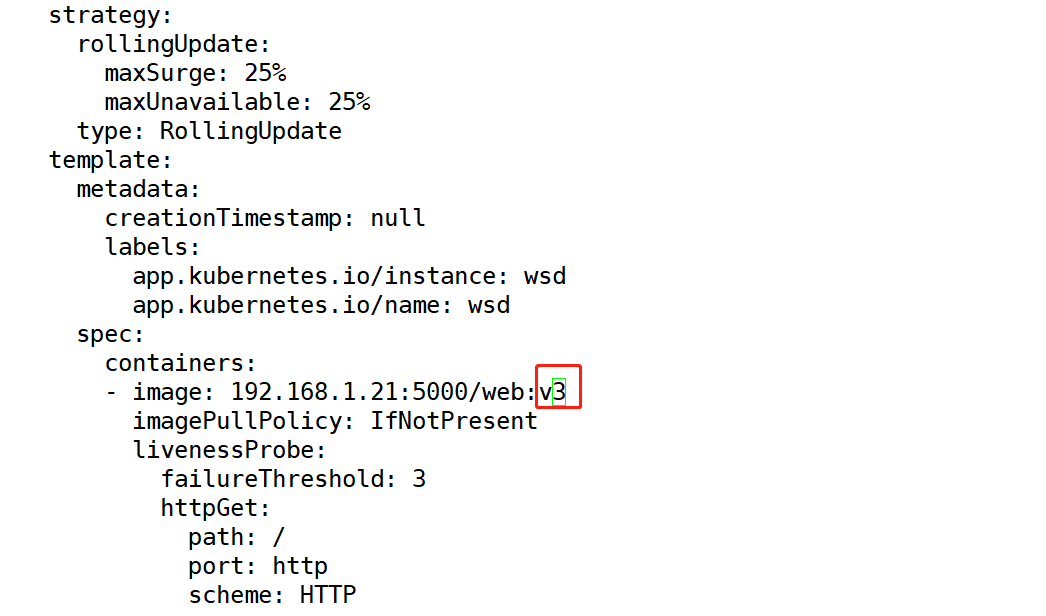
查看一下
[root@master ~]# kubectl get deployments. -o wide
訪問一下
[root@master ~]# curl 127.0.0.1:30000
4)重新定義一個chart包,名稱爲: new-test,將這個包上傳到上述私有倉庫中,需要用helm repo update命玲更新本地的index文件。
[root@master ~]# helm repo list 
[root@master ~]# helm create xgp-wsd
//創建一個名爲xgp-wsd的charts包

[root@master ~]# helm package xgp-wsd/
//將xgp-wsd打包在當前目錄

[root@master ~]# mv xgp-wsd-0.1.0.tgz xgprepo/
//把打包文件放到倉庫目錄

[root@master ~]# helm repo index xgprepo/ --url http://192.168.1.22:8080/charts
//把倉庫目錄新加入的charts包信息記錄在index.yaml中,使得其他加入的主機可以識別到,倉庫的charts包

[root@master ~]# scp xgprepo/* node01:/var/xgp/charts
//將倉庫目錄的文件移動到httpd服務上,使各個主機可以訪問,下載倉庫的charts包

[root@master ~]# helm repo update
//更新一下chart存儲庫

[root@master myrepo]# helm install http://192.168.1.22:8080/charts/xgp-wsd-0.1.0.tgz
//基於倉庫的xgp-wsd-0.1.0.tgz包創建一個服務
查看一下
[root@master ~]# helm search xgp-wsd