


Let's bring the data to the cloud this time! 💾 ☁.
And what better way to do that than a FREE cloud database!
We'll be using the free cluster of Mongo DB Atlas.
What is Mongo DB Atlas?
Mongo DB Atlas is a fully-managed database-as-a-service available on AWS, Azure, and GCP
Before Atlas, I used mLab. mLab was then acquired by MongoDB last year. Pretty much similar to mLab, MongoDB Atlas is the easiest way to have a cloud MongoDB instance.
Why?
-
💲 0 dollars: I am not an advertiser for MongoDB, but I love this service and this one won't break the bank ❌🔨🐖, since... well it's no-strings-attached FREE for up to 512MB. Perfect for small side-projects!
-
🏃♂️ Quick, simple, and fast: no installation and config files. After signing up and creating a cluster (takes 5 minutes), you're all set.
-
☁ It's in the cloud: Not running in your machine as a Mongo service. Not in a disk file like
diskdb. You can manage it from anywhere through the Atlas web app. For your app, you only need a connection URL to access the db. -
😎 Very cool UI: Atlas dashboard is very intuitive, and first-time users will find it easy to use with the visual cues and steps.
Cloud setup
There might be some slight screenshot differences to the actual Atlas UI by the time you do this, but the described steps should get you to the same results.
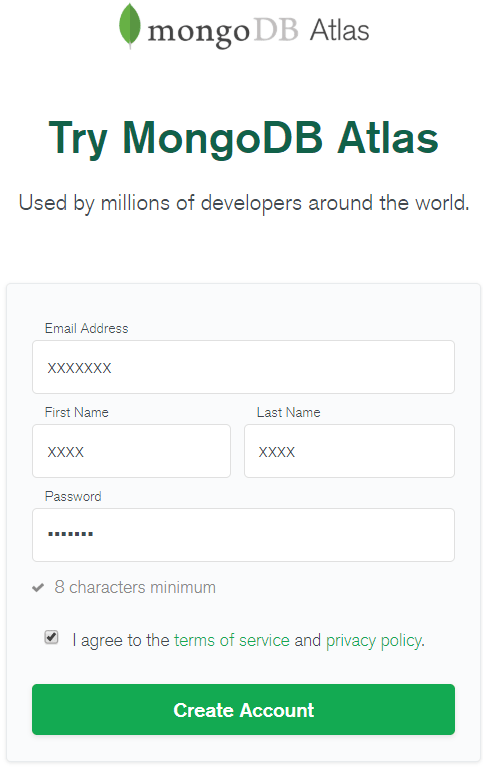
1. First sign up here:
https://www.mongodb.com/cloud/atlas/register
2. Create a free tier Starter Cluster
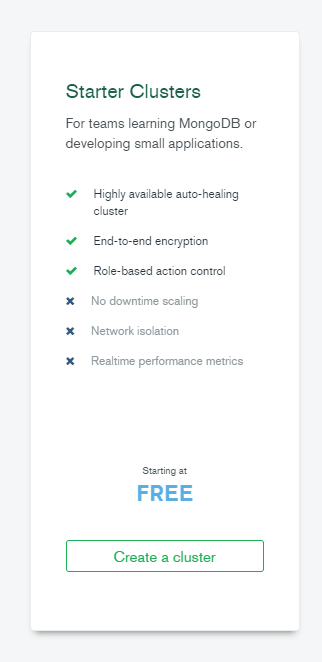
The free Starter Cluster M0 comes with 512 MB Storage, shared RAM and vCPU.
This should be more than enough for our starter Node project.
- Cluster region: you can pick any provider (AWS, Google, Azure) and the region closest to you that has a Free Tier. For me, it was AWS us-east-1.

-
You can leave the rest at FREE defaults.
-
Create the cluster.
The creation and provisioning might take a few minutes
- Afterwards, the dashboard appears, with the side panel that contains all the options needed to manage clusters.

3. Connect to the Cluster
Click [Connect] in the Cluster we have just created.
The dialog that appears gives options to:
- Whitelist your IP address
- Create a MongoDB user

3.1 Whitelist IP Address
Whitelisting means only allowing access to selected (thus trusted) entities
-
[Add Your Current IP address], which should automatically get your current public IP address. Optionally add a description such as "My Home IP address"
- ❗ Remember to do this step again when you switch WiFi, e.g. when moving from coffee shop to home WiFi.
- 💡 If you are in a public wi-fi, you can use a service like https://whatismyipaddress.com/ to get your IPv4 public address, since
ipconfigorifconfigmight give you only the internal network address. - 💣You can use
0.0.0.0/0to enable all IP addresses anywhere, which simplifies this process, but makes it VERY INSECURE.
3.2 Create admin user.
Enter your preferred username and password. This will be the first admin ("root") user, then [Create MongoDB User].
-
Keep these credentials handy, since we'll use them later.
-
Close the window. We'll connect to the cluster later.
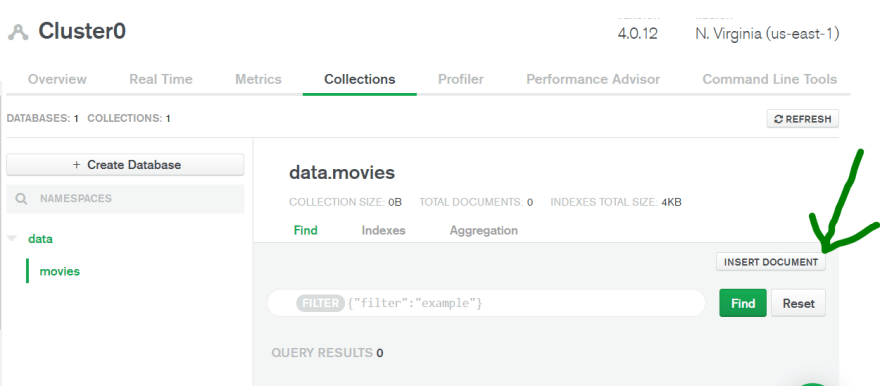
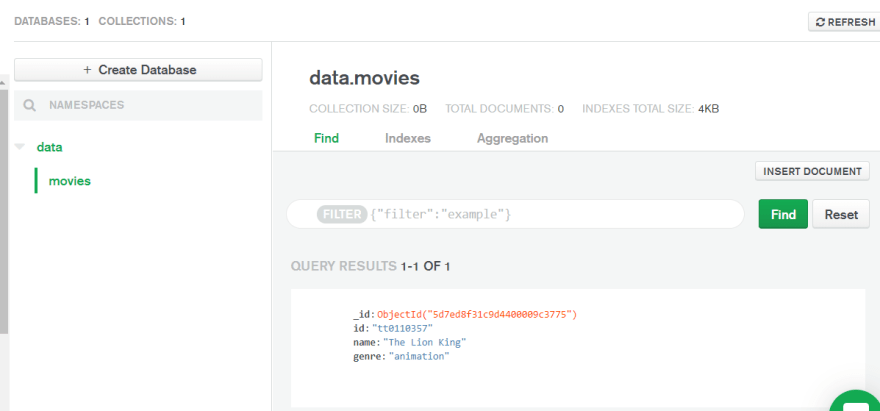
4. 📃 Add sample data
From the cluster view, click [Collections], then [Add my Own Data]

- Same as the last lesson, we use:
- database name:
data - collection name:
movies
- database name:
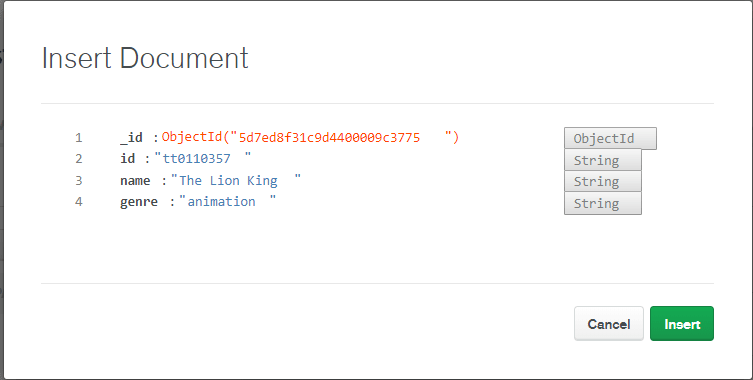
🎥 The movies from this series is from IMDB. You could use the
idfrom any movie page URL. E.g. In "The Lion King" pagehttps://www.imdb.com/title/tt0110357;idistt0110357.
Insert Document
- Insert a movie entry, as before - Leave the given
_idprovided by Atlas since this is internal
- Now we see the inserted data in the dashboard. Add more as you wish
Perfect. Now we got data. Time to connect to the cluster
5. 🔌 Connect to cluster
Go back to the Clusters view, then click Connect in our cluster.

Choose [Connect your Application]

Leave the default Node.js version 3+

Copy the Connection String. We'll use this in the next step.
Now we're ready to dive into code!