


近日有個同事要做一個效果:圖片橫向排列,而且可以橫向滾動,而且能點擊圖片觸發事件,用gallery也可以實現這個效果,現在我用ImageButton來實現,在xml文件中用HorizontalScrollView包起來這個佈局文件就可以了。現把代碼分享給大家;先貼圖讓大家看一眼效果:
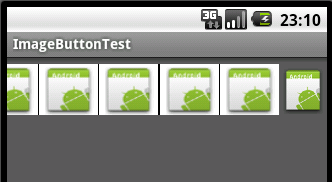
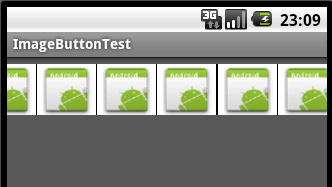
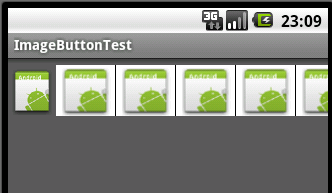
整個隊列在左邊: 整個隊列在中間: 整個隊列在右邊:
一、main.xml佈局
<?xml version="1.0" encoding="utf-8"?>
<LinearLayout xmlns:android="http://schemas.android.com/apk/res/android"
    android:orientation="vertical"
    android:layout_width="fill_parent"
    android:layout_height="fill_parent"
    >
<HorizontalScrollView android:id="@+id/HorizontalScrollView01"
   android:fadingEdgeLength="0.0dip" android:background="#5B5B5B"
   android:layout_width="fill_parent" android:scrollbars="none"
   android:layout_height="fill_parent">
   <LinearLayout android:layout_width="wrap_content"
    android:id="@+id/toolbar_items" android:paddingBottom="7.0dip"
    android:orientation="horizontal" android:layout_height="wrap_content"
    android:paddingTop="7.0dip">
    <ImageView android:layout_height="51.0dip"
     android:layout_width="wrap_content" android:src="@drawable/icon" />
    <LinearLayout android:layout_width="wrap_content"
     android:background="#ffffff" android:layout_height="51.0dip">
     <ImageButton android:background="@drawable/icon"
      android:layout_width="59.0dip" android:layout_height="51.0dip"
      android:scaleType="centerInside" android:id="@+id/back_main">
     </ImageButton>

     <LinearLayout android:paddingLeft="12.0dip"
      android:layout_height="51.0dip" android:layout_width="1sp"
      android:background="#000000">
     </LinearLayout>

     <ImageButton android:id="@+id/new_doc"
      android:layout_width="59.0dip" android:layout_height="51.0dip"
      android:scaleType="centerInside" android:background="@drawable/icon">
     </ImageButton>

     <LinearLayout android:layout_height="51.0dip"
      android:layout_width="1sp" android:background="#000000">
     </LinearLayout>

     <ImageButton android:id="@+id/filter_doc"
      android:layout_width="59.0dip" android:layout_height="51.0dip"
      android:scaleType="centerInside" android:background="@drawable/icon">
     </ImageButton>


     <LinearLayout android:layout_height="51.0dip"
      android:layout_width="1sp" android:background="#000000">
     </LinearLayout>


     <ImageButton android:id="@+id/multiselect_doc"
      android:layout_width="59.0dip" android:layout_height="51.0dip"
      android:scaleType="centerInside" android:background="@drawable/icon">
     </ImageButton>


     <LinearLayout android:layout_height="51.0dip"
      android:layout_width="1sp" android:background="#000000">
     </LinearLayout>

     <ImageButton android:id="@+id/delete_doc"
      android:layout_width="59.0dip" android:layout_height="51.0dip"
      android:scaleType="centerInside" android:background="@drawable/icon">
     </ImageButton>

     <LinearLayout android:layout_height="51.0dip"
      android:layout_width="1sp" android:background="#000000">
     </LinearLayout>

     <ImageButton android:id="@+id/property_doc" android:visibility="gone"
      android:layout_width="59.0dip" android:layout_height="51.0dip"
      android:scaleType="centerInside" android:background="@drawable/icon">
     </ImageButton>

     <LinearLayout android:layout_height="51.0dip"
      android:layout_width="1sp" android:background="#000000">
     </LinearLayout>

     <ImageButton android:id="@+id/sort_doc"
      android:layout_width="59.0dip" android:layout_height="51.0dip"
      android:scaleType="centerInside" android:background="@drawable/icon">
     </ImageButton>


     <LinearLayout android:layout_height="51.0dip"
      android:layout_width="1sp" android:background="#000000">
     </LinearLayout>

     <ImageButton android:id="@+id/send_doc"
      android:layout_width="59.0dip" android:layout_height="51.0dip"
      android:scaleType="centerInside" android:background="@drawable/icon">
     </ImageButton>
    </LinearLayout>
    <ImageView android:layout_width="wrap_content"
     android:layout_height="51.0dip" android:src="@drawable/icon" />

   </LinearLayout>
  </HorizontalScrollView>
</LinearLayout>
二、MainActivity類中的代碼:
package com.cn.android;

import android.app.Activity;
import android.content.Intent;
import android.os.Bundle;
import android.view.View;
import android.view.animation.Animation;
import android.view.animation.AnimationUtils;
import android.view.animation.OvershootInterpolator;
import android.widget.ImageButton;
import android.widget.LinearLayout;

public class MainActivity extends Activity {
    /** Called when the activity is first created. */
    @Override
    public void onCreate(Bundle savedInstanceState) {
        super.onCreate(savedInstanceState);

        setContentView(R.layout.main);
        //打開項目整個隊列圖進入的效果動畫


        LinearLayout toolbarLayout = (LinearLayout) findViewById(R.id.toolbar_items);
        Animation animation = AnimationUtils
           .loadAnimation(this, R.anim.toolbar);
        animation.setInterpolator(new OvershootInterpolator());
        // animation.setInterpolator(new BounceInterpolator());
        toolbarLayout.startAnimation(animation);
        initToolbarBtn();//初始化ImageButton
    }


    //響應按鈕點擊事件


    private void initToolbarBtn() {
        ImageButton backmain = (ImageButton) findViewById(R.id.back_main);
        backmain.setOnClickListener(new View.OnClickListener() {

            public void onClick(View v) {
                 Intent i = getIntent();
                 setResult(RESULT_CANCELED, i);
                 finish();
           }
   });

  ImageButton newdoc = (ImageButton) findViewById(R.id.new_doc);
  newdoc.setOnClickListener(new View.OnClickListener() {

   public void onClick(View v) {
    //寫上自己要實現的方法
   }
  });
    }
}
三、自定義動畫實現從左向右滾動:在res下面建個文件夾名字anim,下建立toolbar.xml<?xml version="1.0" encoding="UTF-8"?>;目的是打開程序畫面的時候有個動畫的效果
<translate
 android:duration="700" android:fromXDelta="100.0%p" android:toXDelta="0.0"
 xmlns:android="http://schemas.android.com/apk/res/android" />