ps: 紅字字體爲重要部分, 仔細看
一、shell特性
1. history查看命令歷史記錄,默認記錄1000條;
[root@Shell ~]# history
    1  vim /etc/hosts
    2  ifconfig
    3  cd /etc/sysconfig/network-scripts/ifcfg-
    4  cd /etc/sysconfig/network-scripts/ifcfg-eth0
    5  ifconfig eth0 up
……………………/省略
[root@Shell ~]# vim /etc/profile               #可自定義history歷史命令記錄;
2. !!執行上條命令;
[root@Shell ~]# !!
    1  vim /etc/hosts
    2  ifconfig
    3  cd /etc/sysconfig/network-scripts/ifcfg-
    4  cd /etc/sysconfig/network-scripts/ifcfg-eth0
    5  ifconfig eth0 up
……………………/省略
3. !$表示上條命令最後一個參數;
[root@Shell ~]# ls 1.txt
1.txt
[root@Shell ~]# ls !$
ls 1.txt
1.txt
4. alias別名;
[root@Shell ~]# alias a="ls"           #創建別名;
[root@Shell ~]# a
1.tar  1.txt  2.txt  anaconda-ks.cfg  install.log  install.log.syslog
[root@Shell ~]# unalias a               #取消別名;
[root@Shell ~]# a
-bash: a: command not found
5. shell中的字符;
*: 表示可以匹配零個或多個字符;
?: 可以匹配一個任意字符;
#: 表示註釋;
$: 用來標記一個變量;
~: 表示家目錄;
&: 把一條可執行命令放入後臺執行;
[]: 表示裏面的括號選一個;
6. 重定向(輸出)、追加、輸入、錯誤重定向、錯誤追加;
[root@Shell ~]# ls [123].txt > error.log
[root@Shell ~]# cat 2.txt >> error.log
[root@Shell ~]# cat < 2.txt
[root@Shell ~]# lasdasd 2> error_2.log
[root@Shell ~]# ndiasndias 2>> error_2.log
7. 作業控制;
[root@Shell ~]# sleep 100          #按Crtl+z放到後臺執行;
[root@Shell ~]# sleep 200          #按Crtl+z放到後臺執行;
[root@Shell ~]# sleep 300          #按Crtl+z放到後臺執行;
[root@Shell ~]# jobs               #查看後臺執行作業;
[root@Shell ~]# fg 1 #將作業調回到前臺執行;
二、變量
1. 自定義變量;
[root@Shell ~]# a=c
[root@Shell ~]# set | grep  -n ^a                #set可以把所有變量列出來;
55:a=c
[root@Shell ~]# env | grep ^a                    #env可以列出的當前用戶的所有環境變量;
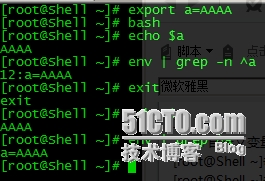
[root@Shell ~]# export a=AAAA                    #export引入全局變量;
[root@Shell ~]# bash
[root@Shell ~]# echo $a
AAAA
[root@Shell ~]# env | grep -n ^a
12:a=AAAA
[root@Shell ~]# exit
exit
[root@Shell ~]# echo $a
AAAA
[root@Shell ~]# bash                             #取消一個自定義變量;
[root@Shell ~]# unset a
[root@Shell ~]# env | grep ^a
2. 自定義變量中間如果帶有空格, 需用引號;
[root@Shell ~]# a=aming Linux
-bash: Linux: command not found
[root@Shell ~]# a='aming Linux'
[root@Shell ~]# echo $a
aming Linux
[root@Shell ~]# b=`echo $a`                    #` `引用裏面的值賦值給b;
[root@Shell ~]# echo $b
aming Linux
[root@Shell ~]# b='echo $a'                    #' '只打印出裏面的參數;
[root@Shell ~]# echo $b
echo $a
[root@Shell ~]# b="echo $a"                    #" "引用裏面的值並打印;
[root@Shell ~]# echo $b
echo aming Linux
3. 合併變量;
[root@Shell ~]# a=2
[root@Shell ~]# b=1
[root@Shell ~]# c=$a'$b'
[root@Shell ~]# echo $c
2$b
[root@Shell ~]# c=$a"$b"
[root@Shell ~]# echo $c
21
[root@Shell ~]# c=$a`$b`
-bash: 1: command not found
4. 系統變量和用戶變量;
[root@Shell ~]# cat /etc/profile
[root@Shell ~]# cat /etc/bashrc
[root@Shell ~]# cat .bash_profile
[root@Shell ~]# cat .bashrc
[root@Shell ~]# echo 'echo "bashrc"' >> .bashrc
[root@Shell ~]# echo 'echo "profile"' >> .bash_profile
[root@Shell ~]# bash
bashrc
[root@Shell ~]# su -
bashrc
profile
總結:
/etc/profile和/etc/bashrc屬於全局配置.
$HOME/bashrc和$HOME/bash_profile屬於用戶配置.
一組對所有用戶生效, 一組對當前用戶生效.
三、Shell常用命令
1. cut分割
-d: 指定分隔符;
-f: 打印第幾段;
-c: 指定截取字符;
以':'爲分隔符, 打印/etc/passwd第一段到三段的字符;
[root@Shell ~]# cut -d ':' -f 1-3 /etc/passwd | head -3
root:x:0
bin:x:1
daemon:x:2
截取/etc/passwd的第一個字符到第五個字符;
[root@Shell ~]# cut -c 1-5 /etc/passwd | head -3
root:
bin:x
daemo
2. sort排序
-t: 指定分隔符;
-k: 對第幾列排序;
-n: 以數字排序(默認從小到大);
-r: 反向排序,結合-n使用;
-u: 去掉重複行;
以':'爲分隔符, 以從小到大數字排序/etc/passwd的第三段字符;
[root@Shell ~]# sort -t ':' -k3 -n /etc/passwd
root:x:0:0:root:/root:/bin/bash
bin:x:1:1:bin:/bin:/sbin/nologin
daemon:x:2:2:daemon:/sbin:/sbin/nologin
adm:x:3:4:adm:/var/adm:/sbin/nologin
lp:x:4:7:lp:/var/spool/lpd:/sbin/nologin
……………………/省略
以':'爲分隔符, 以從大到小數字排序/etc/passwd的第三段字符;
[root@Shell ~]# sort -t ':' -k 3 -nr /etc/passwd
user1:x:500:500::/home/user1:/bin/bash
saslauth:x:499:76:"Saslauthd user":/var/empty/saslauth:/sbin/nologin
dhcpd:x:177:177:DHCP server:/:/sbin/nologin
nobody:x:99:99:Nobody:/:/sbin/nologin
postfix:x:89:89::/var/spool/postfix:/sbin/nologin
3. uniq去重行
-c: 去重行;
[root@Shell ~]# cat 2.txt
222
222
333
222
333
111
222
[root@Shell ~]# uniq -c 2.txt
      2 222
      1 333
      1 222
      1 333
      1 111
      1 222
4. wc統計行數、字符數、詞數
-l: 統計行數;
-m: 統計字符數;
-w: 統計詞數;
[root@Shell ~]# wc 2.txt
7  7 28 2.txt
[root@Shell ~]# wc -l 2.txt
7 2.txt
[root@Shell ~]# wc -m 2.txt
28 2.txt
[root@Shell ~]# wc -w 2.txt
7 2.txt
5. tr替換字符
[root@Shell ~]# ls | tr '1-9' 'A-Z' #將數字1-9替換爲A-Z;
6. split切割文件
-b: 按文件大小分割;
-l : 按行數分割;
[root@Shell ~]# du -sh 1.txt
160K    1.txt
[root@Shell ~]# split -l 20 1.txt
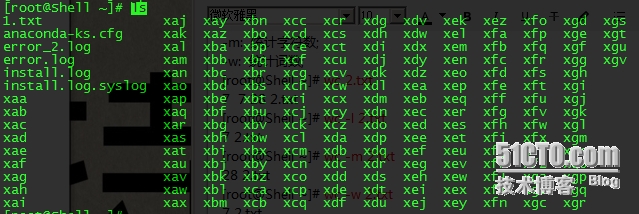
[root@Shell ~]# ls x* | xargs -i mv {} {}.txt                #將x*改爲x*.txt
[root@Shell ~]# split -l 20 1.txt  log                       #自定義分割完後的名字;
7. &&、||、;;
&&: 前面命令執行成功後執行後面命令;
[root@Shell ~]# ls 1.txt && cd /root
1.txt
[root@Shell ~]# ls aaaa.txt && cd /home
ls: cannot access aaaa.txt: No such file or directory
||: 前面命令執行不成功執行後面;
[root@Shell home]# ls aaaa.txt || cd /root/
ls: cannot access aaaa.txt: No such file or directory
;: 前面命令是否執行完成都會執行後面命令;
[root@Shell ~]# ss ; cd /tmp


