


最近學習PVE,需要用到NFS,遂學習NFS服務器的搭建,記錄如下:
一,服務器端搭建
1、服務器環境:用PVE安裝centos7,最小化安裝,然後安裝常用工具
yum install -y net-tools vim wgetIP:192.168.41.179
2、因爲centos7自帶了rpcbind,所以只需要安裝nfs服務端就可以了
yum -y install nfs-utils查看是否安裝成功
rpm -qa nfs-utils 3、創建共享目錄並設置權限
mkdir /data/nfs179
    chown -R nfsnobody.nfsnobody /data/nfs179
查看權限
ll -d /data/nfs179
4、配置共享目錄(vi,vim需先安裝)
vim /etc/exports增加如下內容:
/data/nfs179 *(rw,sync,no_root_squash,no_subtree_check,insecure)5、啓動nfs服務,
systemctl start nfs啓動後,查看狀態
rpcinfo -p 192.168.41.179
showmount -e localhost
6、開防火牆端口(或者直接關閉防火牆)
firewall-cmd --add-service=nfs --permanent --zone=public
    firewall-cmd --add-service=mountd --permanent --zone=public
    firewall-cmd --add-service=rpc-bind --permanent --zone=public

    firewall-cmd --reload     重新載入配置,使其生效
可使用 命令 iptables -L -n 查看開放的端口
二、客戶端測試
1,yum -y intall nfs-utils (客戶端安裝,爲了使用showmount)
2,使用showmount -e 192.168.41.179查看 
3、掛載至本地/mnt/nfs,並測試是否能讀寫
  mkdir /mnt/nfs
mount -t nfs 192.168.41.179:/data/nfs179 /mnt/nfs
touch /mnt/nfs/111.txt
echo "2222" >> 111.txt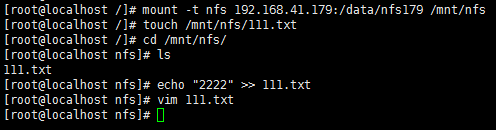
4、或者在PVE的數據中心添加測試

三、服務器端,開機自動啓動
systemctl enable rpcbind
systemctl enable nfs-server

重啓服務器,測試效果
reboot