


什麼是高可用集羣:
高可用集羣,英文名爲High Availability Cluster,簡稱HA Cluster,簡單的說,集羣(cluster)就是一組計算機,他們作爲一個整體向用戶提供一組網絡資源。這些單個的計算機系統,就是集羣的節點(node)。
高可用集羣可實現時時在線服務,其中只有一個提供在線服務,另外的做備份。
本文主要講述corosync/Openais and pacemaker 高可用集羣實現。
Corosync簡介:
Coreosync在傳遞信息的時候可以通過一個簡單的配置文件來定義信息傳遞的方式和協議等。它是一個新興的軟件,2008年推出,但其實它並不是一個真正意義上的新軟件,在2002年的時候有一個項目Openais , 它由於過大,分裂爲兩個子項目,其中可以實現HA心跳信息傳輸的功能就是Corosync ,它的代碼60%左右來源於Openais. Corosync可以提供一個完整的HA功能,但是要實現更多,更復雜的功能,那就需要使用Openais了。Corosync是未來的發展方向。在以後的新項目裏,一般採用Corosync,而hb_gui可以提供很好的HA管理功能,可以實現圖形化的管理。另外相關的圖形化有RHCS的套件luci+ricci。
本文主要介紹高可用集羣corosync/Openais and pacemaker 實現過程步驟如下:
前提:
1)本配置共有兩個測試節點,分別node1.rain.com和node2.rain.com,相的IP地址分別爲172.16.5.10和172.16.5.11;
2)集羣服務爲apache的httpd服務;
3)提供web服務的地址爲172.16.5.1;
4)系統爲rhel5.4
1、準備工作
爲了配置一臺Linux主機成爲HA的節點,通常需要做出如下的準備工作:
1)所有的節點主機名稱和對應的IP地址解析服務可以正常工作且每個節點的主機名稱需要跟"uname -n“命令的結果保持一致;因此,需要保證兩個節點上的/etc/hosts文件均爲下面的內容:
172.16.5.10 node1.rain.com node11
172.16.5.11 node2.rain.com node22
也即是我們的主機名稱分別172.16.5.10爲node1.rain.com,172.16.5.11爲node2.rain.com
並驗證主機172.16.5.10名稱:
- [root@node1 ~]# hostname
- node1.rain.com
- [root@node1 ~]# uname -n
- node1.rain.com
驗證主機172.16.5.11名稱:
- [root@node2 ~]# hostname
- node2.rain.com
- [root@node2 ~]# uname -n
- node2.rain.com
2)設定兩個節點可以基於密鑰進行ssh通信,這可以通過類似如下的命令實現:
node1
- [root@node1 ~]# ssh-keygen -t rsa
- Generating public/private rsa key pair.
- Enter file in which to save the key (/root/.ssh/id_rsa):
- Enter passphrase (empty for no passphrase):
- Enter same passphrase again:
- Your identification has been saved in /root/.ssh/id_rsa.
- Your public key has been saved in /root/.ssh/id_rsa.pub.
- The key fingerprint is:
- 3c:a7:2e:c5:2b:fd:1d:5b:fb:99:cf:98:ba:5c:d4:9d [email protected]
- [root@node1 ~]# ssh-copy-id -i ~/.ssh/id_rsa.pub root@node22
- 21
- The authenticity of host 'node22 (172.16.5.11)' can't be established.
- RSA key fingerprint is 3d:2d:46:1f:0b:9a:77:6f:68:36:f4:64:a4:68:51:81.
- Are you sure you want to continue connecting (yes/no)? yes
- Warning: Permanently added 'node22,172.16.5.11' (RSA) to the list of known hosts.
- root@node22's password:
- Now try logging into the machine, with "ssh 'root@node22'", and check in:
- .ssh/authorized_keys
- to make sure we haven't added extra keys that you weren't expecting.
node2
- [root@node2 ~]# ssh-keygen -t rsa
- Generating public/private rsa key pair.
- Enter file in which to save the key (/root/.ssh/id_rsa):
- Enter passphrase (empty for no passphrase):
- Enter same passphrase again:
- Your identification has been saved in /root/.ssh/id_rsa.
- Your public key has been saved in /root/.ssh/id_rsa.pub.
- The key fingerprint is:
- fd:96:eb:cc:aa:0e:97:08:fc:5d:9f:6a:c6:08:e0:30 [email protected]
- [root@node2 ~]# ssh-copy-id -i ~/.ssh/id_rsa.pub root@node11
- 21
- The authenticity of host 'node11 (172.16.5.10)' can't be established.
- RSA key fingerprint is 3d:2d:46:1f:0b:9a:77:6f:68:36:f4:64:a4:68:51:81.
- Are you sure you want to continue connecting (yes/no)? yes
- Warning: Permanently added 'node11,172.16.5.10' (RSA) to the list of known hosts.
- root@node11's password:
- Now try logging into the machine, with "ssh 'root@node11'", and check in:
- .ssh/authorized_keys
- to make sure we haven't added extra keys that you weren't expecting.
cluster-glue-1.0.6-1.6.el5.i386.rpm libesmtp-1.0.4-5.el5.i386.rpm
cluster-glue-libs-1.0.6-1.6.el5.i386.rpm corosync-1.2.7-1.1.el5.i386.rpm pacemaker-1.1.5-1.1.el5.i386.rpm corosynclib-1.2.7-1.1.el5.i386.rpm pacemaker-cts-1.1.5-1.1.el5.i386.rpm heartbeat-3.0.3-2.3.el5.i386.rpm pacemaker-libs-1.1.5-1.1.el5.i386.rpm heartbeat-libs-3.0.3-.3.el5.i386.rpm perl-TimeDate-1.16-5.el5.noarch.rpm
這裏使用yum安裝:
- [root@node1 ~]# yum -y --nogpgcheck localinstall *.rpm
4、配置corosync
- [root@node1 ~]# cd /etc/corosync/
- [root@node1 corosync]# cp corosync.conf.example corosync.conf
- [root@node1 corosync]# vim corosync.conf
- 添加:
- service {
- ver: 0
- name: pacemaker
- use_mgmtd: yes
- }
- aisexec {
- user: root
- group: root
- }
- 更改:bindnetaddr: 172.16.0.0
- secauth:on
- to_syslog: no
生成節點間通信時用到的認證密鑰文件:
- [root@node1 corosync]# corosync-keygen
- Corosync Cluster Engine Authentication key generator.
- Gathering 1024 bits for key from /dev/random.
- Press keys on your keyboard to generate entropy.
- Writing corosync key to /etc/corosync/authkey.
- [root@node1 corosync]# ls
- authkey corosync.conf corosync.conf.example service.d uidgid.d
將corosync和authkey複製至node22:
- [root@node1 corosync]# scp -p corosync.conf authkey node22:/etc/corosync/
- corosync.conf 100% 545 0.5KB/s 00:00
- authkey 100% 128 0.1KB/s 00:00
分別爲兩個節點創建corosync生成日誌所在目錄:
- [root@node1 ~]# mkdir /var/log/cluster
- [root@node1 ~]# ssh node22 'mkdir /var/log/cluster'
5、啓動corosync
- [root@node1 ~]# service corosync start
- Starting Corosync Cluster Engine (corosync): [ OK ]
查看corosync引擎是否正常啓動:
- [root@node1 ~]# grep -e "Corosync Cluster Engine" -e "configuration file" /var/log/cluster/corosync.log
- Apr 12 03:39:24 corosync [MAIN ] Corosync Cluster Engine ('1.2.7'): started and ready to provide service.
- Apr 12 03:39:24 corosync [MAIN ] Successfully read main configuration file '/etc/corosync/corosync.conf'.
查看初始化成員節點通知是否正常發出:
- # grep TOTEM /var/log/cluster/corosync.log
- Jun 14 19:03:49 node1 corosync[5120]: [TOTEM ] Initializing transport (UDP/IP).
- Jun 14 19:03:49 node1 corosync[5120]: [TOTEM ] Initializing transmit/receive security: libtomcrypt SOBER128/SHA1HMAC (mode 0).
- Jun 14 19:03:50 node1 corosync[5120]: [TOTEM ] The network interface [172.16.100.11] is now up.
- Jun 14 19:03:50 node1 corosync[5120]: [TOTEM ] A processor joined or left the membership and a new membership was formed.
檢查啓動過程中是否有錯誤產生:
- # grep ERROR: /var/log/cluster/corosync.log | grep -v unpack_resources
查看pacemaker是否正常啓動:
- [root@node1 ~]# grep pcmk_startup /var/log/cluster/corosync.log
- Apr 18 09:14:34 corosync [pcmk ] info: pcmk_startup: CRM: Initialized
- Apr 18 09:14:34 corosync [pcmk ] Logging: Initialized pcmk_startup
- Apr 18 09:14:34 corosync [pcmk ] info: pcmk_startup: Maximum core file size is: 4294967295
- Apr 18 09:14:34 corosync [pcmk ] info: pcmk_startup: Service: 9
- Apr 18 09:14:34 corosync [pcmk ] info: pcmk_startup: Local hostname: node1.rain.com
- Apr 18 11:41:14 corosync [pcmk ] info: pcmk_startup: CRM: Initialized
- Apr 18 11:41:14 corosync [pcmk ] Logging: Initialized pcmk_startup
- Apr 18 11:41:14 corosync [pcmk ] info: pcmk_startup: Maximum core file size is: 4294967295
- Apr 18 11:41:14 corosync [pcmk ] info: pcmk_startup: Service: 9
- Apr 18 11:41:14 corosync [pcmk ] info: pcmk_startup: Local hostname: node1.rain.com
如果上面命令執行均沒有問題,接着可以執行如下命令啓動node2上的corosync
- [root@node1 ~]# ssh node22 -- '/etc/init.d/corosync start'
- Starting Corosync Cluster Engine (corosync): [ OK ]
注意:啓動node2需要在node1上使用如上命令進行,不要在node2節點上直接啓動;
使用如下命令查看集羣節點的啓動狀態:
- [root@node1 ~]# crm status
- ============
- Last updated: Thu Apr 12 03:47:56 2012
- Stack: openais
- Current DC: node1.rain.com - partition with quorum
- Version: 1.1.5-1.1.el5-01e86afaaa6d4a8c4836f68df80ababd6ca3902f
- 2 Nodes configured, 2 expected votes
- 0 Resources configured.
- ============
- Online: [ node1.rain.com node2.rain.com ]
6、配置集羣的工作屬性,禁用stonith
corosync默認啓用了stonith,而當前集羣並沒有相應的stonith設備,因此此默認配置目前尚不可用,這可以通過如下命令驗正:
- [root@node1 ~]# crm_verify -L
- crm_verify[13965]: 2012/04/12_03:54:30 ERROR: unpack_resources: Resource start-up disabled since no STONITH resources have been defined
- crm_verify[13965]: 2012/04/12_03:54:30 ERROR: unpack_resources: Either configure some or disable STONITH with the stonith-enabled option
- crm_verify[13965]: 2012/04/12_03:54:30 ERROR: unpack_resources: NOTE: Clusters with shared data need STONITH to ensure data integrity
- Errors found during check: config not valid
- -V may provide more details
我們裏可以通過如下命令先禁用stonith:
- [root@node1 ~]# crm configure property stonith-enabled=false
查看當前的配置信息:
- [root@node1 ~]# crm configure show
- node node1.rain.com
- node node2.rain.com
- property $id="cib-bootstrap-options" \
- dc-version="1.1.5-1.1.el5-01e86afaaa6d4a8c4836f68df80ababd6ca3902f" \
- cluster-infrastructure="openais" \
- expected-quorum-votes="2" \
- stonith-enabled="false"
從中可以看出stonith已經被禁用。
7、爲集羣添加集羣資源
orosync支持heartbeat,LSB和ocf等類型的資源代理,目前較爲常用的類型爲LSB和OCF兩類,stonith類專爲配置stonith設備而用;
查看當前集羣系統所支持的類型:
- [root@node1 ~]# crm ra classes
- heartbeat
- lsb
- ocf / heartbeat linbit pacemaker
- stonith
如果想要查看某種類別下的所用資源代理的列表,可以使用類似如下命令實現:
- # crm ra list lsb
- # crm ra list ocf heartbeat
- # crm ra list ocf pacemaker
- # crm ra list stonith
- # crm ra info [class:[provider:]]resource_agent
例如:
- # crm ra info ocf:heartbeat:IPaddr
8、創建的web集羣創建一個IP地址資源,以在通過集羣提供web服務時使用;這可以過如下方式實現:
通過如下的命令執行結果可以看出此資源已經在node1.rain.com上啓動:
- 語法:
- primitive <rsc> [<class>:[<provider>:]]<type>
- [params attr_list]
- [operations id_spec]
- [op op_type [<attribute>=<value>...] ...]
- op_type :: start | stop | monitor
- 例子:
- primitive apcfence stonith:apcsmart \
- params ttydev=/dev/ttyS0 hostlist="node11 node22" \
- op start timeout=60s \
- op monitor interval=30m timeout=60s
- 應用:
- # crm configure primitive WebIP ocf:heartbeat:IPaddr params ip=172.16.5.1
- [root@node1 ~]# crm status
- ============
- Last updated: Thu Apr 12 04:30:51 2012
- Stack: openais
- Current DC: node1.rain.com - partition with quorum
- Version: 1.1.5-1.1.el5-01e86afaaa6d4a8c4836f68df80ababd6ca3902f
- 2 Nodes configured, 2 expected votes
- 1 Resources configured.
- ============
- Online: [ node1.rain.com node2.rain.com ]
- WebIP (ocf::heartbeat:IPaddr): Started node1.rain.com
當然,也可以在node1上執行ifconfig命令看到此地址已經在eth0的別名上生效:
- root@node1 ~]# ifconfig
- 其中可以查看到:
- eth0:0 Link encap:Ethernet HWaddr 00:0C:29:3A:AA:2F
- inet addr:172.16.5.1 Bcast:172.16.255.255 Mask:255.255.0.0
- UP BROADCAST RUNNING MULTICAST MTU:1500 Metric:1
- Interrupt:67 Base address:0x2000
而後我們到node2上通過如下命令停止node11上的corosync服務:
- [root@node2 ~]# ssh node11 /etc/init.d/corosync stop
- Signaling Corosync Cluster Engine (corosync) to terminate: [ OK ]
- Waiting for corosync services to unload:.......[ OK ]
查看集羣工作狀態:
- [root@node2 ~]# crm status
- ============
- Last updated: Thu Apr 12 04:41:40 2012
- Stack: openais
- Current DC: node2.rain.com - partition WITHOUT quorum
- Version: 1.1.5-1.1.el5-01e86afaaa6d4a8c4836f68df80ababd6ca3902f
- 2 Nodes configured, 2 expected votes
- 1 Resources configured.
- ============
- Online: [ node2.rain.com ]
- OFFLINE: [ node1.rain.com ]
上面的信息顯示node1.rain.com已經離線,但資源WebIP卻沒能在node2.rain.com上啓動。這是因爲此時的集羣狀態爲"WITHOUT quorum",即已經失去了quorum,此時集羣服務本身已經不滿足正常運行的條件,這對於只有兩節點的集羣來講是不合理的。因此,我們可以通過如下的命令來修改忽略quorum不能滿足的集羣狀態檢查:
- crm(live)configure# property no-quorum-policy=ignore
查看集羣狀態,集羣就會在節點node2上啓動此資源了,如下所示:
- crm(live)# status
- ============
- Last updated: Thu Apr 12 04:52:28 2012
- Stack: openais
- Current DC: node2.rain.com - partition with quorum
- Version: 1.1.5-1.1.el5-01e86afaaa6d4a8c4836f68df80ababd6ca3902f
- 2 Nodes configured, 2 expected votes
- 1 Resources configured.
- ============
- Online: [ node1.rain.com node2.rain.com ]
- WebIP (ocf::heartbeat:IPaddr): Started node2.rain.com
驗證完後,啓動node1.rain.com
- # ssh node11 -- /etc/init.d/corosync start
正常啓動node1.rain.com後,集羣資源WebIP很可能就會從node2.rain.com轉移回node1.rain.com。資源的這種在節點間每一次的來回流動都會造成那段時間內其無法正常被訪問,所以,我們有時候需要在資源因爲節點故障轉移到其它節點後,即便原來的節點恢復正常也禁止資源再次流轉回來。這可以通過定義資源的黏性(stickiness)來實現。在創建資源時或在創建資源後,都可以指定指定資源黏性。
注:資源黏性值範圍及其作用:
0:這是默認選項。資源放置在系統中的最適合位置。這意味着當負載能力“較好”或較差的節點變得可用時才轉移資源。此選項的作用基本等同於自動故障回覆,只是資源可能會轉移到非之前活動的節點上;
大於0:資源更願意留在當前位置,但是如果有更合適的節點可用時會移動。值越高表示資源越願意留在當前位置;
小於0:資源更願意移離當前位置。絕對值越高表示資源越願意離開當前位置;
INFINITY:如果不是因節點不適合運行資源(節點關機、節點待機、達到migration-threshold 或配置更改)而強制資源轉移,資源總是留在當前位置。此選項的作用幾乎等同於完全禁用自動故障回覆;
-INFINITY:資源總是移離當前位置;
這裏我們可以指定默認黏性值:
- # crm configure rsc_defaults resource-stickiness=100
9、結合上面已經配置好的IP地址資源,將此集羣配置成爲一個active/passive模型的web(httpd)服務集羣
爲了將此集羣啓用爲web(httpd)服務器集羣,我們得先在各節點上安裝httpd,並配置其能在本地各自提供一個測試頁面。
- Node1:
- # yum -y install httpd
- # echo "<h1>Node1.rain.com</h1>" > /var/www/html/index.html
- Node2:
- # yum -y install httpd
- # echo "<h1>Node2.rain.com</h1>" > /var/www/html/index.html
測試頁面顯示成功:

當我們關閉node1上的corosync服務時:
- [root@node2 ~]# ssh node11 '/etc/init.d/corosync stop'
- Signaling Corosync Cluster Engine (corosync) to terminate: [ OK ]
- Waiting for corosync services to unload:......[ OK ]
會出現以下界面:
ZU2_@EF%E6]}F_POD(MMV.jpg)
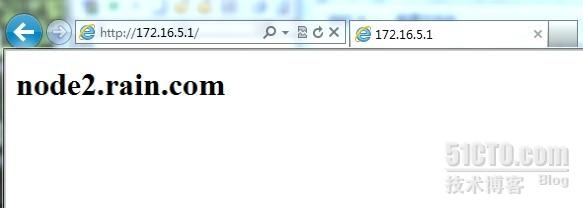
則證明服務正常
接下來我們將此httpd服務添加爲集羣資源。將httpd添加爲集羣資源有兩處資源代理可用:lsb和ocf:heartbeat,爲了簡單起見,我們這裏使用lsb類型:
新建資源WebSite:
- # crm configure primitive WebSite lsb:httpd
查看資源的啓用狀態:
- [root@node1 ~]# crm status
- ============
- Last updated: Wed Apr 18 15:05:47 2012
- Stack: openais
- Current DC: node2.rain.com - partition with quorum
- Version: 1.1.5-1.1.el5-01e86afaaa6d4a8c4836f68df80ababd6ca3902f
- 2 Nodes configured, 2 expected votes
- 2 Resources configured.
- ============
- Online: [ node1.rain.com node2.rain.com ]
- WebIP (ocf::heartbeat:IPaddr): Started node2.rain.com
- WebSite (lsb:httpd): Started node2.rain.com
從上面的信息中可以看出WebIP和WebSite有可能會分別運行於兩個節點上,這對於通過此IP提供Web服務的應用來說是不成立的,即此兩者資源必須同時運行在某節點上。
由此可見,即便集羣擁有所有必需資源,但它可能還無法進行正確處理。資源約束則用以指定在哪些羣集節點上運行資源,以何種順序裝載資源,以及特定資源依賴於哪些其它資源。pacemaker共給我們提供了三種資源約束方法:
1)Resource Location(資源位置):定義資源可以、不可以或儘可能在哪些節點上運行;
2)Resource Collocation(資源排列):排列約束用以定義集羣資源可以或不可以在某個節點上同時運行;
3)Resource Order(資源順序):順序約束定義集羣資源在節點上啓動的順序;
定義約束時,還需要指定分數。各種分數是集羣工作方式的重要組成部分。其實,從遷移資源到決定在已降級集羣中停止哪些資源的整個過程是通過以某種方式修改分數來實現的。分數按每個資源來計算,資源分數爲負的任何節點都無法運行該資源。在計算出資源分數後,集羣選擇分數最高的節點。INFINITY(無窮大)目前定義爲 1,000,000。加減無窮大遵循以下3個基本規則:
1)任何值 + 無窮大 = 無窮大
2)任何值 - 無窮大 = -無窮大
3)無窮大 - 無窮大 = -無窮大
定義資源約束時,也可以指定每個約束的分數。分數表示指派給此資源約束的值。分數較高的約束先應用,分數較低的約束後應用。通過使用不同的分數爲既定資源創建更多位置約束,可以指定資源要故障轉移至的目標節點的順序。
因此,對於前述的WebIP和WebSite可能會運行於不同節點的問題,可以通過以下命令來解決:
# crm configure colocation website-with-ip INFINITY: WebSite WebIP
接着,我們還得確保WebSite在某節點啓動之前得先啓動WebIP,這可以使用如下命令實現:
# crm configure order httpd-after-ip mandatory: WebIP WebSite
此外,由於HA集羣本身並不強制每個節點的性能相同或相近,所以,某些時候我們可能希望在正常時服務總能在某個性能較強的節點上運行,這可以通過位置約束來實現:
# crm configure location prefer-node1 WebSite rule 200: node1
這條命令實現了將WebSite約束在node1上,且指定其分數爲200;
好了 ,這就是我們的corosync實現的高可用集羣過程,做這麼多真的不容易呀!不過多練習可以增強記憶,平常在學習中要記得多動手的習慣。