


1.創建neutron數據庫
[root@localhost ~]# mysql -uroot -pdevops
Welcome to the MariaDB monitor. Commands end with ; or \g.
Your MariaDB connection id is 94
Server version: 10.1.20-MariaDB MariaDB Server
Copyright (c) 2000, 2016, Oracle, MariaDB Corporation Ab and others.
Type 'help;' or '\h' for help. Type '\c' to clear the current input statement.
MariaDB [(none)]> CREATE DATABASE neutron;
MariaDB [(none)]> GRANT ALL PRIVILEGES ON neutron. to 'neutron'@'localhost' IDENTIFIED BY 'devops';
MariaDB [(none)]> GRANT ALL PRIVILEGES ON neutron. to 'neutron'@'%' IDENTIFIED BY 'devops';
2.創建neutron用戶和項目
[root@localhost ~]# source /root/admin-openrc
[root@localhost ~]# openstack user create --domain default neutron --password devops
[root@localhost ~]# openstack role add --project service --user neutron admin
[root@localhost ~]# openstack service create --name neutron --description "OpenStack Networking" network
[root@localhost ~]# openstack endpoint create --region RegionOne network public http://controller:9696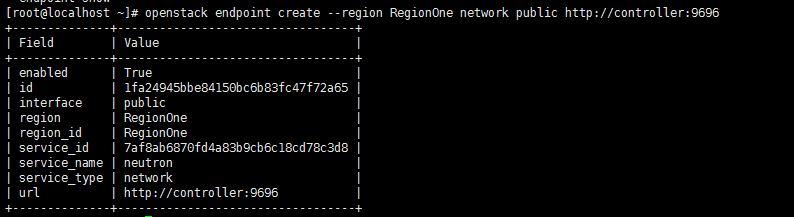
[root@localhost ~]# openstack endpoint create --region RegionOne network internal http://controller:9696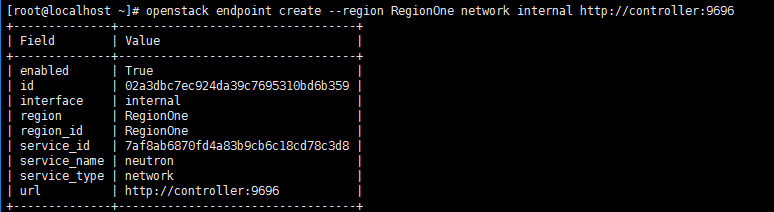
[root@localhost ~]# openstack endpoint create --region RegionOne network admin http://controller:9696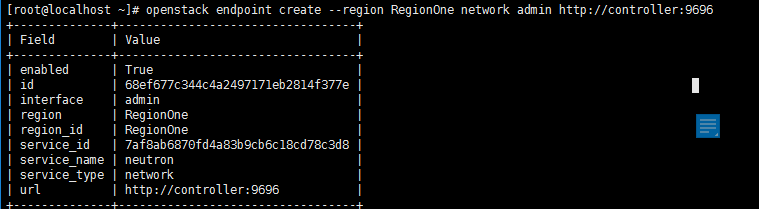
3.安裝neuton服務和修改配置文件
[root@localhost ~]# yum -y install openstack-neutron openstack-neutron-ml2 openstack-neutron-linuxbridge ebtables
[root@controller ~]# cp /etc/neutron/neutron.conf /etc/neutron/neutron.conf.bak
[root@controller ~]# >/etc/neutron/neutron.conf
[root@controller ~]# cat /etc/neutron/neutron.conf
[DEFAULT]
core_plugin = ml2
service_plugins = router
allow_overlapping_ips = True
auth_strategy = keystone
transport_url = rabbit://openstack:devops@controller
notify_nova_on_port_status_changes = True
notify_nova_on_port_data_changes = True
[keystone_authtoken]
auth_uri = http://controller:5000
auth_url = http://controller:35357
memcached_servers = controller:11211
auth_type = password
project_domain_name = default
user_domain_name = default
project_name = service
username = nova
password = devops
[database]
connection = mysql+pymysql://neutron:devops@controller/neutron
[nova]
auth_url = http://controller:35357
auth_type = password
project_domain_name = default
user_domain_name = default
region_name = RegionOne
project_name = service
username = nova
password = devops
[oslo_concurrency]
lock_path = /var/lib/neutron/tmp
[root@controller ~]# cat /etc/neutron/plugins/ml2/ml2_conf.ini | grep -v "^#" | grep -v "^$"
[DEFAULT]
[ml2]
type_drivers = flat,vlan,vxlan
mechanism_drivers = linuxbridge,l2population
extension_drivers = port_security
tenant_network_types = vxlan
path_mtu = 1500
[ml2_type_flat]
flat_networks = provider
[ml2_type_geneve]
[ml2_type_gre]
[ml2_type_vlan]
[ml2_type_vxlan]
vni_ranges = 1:1000
[securitygroup]
enable_ipset = True
[root@controller ~]# cat /etc/neutron/plugins/ml2/linuxbridge_agent.ini | grep -v "^#" | grep -v "^$"
[DEFAULT]
debug = false
[agent]
prevent_arp_spoofing = True
[linux_bridge]
physical_interface_mappings = provider:ens33
[securitygroup]
enable_security_group = True
firewall_driver = neutron.agent.linux.iptables_firewall.IptablesFirewallDriver
[vxlan]
enable_vxlan = True
local_ip = 192.168.0.111
l2_population = True
[root@controller ~]# cat /etc/neutron/l3_agent.ini | grep -v "^#" | grep -v "^$"
[DEFAULT]
interface_driver = neutron.agent.linux.interface.BridgeInterfaceDriver
external_network_bridge =
debug = false
[agent]
[ovs]
[root@controller ~]# cat /etc/neutron/dhcp_agent.ini | grep -v "^#" | grep -v "^$"
[DEFAULT]
interface_driver = neutron.agent.linux.interface.BridgeInterfaceDriver
dhcp_driver = neutron.agent.linux.dhcp.Dnsmasq
enable_isolated_metadata = True
verbose = True
debug = false
[agent]
[ovs]
重新配置/etc/nova/nova.conf,配置這步的目的是讓compute節點能使用上neutron網絡
[neutron]
url = http://controller:9696
auth_url = http://controller:35357
auth_type = password
project_domain_name = default
user_domain_name = default
region_name = RegionOne
project_name = service
username = neutron
password = devops
service_metadata_proxy = True
metadata_proxy_shared_secret = devops
將dhcp-option-force=26,1450寫入/etc/neutron/dnsmasq-neutron.conf
# echo "dhcp-option-force=26,1450" >/etc/neutron/dnsmasq-neutron.conf
[root@controller ~]# cat /etc/neutron/metadata_agent.ini | grep -v "^#" | grep -v "^$"
[DEFAULT]
nova_metadata_ip = controller
metadata_proxy_shared_secret = devops
metadata_workers = 4
verbose = True
debug = false
nova_metadata_protocol = http
[agent]
[cache]
4.創建連接並創建keystone用戶
[root@localhost ~]# ln -s /etc/neutron/plugins/ml2/ml2_conf.ini /etc/neutron/plugin.ini
5.更新數據庫
[root@localhost ~]# su -s /bin/sh -c "neutron-db-manage --config-file /etc/neutron/neutron.conf --config-file /etc/neutron/plugins/ml2/ml2_conf.ini upgrade head" neutron
[root@localhost ~]# systemctl restart openstack-nova-api.service
[root@controller ~]# systemctl status openstack-nova-api.service
6.啓動服務
[root@localhost ~]# systemctl enable neutron-server.service neutron-linuxbridge-agent.service neutron-dhcp-agent.service neutron-metadata-agent.service
[root@localhost ~]# systemctl start neutron-server.service neutron-linuxbridge-agent.service neutron-dhcp-agent.service neutron-metadata-agent.service
啓動neutron-l3-agent.service並設置開機啓動
# systemctl enable neutron-l3-agent.service
**# systemctl restart neutron-l3-agent.service
# systemctl status neutron-l3-agent.service
[root@controller ~]# neutron ext-list
[root@localhost ~]# neutron agent-list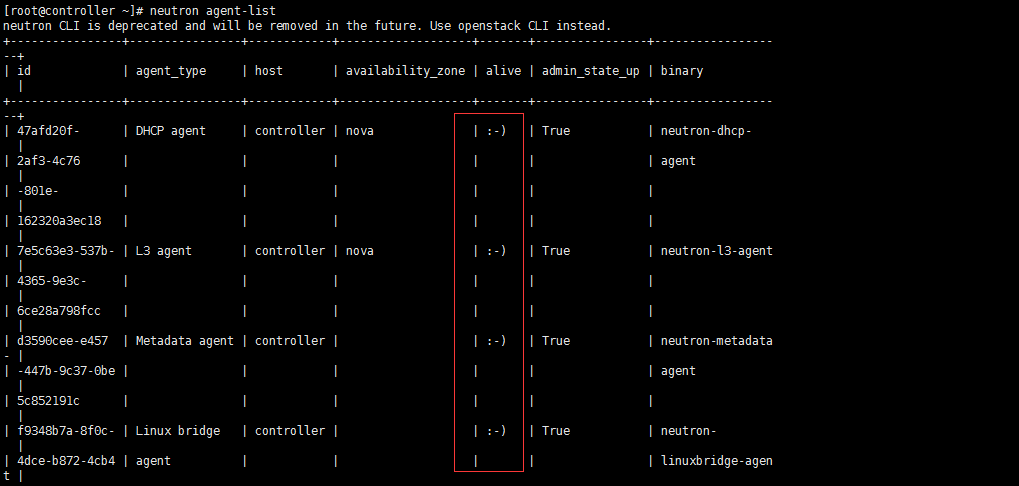
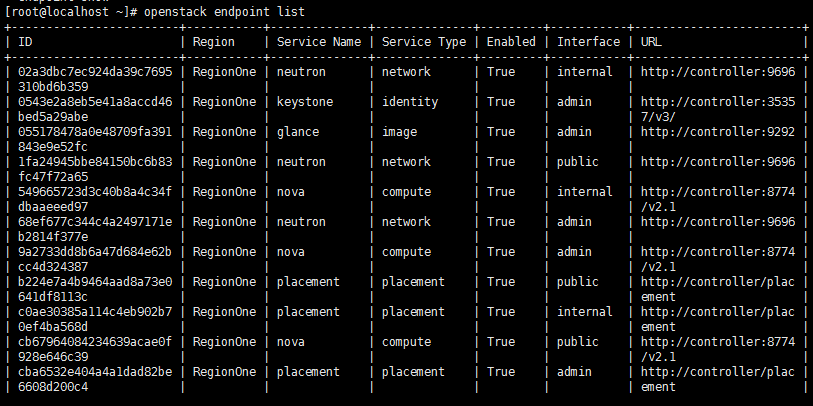
7.查看註冊信息
[root@localhost ~]# openstack endpoint list
所有的配置文件在百度雲盤中:
鏈接:https://pan.baidu.com/s/1CnmKkFMTemv199ctgb5Oig
提取碼:27om
複製這段內容後打開百度網盤手機App,操作更方便哦