oracle大型數據庫系統在AIX/unix上的實戰詳解 集中答疑 40 文平
近期來,若干本書讀者希望我能發表一下10g/11g在AIX上的安裝細節,我找到以前的一個文檔(其中一部分內容應該來源於網上難以考察出處,但感謝原作者的分享),這裏發表一下,希望能對大家有所幫助!
oracle11g的過程,我將在近期整理好併發布。
山東電力Oracle數據庫技術培訓,北京時代朝陽數據庫技術中心
文平:Oracle/Sybase數據庫技術顧問
Office:010-82609662 /Mobile:15811146918
Oracle For Aix安裝
1:安裝Oracle10.2的最基本要求
硬件:
? 64位
? 內存與交換區
| RAM | Swap Space |
| Between 1024 MB and 2048 MB | 1.5 times the size of RAM |
| Between 2049 MB and 8192 MB | Equal to the size of RAM |
| More than 8192 MB | 0.75 times the size of RAM |
? 硬盤空間:除數據外,Oracle軟件本身至少需要3G
軟件:
? 操作系統:
· AIX 5L version 5.2, Maintenance Level 04 or later , or AIX 5L version 5.3, Maintenance Level 02 or later.
· AIX的軟件包:
o bos.adt.base o bos.adt.lib o bos.adt.libm o bos.perf.libperfstat o bos.perf.perfstat o bos.perf.proctools o xlC.aix50.rte:7.0.0.4 or later o xlC.rte:7.0.0.1 or later2:AIX的修補:
對於(APARs) for AIX 5L v5.2 ML 04:
IY63133: large percentage of CPU time spent in ldata_balance routine
IY64978: deadlock with concurrent renaming and unlinking under JFS
IY63366: dlsym returns null even for valid symbol in AIX520 ML-4
IY64691: chvg -b can cause corruption and crash
IY64737: AIO can hang in knotunlock
IY65001: mklvcopy on a striped lv is failing to update lvcb
對於(APARs) for AIX 5L v5.3 ML 02:
IY58143: REQUIRED UPDATE FOR AIX 5.3
IY59386: libdepend.mk files are all empty
IY60930: Unable to delete network routes
IY66513: LDR_CNTRL turns on undesirable option when initialized with incorrect value
IY70159: krtl relocation problem
3:安裝AIX 5L 53-001. 插入CD 5.3第一片盤。
2. 啓動計算機,聽見嘀嘀兩聲,按F1鍵進入systerm management services 界面,選擇boot sequence 。
3. 將CD-ROM設置爲啓動順序1,保存設置。
4. 進入安裝界面,開始一個全新系統安裝。
5. 提示插入後續盤片,繼續安裝。
6. 注意安裝時Kernel 選擇64bit,用命令prtcont查看。
7. 如選擇中文語言,則要求安裝盤1、2、7,如不選,則安裝盤1、2
機器啓動
1. 進入Configerition assistant界面
2. 設定IP地址爲192.168.3.170,掩碼爲255.255.255.0。
在安裝Oracle前對系統進行配置 步驟一檢查系統所需軟件和修補包
4:檢查系統安裝軟件
n 確認安裝的AIX版本是否高於5.2-01,否則升級系統版本。
# oslevel -r
5300-00確認是否是 5300-04)需升級到5300-02以上版本就可以。按如下升級:
升級前需打包:
bos.adt bos.compat bos. cifs 按smitty->一路回車
a) 擴充usr文件系統到3G
檢查usr空間的大小
# df -k
Filesystem 1024-blocks Free %Used Iused %Iused Mounted on
/dev/hd4 16384 4588 72% 1509 19% /
/dev/hd2 1064960 8608 100% 24103 10% /usr
確認文件系統類型jfs jfs2
lsvg -l rootvg (查看文件系統類型,例如如下查看到的是jfs)
rootvg:
LV NAME TYPE LPs PPs PVs LV STATE MOUNT POINT
hd5 boot 1 1 1 closed/syncd N/A
hd6 paging 32 32 1 open/syncd N/A
hd8 jfslog 1 1 1 open/syncd N/A
hd4 jfs 1 1 1 open/syncd /
hd2 jfs 65 65 1 open/syncd /usr
hd9var jfs 1 1 1 open/syncd /var
hd3 jfs 2 2 1 open/syncd /tmp
hd1 jfs 1 1 1 open/syncd /home
hd10opt jfs 7 7 1 open/syncd /opt
如是jfs 選擇日誌文件系統類型,如是 jfs2則選擇擴展文件系統
用如下命令查看大小,此時查看到的usr的大小爲3 G
# df -k
Filesystem 1024-blocks Free %Used Iused %Iused Mounted on
/dev/hd4 16384 4584 73% 1509 19% /
/dev/hd2 3014656 1897104 38% 24103 4% /usr
/dev/hd9var 16384 10048 39% 362 9% /var
/dev/hd3 32768 31596 4% 51 1% /tmp
/dev/hd1 16384 15820 4% 18 1% /home
/proc - - - - - /proc
/dev/hd10opt 114688 25600 78% 2202 8% /opt
b) 將IY58143上傳到/usr/sys/inst.images
c) 進入/usr/sys/inst.images目錄,運行inutoc
d) smitty update_all (接受license yes) (而非install APAR)
# instfix -ik IY58143
All filesets for IY58143 were found.
# oslevel -r
5300-00
e) 重啓AIX #shutdown –Fr
f) 將升級包上傳到/usr/sys/inst.images
g) 進入/usr/sys/inst.images目錄,運行inutoc
# cd /
# pwd
/
# cd usr
# cd sys
# cd inst.images
# inutoc
h) smitty update_all (接受license yes)
i) OK後 重新啓動系統後查看oslevel –r (5300-03)
# oslevel -r
5300-03
# instfix -i |grep ML
All filesets for 5.3.0.0_AIX_ML were found.
All filesets for 5300-02_AIX_ML were found.
All filesets for 5300-01_AIX_ML were found.
All filesets for 5300-03_AIX_ML were found.
如果不成功就執行:Instfix –ik 5300-03_AIX_ML 會列出不成功的包
# instfix -ik 5300-03_AIX_ML
All filesets for 5300-03_AIX_ML were found.說明已經成功
5:檢查AIX系統的安裝情況是否符合要求
Oracle要求的AIX的軟件包:
o bos.adt.base o bos.adt.lib o bos.adt.libm o bos.perf.libperfstat o bos.perf.perfstat o bos.perf.proctools o xlC.aix50.rte:7.0.0.4 or later o xlC.rte:7.0.0.1 or later確認需要的軟件是否安裝:
# lslpp -l bos.adt.base
Fileset Level State Description
----------------------------------------------------------------------------
Path: /usr/lib/objrepos
bos.adt.base 5.3.0.30 COMMITTED Base Application Development
Toolkit
# lslpp -l bos.adt.lib
Fileset Level State Description
----------------------------------------------------------------------------
Path: /usr/lib/objrepos
bos.adt.lib 5.3.0.30 COMMITTED Base Application Development
Libraries
# lslpp -l bos.adt.libm
lslpp: 0504-132 Fileset bos.adt.libm not installed.
# lslpp -l bos.perf.libperfstat
Fileset Level State Description
----------------------------------------------------------------------------
Path: /usr/lib/objrepos
bos.perf.libperfstat 5.3.0.30 COMMITTED Performance Statistics Library
Interface
Path: /etc/objrepos
bos.perf.libperfstat 5.3.0.0 COMMITTED Performance Statistics Library
Interface
# lslpp -l bos.perf.proctools
Fileset Level State Description
----------------------------------------------------------------------------
Path: /usr/lib/objrepos
bos.perf.proctools 5.3.0.30 COMMITTED Proc Filesystem Tools
#
# lslpp -l xlC.*
Fileset Level State Description
----------------------------------------------------------------------------
Path: /usr/lib/objrepos
xlC.aix50.rte 6.0.0.13 COMMITTED C Set ++ Runtime for AIX 5.0
xlC.cpp 6.0.0.0 COMMITTED C for AIX Preprocessor
xlC.msg.en_US.cpp 6.0.0.0 COMMITTED C for AIX Preprocessor
Messages--U.S. English
xlC.msg.en_US.rte 6.0.0.0 COMMITTED C Set ++ Runtime
Messages--U.S. English
xlC.rte 6.0.0.0 COMMITTED C Set ++ Runtime
#
bos.adt.limb不存在,需要安裝。
安裝bos.adt.libm
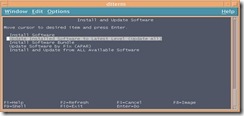
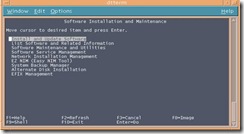
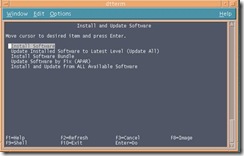
進入菜單smitty,選擇安裝和更新軟件
選擇安裝軟件:
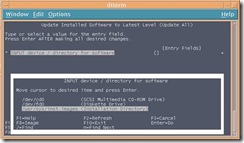
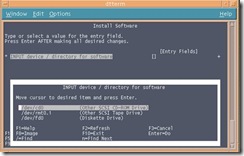
進入安裝軟件後,按F4選擇安裝軟件用到的輸入設備,選擇CD安裝:
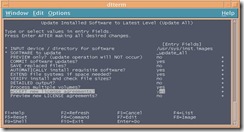
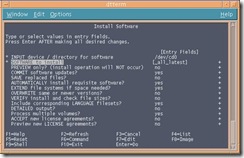
進入對於要安裝的軟件菜單項:
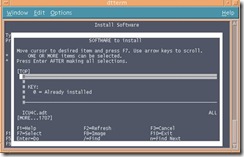
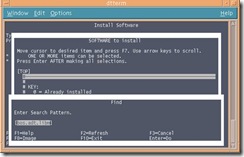
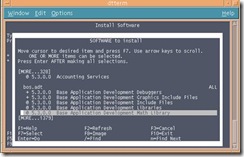
按F4 給出安裝列表。在列表中,軟件項目之前的@符號代表此軟件已經安裝,+代表未安裝:
輸入“/”查找軟件bos.adt.libm
按F7選擇,點擊Enter安裝:
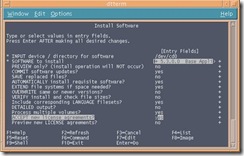
選擇接受License Agreements:
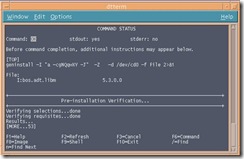
回車開始安裝:
# lslpp -l bos.adt.libm
Fileset Level State Description
----------------------------------------------------------------------------
Path: /usr/lib/objrepos
bos.adt.libm 5.3.0.0 COMMITTED Base Application Development
Math Library
檢查安裝oracel所需操作系統的修補包根據所要安裝產品,檢查下列修補是否安裝:
6: 確認APAR是否安裝
· AIX所需的修補包如下::
對於(APARs) for AIX 5L v5.3 ML 02:
IY58143: REQUIRED UPDATE FOR AIX 5.3
IY59386: libdepend.mk files are all empty
IY60930: Unable to delete network routes
IY66513: LDR_CNTRL turns on undesirable option when initialized with incorrect value
IY70159: krtl relocation problem
驗證以上的包是否已經安裝
# instfix -ik IY58143
Not all filesets for IY58143 were found.
# instfix -ik IY59386
All filesets for IY59386 were found.
# instfix -ik IY60930
All filesets for IY60930 were found.
# instfix -ik IY66513
All filesets for IY66513 were found.
# instfix -ik IY70159
All filesets for IY70159 were found.
通過驗證
# instfix -ik IY58143
Not all filesets for IY58143 were found.
步驟三創建安裝Oracle所需的UNIX組和用戶如果系統首次安裝ORACLE數據庫軟件,則需要創建一些UNIX組和用戶。
所需安裝如下UNIX組和用戶:OSDBA組(dba)、OSOPER(oper)組、Oracle Inventory 組(oinstall)、擁有Oracle軟件的用戶(oracle)。所創建用戶必須把Oracle Inventory 組作爲首要組,可以把OSDBA和OSOPER組作爲次組。
%%%%%%%%%%%%%%%%%%%%%%%%%%%%%%%%%%%%%%%%%%
7:創建組
1.創建Oracle Inventory組
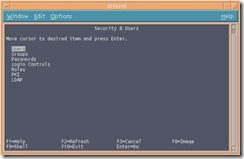
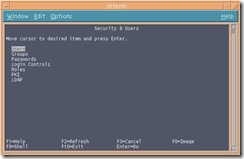
# smit security
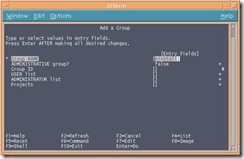
選擇Groups項,創建oinstall組
按下Enter鍵創建。
2. 創建OSDBA組(dba):
用上述過程相同的方法創建。
8:創建用戶:
1. 創建Oracle用戶:
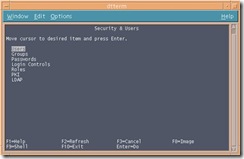
# smit security
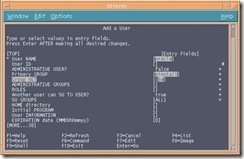
選擇Users項,創建oracle用戶, 將oinstall作爲primary group, 將dba 作爲secondary group(group set).
按下enter鍵創建。
注意: primary group oinstall group set dba
2、設置oracle用戶的密碼:
# passwd oracle
Changing password for "oracle"
oracle's New password:
Enter the new password again:
設置密碼爲oracle
創建好用戶後到/home目錄下查看
# cd /home
# ls -al
total 13
drwxr-xr-x 6 bin bin 512 Aug 16 20:59 .
drwxr-xr-x 22 root system 1024 Aug 16 21:35 ..
drwxr-xr-x 2 root system 512 Aug 16 19:27 TT_DB
drwxr-xr-x 2 guest usr 512 Aug 04 2004 guest
drwx------ 2 root system 512 Aug 04 2004 lost+found
drwxr-xr-x 4 oracle oinstall 512 Aug 16 21:34 oracle
確認nobody用戶是否存在:
# id nobody
uid=4294967294(nobody) gid=4294967294(nobody)
步驟內核參數和Shell Limits:
9:配置Shell Limits:
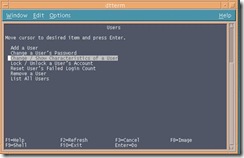
# smitty
選擇Users選項,再選擇Change/Show Characteristics of a User選項
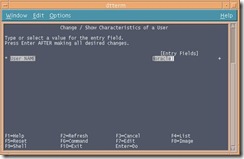
在用戶名處輸入oracle用戶名;
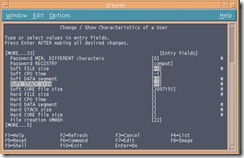
修改Soft FILE size爲-1;修改Soft CUP time爲-1;修改Soft DATA segment爲-1;修改Soft STACK size爲-1;
按下Enter鍵確認。
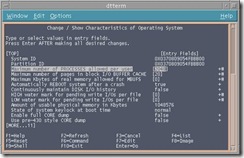
10:配置系統配置參數:
# smitty chgsys
設置Maximum number of PROCESSES allowed per user 爲2048。
11:創建安裝oracle的文件系統查看當前空閒磁盤:
# lspv
hdisk0 00023f7f00040265 None
hdisk1 00023f7f1955b7e1 rootvg active
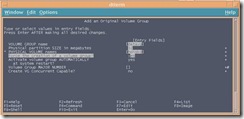
創建新的vg查看系統中pp的大小
# lsvg rootvg
VOLUME GROUP: rootvg VG IDENTIFIER: 00023f7f00004c00000000001e122e40
VG STATE: active PP SIZE: 16 megabyte(s)
VG PERMISSION: read/write TOTAL PPs: 542 (8672 megabytes)
MAX LVs: 256 FREE PPs: 312 (4992 megabytes)
LVs: 9 USED PPs: 230 (3680 megabytes)
OPEN LVs: 8 QUORUM: 2
TOTAL PVs: 1 VG DESCRIPTORS: 2
STALE PVs: 0 STALE PPs: 0
ACTIVE PVs: 1 AUTO ON: yes
MAX PPs per VG: 32512
MAX PPs per PV: 1016 MAX PVs: 32
LTG size (Dynamic): 256 kilobyte(s) AUTO SYNC: no
HOT SPARE: no BB POLICY: relocatable
# lspv
hdisk0 00023f7f00040265 datavg active
hdisk1 00023f7f1955b7e1 rootvg active
查看激活的vg
# lsvg -o
datavg
rootvg
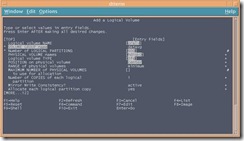
創建lv
查看剛纔創建的lv:
# lsvg -l datavg
datavg:
LV NAME TYPE LPs PPs PVs LV STATE MOUNT POINT
oralv jfs 600 600 1 closed/syncd N/A
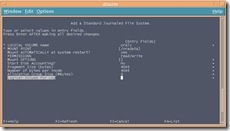
創建文件系統,注意:mount點需要加/
列出當前的文件系統,查看
# lsfs
Name Nodename Mount Pt VFS Size Options Auto Accounting
/dev/hd4 -- / jfs 32768 -- yes no
/dev/hd1 -- /home jfs 32768 -- yes no
/dev/hd2 -- /usr jfs 6029312 -- yes no
/dev/hd9var -- /var jfs 32768 -- yes no
/dev/hd3 -- /tmp jfs 65536 -- yes no
/proc -- /proc procfs -- -- yes no
/dev/hd10opt -- /opt jfs 229376 -- yes no
/dev/oralv -- /oradata jfs 39321600 rw yes no
查看文件系統的大小
# df -k
Filesystem 1024-blocks Free %Used Iused %Iused Mounted on
/dev/hd4 16384 4572 73% 1517 19% /
/dev/hd2 3014656 1897104 38% 24103 4% /usr
/dev/hd9var 16384 10048 39% 363 9% /var
/dev/hd3 32768 31596 4% 51 1% /tmp
/dev/hd1 16384 15820 4% 18 1% /home
/proc - - - - - /proc
/dev/hd10opt 114688 25600 78% 2202 8% /opt
查看當前已經mount上的文件系統
# mount
node mounted mounted over vfs date options
-------- --------------- --------------- ------ ------------ ---------------
/dev/hd4 / jfs Aug 16 12:24 rw,log=/dev/hd8
/dev/hd2 /usr jfs Aug 16 12:24 rw,log=/dev/hd8
/dev/hd9var /var jfs Aug 16 12:24 rw,log=/dev/hd8
/dev/hd3 /tmp jfs Aug 16 12:24 rw,log=/dev/hd8
/dev/hd1 /home jfs Aug 16 12:25 rw,log=/dev/hd8
/proc /proc procfs Aug 16 12:25 rw
/dev/hd10opt /opt jfs Aug 16 12:25 rw,log=/dev/hd8
#
12:Mount創建的文件系統
# mount /oradata
# mount
node mounted mounted over vfs date options
-------- --------------- --------------- ------ ------------ ---------------
/dev/hd4 / jfs Aug 16 12:24 rw,log=/dev/hd8
/dev/hd2 /usr jfs Aug 16 12:24 rw,log=/dev/hd8
/dev/hd9var /var jfs Aug 16 12:24 rw,log=/dev/hd8
/dev/hd3 /tmp jfs Aug 16 12:24 rw,log=/dev/hd8
/dev/hd1 /home jfs Aug 16 12:25 rw,log=/dev/hd8
/proc /proc procfs Aug 16 12:25 rw
/dev/hd10opt /opt jfs Aug 16 12:25 rw,log=/dev/hd8
/dev/oralv /oradata jfs Aug 16 15:58 rw,log=/dev/loglv00
# df -k
Filesystem 1024-blocks Free %Used Iused %Iused Mounted on
/dev/hd4 16384 4572 73% 1517 19% /
/dev/hd2 3014656 1897104 38% 24103 4% /usr
/dev/hd9var 16384 10048 39% 363 9% /var
/dev/hd3 32768 31596 4% 51 1% /tmp
/dev/hd1 16384 15820 4% 18 1% /home
/proc - - - - - /proc
/dev/hd10opt 114688 25600 78% 2202 8% /opt
/dev/oralv 19660800 19043652 4% 17 1% /oradata
13:創建安裝Oracle軟件需要的目錄創建存放原始光盤軟件的目錄
# pwd
/
# cd oradata
# mkdir aixsoft10.2g
# ls
aixsoft10.2g lost+found
創建oracle安裝目錄
具體安裝步驟要求:
**************** from oracle install doc
1. Enter the following command to create subdirectories in the mount point
directory that you identified for the Oracle base directory:
# mkdir -p /u01/app/oracle
2. If you intend to use a second file system for the Oracle Database files, then
create an oradata subdirectory in the mount point directory that you
identified for the Oracle data file directory (shown as /u02 in the examples):
# mkdir /u02/oradata
3. Change the owner and group of the directories that you created to the
oracle user and the oinstall group:
# chown -R oracle:oinstall /u01/app/oracle
# chown -R oracle:oinstall /u02/oradata
4. Change the permissions on the directories that you created to 775:
# chmod -R 775 /u01/app/oracle
# chmod -R 775 /u02/oradata
*************************** end of this doc
# pwd
/oradata
# ls
aixsoft10.2g lost+found
# ls -alt
total 32
drwxr-xr-x 22 root system 1024 Aug 16 18:49 ..
drwxr-sr-x 2 root sys 512 Aug 16 16:06 aixsoft10.2g
drwxr-sr-x 4 sys sys 512 Aug 16 16:02 .
drwxrwx--- 2 root system 512 Aug 16 15:55 lost+found
# mkdir -p u01/app/oracle
# mkdir -p u02/oradata
# ls -al
total 48
drwxr-sr-x 6 sys sys 512 Aug 16 18:51 .
drwxr-xr-x 22 root system 1024 Aug 16 18:49 ..
drwxr-sr-x 2 root sys 512 Aug 16 16:06 aixsoft10.2g
drwxrwx--- 2 root system 512 Aug 16 15:55 lost+found
drwxr-sr-x 3 root sys 512 Aug 16 18:50 u01
drwxr-sr-x 3 root sys 512 Aug 16 18:51 u02
# chown -R oracle:oinstall u01 u02
# ls -alt
total 48
drwxr-sr-x 6 sys sys 512 Aug 16 18:51 .
drwxr-sr-x 3 oracle oinstall 512 Aug 16 18:51 u02
drwxr-sr-x 3 oracle oinstall 512 Aug 16 18:50 u01
drwxr-xr-x 22 root system 1024 Aug 16 18:49 ..
drwxr-sr-x 2 root sys 512 Aug 16 16:06 aixsoft10.2g
drwxrwx--- 2 root system 512 Aug 16 15:55 lost+found
# chmod -R 775 /oradata/u01/app/oracle
# chmod -R 775 /oradata/u02/oradata
14:設置oracle用戶環境變量
以oracle用戶登陸系統後編輯.profile文件 (/home/oracle)
$ pwd
/home/oracle
$ cat .profile (.profile文件的內容)
ORACLE_BASE=/oradata/u01/app/oracle
ORACLE_SID=zydb
ORACLE_HOME=$ORACLE_BASE/product/10.2.0/db_1
PATH=/usr/bin:/etc:/usr/sbin:/usr/ucb:$HOME/bin:/usr/bin/X11:/sbin:$ORACLE_HOME/bin:.
umask=022
export PATH ORACLE_BASE ORACLE_SID ORACLE_HOME
if [ -s "$MAIL" ] # This is at Shell startup. In normal
then echo "$MAILMSG" # operation, the Shell checks
fi # periodically.
修改oracle用戶下的.dtprofile文件,/home/oracle
把最後一行註釋去掉
並且把root用戶根目錄下的.dtprofile最後一行註釋去掉。
15:開始安裝
$ export DISPLAY=192.168.3.187:0.0 (本機是127.0.0.1:0.0)
$ xhost +
access control disabled, clients can connect from any host
$ xclock
ftp上傳oracle安裝包到/oradata/ aixsoft10.2g 目錄下
# ls
10gr2_aix5l64_database.cpio.gz
查看大小確認 在/oradata目錄下用 du –k
解壓:
# gunzip 10gr2_aix5l64_database.cpio.gz
# cpio -idcmv < 10gr2_aix5l64_database.cpio
To start Oracle Universal Installer, enter the following commands:
$ cd /tmp
$ /directory_path/runInstaller
16:按照OUI的順序,逐步完成,結果如下:
The following J2EE Applications have been deployed and are accessible at the URLs listed below.
iSQL*Plus URL:
http://ibm1:5560/isqlplus
iSQL*Plus DBA URL:
Enterprise Manager 10g Database Control URL:

