什麼是LNMP架構
LNMP平臺就是Linux、Ngnix、 MySQL、 PHP的組合架構,需要Linux服務器、MySQL數據庫、PHP解析環境
MySQL安裝配置
爲了與Nginx、PHP環境保持一致,此處選擇採用源代碼編譯的方式安裝MySQL組件
MySQL部署的方法
- 編譯安裝MySQL
- 優化調整
- 初始化數據庫
- 啓動mysq|服務並設置root數據庫賬號的密碼
PHP解析環境的安裝
配置網頁動靜分離,解析PHP,有兩種方法可以選擇
- 使用PHP的FPM模塊
- 將訪問PHP頁面的Web請求轉交給Apache服務器去處理
較新版本的PHP已經自帶FPM模塊,用來對PHP解析實例進行管理、優化解析效率
- FastCGI將Http Server和動態腳本語言分離開
- Nginx專門處理靜態請求,轉發動態請求
- PHP_FPM專門 ]解析PHP動態請求
單服務器的LNMP架構通常使用FPM的方式來解析PHP,本次也使用FPM模塊處理動態請求。
PHP編譯安裝步驟
- 編譯安裝PHP
- 編譯選項時添加"--enable-fpm” 以啓用此模塊
- 安裝後的調整,主要是配置文件的建立與相應命令工具的路徑優化
- 安裝ZendGuardloader (提高PHP解析效率),並進行加載配置
實驗準備
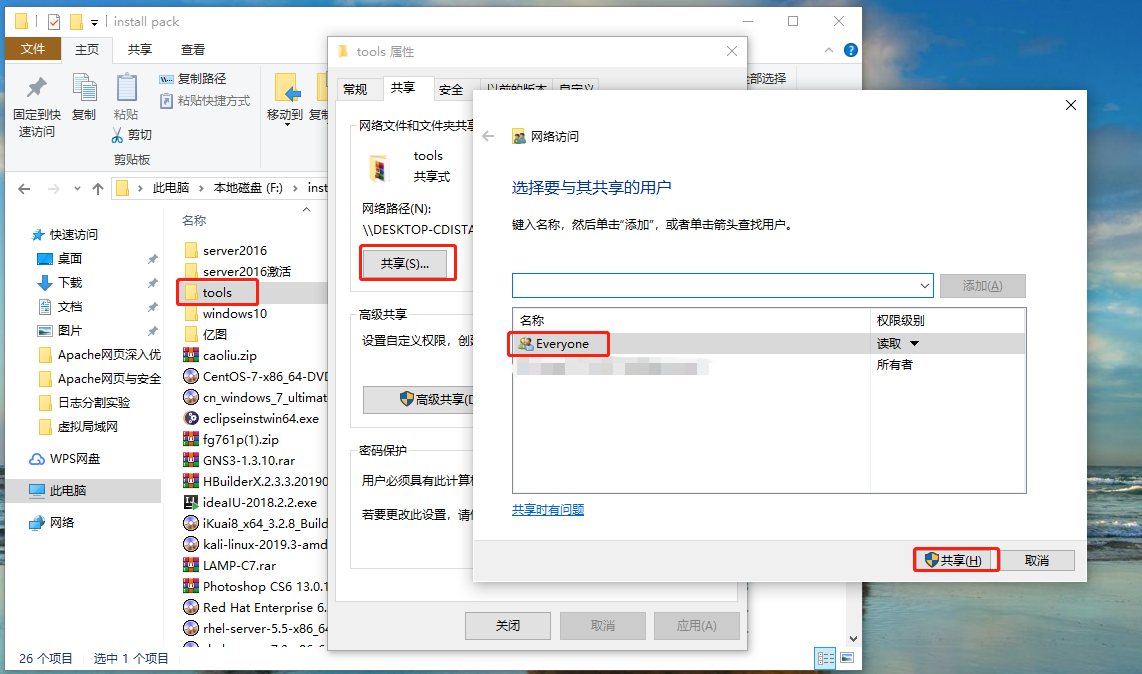
1.將宿主機上的工具包共享出去
2.通過Samba服務將工具包掛載到Linux系統
[root@localhost ~]# mkdir /mnt/tools
[root@localhost ~]# smbclient -L //192.168.100.50/
Enter SAMBA\root's password:
OS=[Windows 10 Enterprise LTSC 2019 17763] Server=[Windows 10 Enterprise LTSC 2019 6.3]

    Sharename       Type      Comment
    ---------       ----      -------
    IPC$            IPC       遠程 IPC
    share           Disk
    tools           Disk
    Users           Disk
Connection to 192.168.100.50 failed (Error NT_STATUS_RESOURCE_NAME_NOT_FOUND)
NetBIOS over TCP disabled -- no workgroup available
[root@localhost ~]# mount.cifs //192.168.100.50/tools /mnt/tools/
Password for root@//192.168.100.50/tools:
[root@localhost ~]#
編譯安裝Nginx服務
1.將nginx服務源碼包解壓到“/opt/”目錄
[root@localhost ~]# cd /mnt/tools/
[root@localhost tools]# ls
awstats-7.6.tar.gz                extundelete-0.2.4.tar.bz2  forbid.png                 jdk-8u191-windows-x64.zip  LAMP-C7  picture.jpg
cronolog-1.6.2-14.el7.x86_64.rpm  fiddler.exe                intellijideahahau2018.rar  john-1.8.0.tar.gz          LNMP
[root@localhost tools]# cd LNMP/
[root@localhost LNMP]# ls
Discuz_X3.4_SC_UTF8.zip  mysql-boost-5.7.20.tar.gz  nginx-1.12.2.tar.gz  php-7.1.10.tar.bz2  php-7.1.20.tar.gz
[root@localhost LNMP]# tar zxvf nginx-1.12.2.tar.gz -C /opt/
...............//省略解壓過程
[root@localhost LNMP]#
2.安裝編譯所需工具包
[root@localhost ~]# yum install gcc gcc-c++ pcre-devel zlib-devel -y
...........//省略安裝過程
[root@localhost ~]#
3.切換到nginx服務源碼包目錄,創建一個nginx用戶
[root@localhost LNMP]# cd /opt/
[root@localhost opt]# ls
nginx-1.12.2  rh
[root@localhost opt]# cd nginx-1.12.2/
[root@localhost nginx-1.12.2]# ls
auto  CHANGES  CHANGES.ru  conf  configure  contrib  html  LICENSE  man  README  src
[root@localhost nginx-1.12.2]#
[root@localhost nginx-1.12.2]# useradd -M -s /sbin/nologin nginx    //-M 不創建家目錄
[root@localhost nginx-1.12.2]# id nginx
uid=1001(nginx) gid=1001(nginx) 組=1001(nginx)
[root@localhost nginx-1.12.2]#
4.配置nginx服務
[root@localhost nginx-1.12.2]# ./configure \
> --prefix=/usr/local/nginx \      //安裝路徑
> --user=nginx \    //屬主
> --group=nginx \   //屬組
> --with-http_stub_status_module   //啓用統計模塊
5.編譯安裝nginx服務
[root@localhost nginx-1.12.2]# make && make install
..........//省略過程
[root@localhost nginx-1.12.2]#
6.在易於系統識別的目錄下,建立nginx服務命令的軟鏈接
[root@localhost nginx-1.12.2]# ln -s /usr/local/nginx/sbin/* /usr/local/sbin/   //建立軟鏈接
[root@localhost nginx-1.12.2]# nginx -t    //配置文件測試
nginx: the configuration file /usr/local/nginx/conf/nginx.conf syntax is ok
nginx: configuration file /usr/local/nginx/conf/nginx.conf test is successful
[root@localhost nginx-1.12.2]#
7.製作nginx服務管理腳本(任選一種即可)
腳本一:通過“systemctl”命令管理
[root@localhost nginx-1.12.2]# cd /lib/systemd/system
[root@localhost system]# vim nginx.service

[Unit]
Description=nginx
After=network.target
[Service]
Type=forking
PIDFile=/usr/local/nginx/logs/nginx.pid
ExecStart=/usr/local/nginx/sbin/nginx
ExecReload=/usr/bin/kill -s HUP $MAINPID
ExecStop=/usr/bin/kill -s QUIT $MAINPID
PrivateTmp=true
[Install]
WantedBy=multi-user.target

[root@localhost system]# chmod 754 nginx.service     //添加執行權限
[root@localhost system]# systemctl start nginx.service   //開啓服務
[root@localhost system]# netstat -ntap | grep 80   //查看tcp80端口
tcp        0      0 0.0.0.0:80              0.0.0.0:*               LISTEN      52924/nginx: master
[root@localhost system]#
[root@localhost system]# systemctl stop firewalld.service   //關閉防火牆
[root@localhost system]# setenforce 0
[root@localhost system]#
腳本二:通過“service”命令管理
[root@nginx nginx-1.12.2]# vim /etc/init.d/nginx
#!/bin/bash
# chkconfig: - 99 20
# description: Nginx Service Control Script
PROG="/usr/local/nginx/sbin/nginx"
PIDF="/usr/local/nginx/logs/nginx.pid"
case "$1" in
start)
$PROG
;;
stop)
kill -s QUIT $(cat $PIDF)
;;
restart)
$0 stop
$0 start
;;
reload)
kill -s HUP $(cat $PIDF)
;;
*)
echo "Usage: $0 {start|stop|restart|reload}"
exit 1
esac
exit 0
[root@nginx nginx-1.12.2]#
[root@nginx nginx-1.12.2]# chmod +x /etc/init.d/nginx //添加執行權限
[root@nginx nginx-1.12.2]# chkconfig --add nginx //添加讓service能識別nginx服務
[root@nginx nginx-1.12.2]#
[root@nginx nginx-1.12.2]# service nginx start //開啓服務
[root@nginx nginx-1.12.2]# netstat -ntap | grep 80 //查看tcp80端口
tcp 0 0 0.0.0.0:80 0.0.0.0:* LISTEN 58696/nginx: master
[root@nginx nginx-1.12.2]#
[root@nginx nginx-1.12.2]# systemctl stop firewalld.service //關閉防火牆
[root@nginx nginx-1.12.2]# setenforce 0
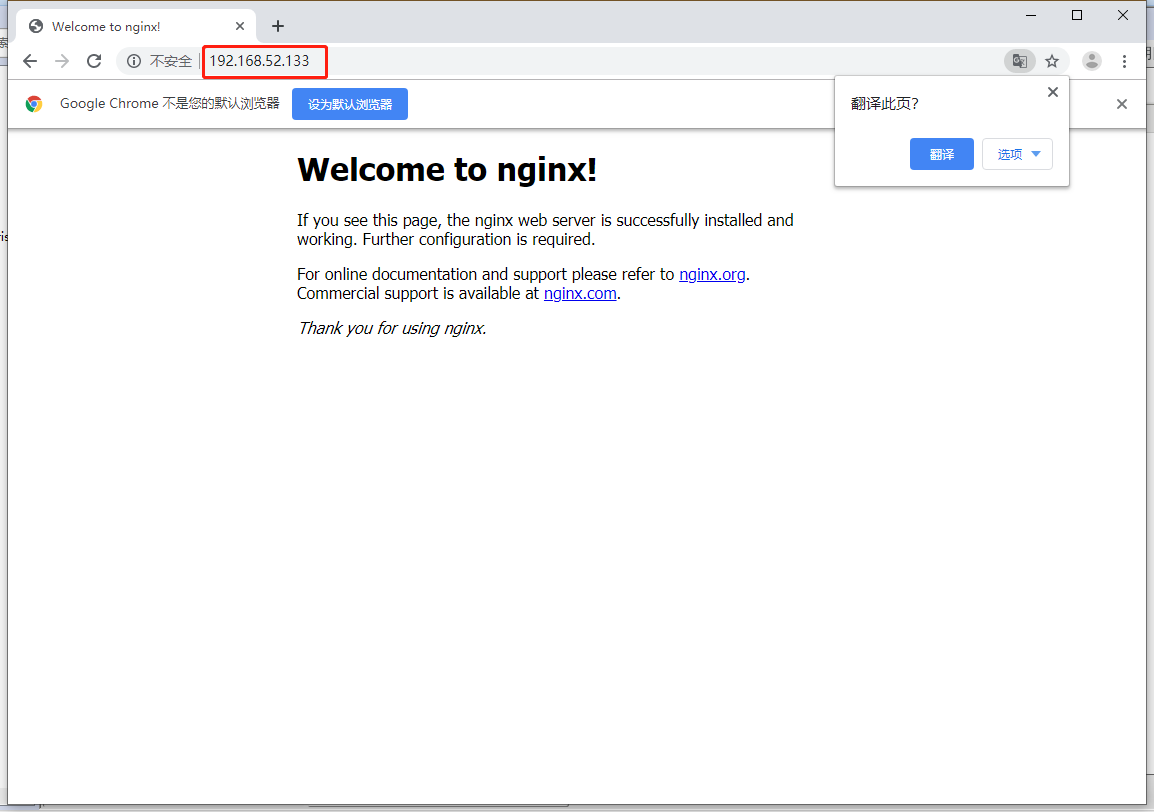
[root@nginx nginx-1.12.2]# 8.用宿主機瀏覽器訪問nginx服務
編譯安裝MySQL
1.安裝編譯mysql所需環境包
[root@localhost system]# yum install ncurses ncurses-devel bison cmake -y
.........//省略安裝過程
[root@localhost system]#
2.添加一個mysql用戶
[root@localhost system]# useradd -s /sbin/nologin mysql
[root@localhost system]#
3.將mysql源碼包解壓到“/opt/”目錄下
[root@localhost system]# cd /mnt/tools/LNMP/
[root@localhost LNMP]# ls
Discuz_X3.4_SC_UTF8.zip  mysql-boost-5.7.20.tar.gz  nginx-1.12.2.tar.gz  php-7.1.10.tar.bz2  php-7.1.20.tar.gz
[root@localhost LNMP]# tar zxvf mysql-boost-5.7.20.tar.gz -C /opt/
............//省略解壓過程
[root@localhost LNMP]#
4.配置mysql服務
[root@localhost LNMP]#cd /opt/mysql-5.7.20/
[root@localhost mysql-5.7.20]# ls
boost                cmd-line-utils           Docs                 libevent         mysys      source_downloads  VERSION
BUILD                config.h.cmake           Doxyfile-perfschema  libmysql         mysys_ssl  sql               VERSION.dep
client               configure.cmake          extra                libmysqld        packaging  sql-common        vio
cmake                COPYING                  include              libservices      plugin     storage           win
CMakeCache.txt       CPackConfig.cmake        info_macros.cmake    make_dist.cmake  rapid      strings           zlib
CMakeFiles           CPackSourceConfig.cmake  INSTALL              Makefile         README     support-files
cmake_install.cmake  CTestTestfile.cmake      libbinlogevents      man              regex      testclients
CMakeLists.txt       dbug                     libbinlogstandalone  mysql-test       scripts    unittest
[root@localhost mysql-5.7.20]# cmake \
> -DCMAKE_INSTALL_PREFIX=/usr/local/mysql \     //安裝路徑
> -DMYSQL_UNIX_ADDR=/usr/local/mysql/mysql.sock \    //定義sock文件連接數據庫文件
> -DSYSCONFDIR=/etc \    //配置文件目錄
> -DSYSTEMD_PID_DIR=/usr/local/mysql \   //PID文件目錄
> -DDEFAULT_CHARSET=utf8 \    //指定字符集,utf8支持中文字符
> -DDEFAULT_COLLATION=utf8_general_ci \    指定字符集默認
> -DWITH_INNOBASE_STORAGE_ENGINE=1 \    存儲引擎
> -DWITH_ARCHIVE_STORAGE_ENGINE=1 \
> -DWITH_BLACKHOLE_STORAGE_ENGINE=1 \
> -DWITH_PERFSCHEMA_STORAGE_ENGINE=1 \
> -DMYSQL_DATADIR=/usr/local/mysql/data \     //數據庫數據文件目錄
> -DWITH_BOOST=boost \     //底層運行庫
> -DWITH_SYSTEMD=1      //主從參數
5.編譯安裝MySQL服務
[root@localhost mysql-5.7.20]# make && make install
...........//省略編譯過程
[root@localhost mysql-5.7.20]#
6.更改數據庫目錄屬主、屬組
[root@localhost mysql-5.7.20]# chown -R mysql:mysql /usr/local/mysql/
[root@localhost mysql-5.7.20]#
7.修改配置文件
[root@localhost mysql-5.7.20]# vim /etc/my.cnf
[client]                            //客戶端
port = 3306
default-character-set=utf8
socket = /usr/local/mysql/mysql.sock

[mysql]                           //客戶端
port = 3306
default-character-set=utf8
socket = /usr/local/mysql/mysql.sock

[mysqld]                         //服務器
user = mysql                  //用戶
basedir = /usr/local/mysql      //設置mysql的安裝目錄
datadir = /usr/local/mysql/data    //設置mysql數據庫的數據的存放目錄
port = 3306                    //設置3306端口
character_set_server=utf8           //中文字符集
pid-file = /usr/local/mysql/mysqld.pid     //pid文件路徑
socket = /usr/local/mysql/mysql.sock     //sock文件路徑
server-id = 1                                     //主從參數

sql_mode=NO_ENGINE_SUBSTITUTION,STRICT_TRANS_TABLES,NO_AUTO_CREATE_USER,NO_AUTO_VALUE_ON_ZERO,NO_ZERO_IN_DATE,NO_ZERO_DATE,ERROR_FOR_DIVISION_BY_ZERO,PIPES_AS_CONCAT,ANSI_QUOTES
//支持模塊
8.將mysql相關命令添加本地環境配置中
[root@localhost mysql-5.7.20]# echo 'PATH=/usr/local/mysql/bin:/usr/local/mysql/lib:$PATH' >> /etc/profile
//將MySQL寫到本地環境配置中
[root@localhost mysql-5.7.20]# echo 'export PATH' >> /etc/profile   //設置全局環境配置
[root@localhost mysql-5.7.20]# source /etc/profile    //重新加載配置文件
[root@localhost mysql-5.7.20]#
9.初始化數據庫
[root@localhost mysql-5.7.20]# cd /usr/local/mysql/
[root@localhost mysql]# ls
bin  COPYING  COPYING-test  docs  include  lib  man  mysql-test  README  README-test  share  support-files  usr

[root@localhost mysql]# bin/mysqld \
> --initialize-insecure \    //初始化
> --user=mysql \   //用戶
> --basedir=/usr/local/mysql \    //安裝目錄
> --datadir=/usr/local/mysql/data   //數據庫數據文件目錄
10.將MySQL服務配置文件複製到/usr/lib/systemd/system/下便於使用systemctl管理
[root@localhost mysql]# cp usr/lib/systemd/system/mysqld.service /lib/systemd/system/
//複製
[root@localhost mysql]# systemctl start mysqld.service   //啓動服務
[root@localhost mysql]# netstat -ntap | grep 3306    //查看tcp3306端口
tcp6       0      0 :::3306                 :::*                    LISTEN      78684/mysqld
[root@localhost mysql]#
11.配置MySQL密碼
[root@localhost mysql]# mysqladmin -u root -p password
Enter password:
New password:
Confirm new password:
Warning: Since password will be sent to server in plain text, use ssl connection to ensure password safety.
[root@localhost mysql]#
12.嘗試登陸MySQL數據庫
[root@localhost mysql]# mysql -u root -p
Enter password:
Welcome to the MySQL monitor.  Commands end with ; or \g.
Your MySQL connection id is 5
Server version: 5.7.20 Source distribution

Copyright (c) 2000, 2017, Oracle and/or its affiliates. All rights reserved.

Oracle is a registered trademark of Oracle Corporation and/or its
affiliates. Other names may be trademarks of their respective
owners.

Type 'help;' or '\h' for help. Type '\c' to clear the current input statement.

mysql> quit    //退出數據庫
Bye
[root@localhost mysql]#
編譯安裝PHP
1.安裝編譯所需環境包
[root@localhost mysql]# yum -y install \
> libjpeg libjpeg-devel \   //jpeg圖片格式和開發包
> libpng libpng-devel \     //png圖片和開發包
> freetype freetype-devel \    //字體庫
> libxml2 libxml2-devel \    xml文件庫
> zlib zlib-devel \   //壓縮庫
> curl curl-devel \   //支持數據文件下載工具
> openssl openssl-devel    //安全訪問連接
2.解壓源碼包
[root@localhost mysql]# cd /mnt/tools/LNMP/
[root@localhost LNMP]# ls
Discuz_X3.4_SC_UTF8.zip  mysql-boost-5.7.20.tar.gz  nginx-1.12.2.tar.gz  php-7.1.10.tar.bz2  php-7.1.20.tar.gz
[root@localhost LNMP]# tar jxvf php-7.1.10.tar.bz2 -C /opt/
..........//省略過程
[root@localhost LNMP]#
3.配置PHP服務
[root@localhost LNMP]# cd /opt/php-7.1.10
[root@localhost php-7.1.10]# ./configure
--prefix=/usr/local/php                        //安裝路徑
--with-mysql-sock=/usr/local/mysql/mysql.sock   //連接文件建立通信橋樑
--with-mysqli                                    //客戶端支持庫
--with-zlib                                         //壓縮
--with-curl                                        //支持上傳下載功能
--with-gd                                          //gd圖像支持圖片處理庫
--with-jpeg-dir                                  //jpeg
--with-png-dir                                   //png
--with-freetype-dir                            //字體
--with-openssl                                  //安全訪問連接
--enable-fpm                                    //fpm支持動態請求模塊
--enable-mbstring                            //支持多字節的字符串
--enable-xml                                    //xml文件
--enable-session                             //session支持會話
--enable-ftp                                     //ftp服務
--enable-pdo                                   //驅動連接管理
--enable-tokenizer                          //PHP自帶函數
--enable-zip                                    //zip壓縮包
4.編譯安裝
[root@localhost php-7.1.10]# make && make install
..........//省略過程
[root@localhost php-7.1.10]#
5.配置核心配置文件(php.ini核心配置文件,php-fpm.conf進程服務配置文件,www.conf擴展配置文件 )
[root@localhost php-7.1.10]# cp php.ini-development /usr/local/php/lib/php.ini   //複製到安裝目錄lib庫中
[root@localhost php-7.1.10]# vim /usr/local/php/lib/php.ini    //配置核心配置文件

mysqli.default_socket = /usr/local/mysql/mysql.sock    //默認連接文件
date.timezone = Asia/Shanghai     //時區

[root@localhost php-7.1.10]# /usr/local/php/bin/php -m
[PHP Modules]
Core
ctype
curl
date
...........//省略部分內容
zip
zlib

[Zend Modules]

[root@localhost php-7.1.10]#
6.配置及優化FPM模塊
[root@localhost php-7.1.10]# cd /usr/local/php/etc/
[root@localhost etc]# ls
pear.conf  php-fpm.conf.default  php-fpm.d
[root@localhost etc]# cp php-fpm.conf.default php-fpm.conf   //優化複製默認進程服務配置文件
[root@localhost etc]# vim php-fpm.conf

pid = run/php-fpm.pid    //開啓fpm.pid進程

[root@localhost etc]#
[root@localhost etc]# ls
pear.conf  php-fpm.conf  php-fpm.conf.default  php-fpm.d
[root@localhost etc]# cd php-fpm.d/
[root@localhost php-fpm.d]# ls
www.conf.default
[root@localhost php-fpm.d]# cp www.conf.default www.conf    //優化複製擴展配置文件
[root@localhost php-fpm.d]# /usr/local/php/sbin/php-fpm -c /usr/local/php/lib/php.ini
[root@localhost php-fpm.d]# netstat -ntap | grep 9000   //查看端口信息
tcp        0      0 127.0.0.1:9000          0.0.0.0:*               LISTEN      87363/php-fpm: mast
[root@localhost php-fpm.d]# ln -s /usr/local/php/bin/* /usr/local/bin/   //查看端口信息
[root@localhost php-fpm.d]#
7.讓Nginx支持PHP功能
[root@localhost php-fpm.d]# vim /usr/local/nginx/conf/nginx.conf    //配置nginx配置文件

        location ~ \.php$ {
            root           html;
            fastcgi_pass   127.0.0.1:9000;
            fastcgi_index  index.php;
            fastcgi_param  SCRIPT_FILENAME  /usr/local/nginx/html$fastcgi_script_name;  //修改站點路徑
            include        fastcgi_params;
        }

[root@localhost php-fpm.d]# systemctl stop nginx.service    //關閉服務
[root@localhost php-fpm.d]# systemctl start nginx.service   //開啓服務
[root@localhost php-fpm.d]#
8.創建PHP測試網頁
[root@localhost php-fpm.d]# cd /usr/local/nginx/html/
[root@localhost html]# ls
50x.html  index.html
[root@localhost html]# mv index.html index.php   //修改名稱
[root@localhost html]# ls
50x.html  index.php
[root@localhost html]# vim index.php

<?php
phpinfo();
?>
[root@localhost html]#
9.用宿主機訪問網頁

10.進入MySQL數據庫創建bbs數據庫
[root@localhost html]# mysql -u root -p
Enter password: //進入數據庫,密碼爲之前設定的
Welcome to the MySQL monitor. Commands end with ; or \g.
Your MySQL connection id is 6
Server version: 5.7.20 Source distribution
Copyright (c) 2000, 2017, Oracle and/or its affiliates. All rights reserved.
Oracle is a registered trademark of Oracle Corporation and/or its
affiliates. Other names may be trademarks of their respective
owners.
Type 'help;' or '\h' for help. Type '\c' to clear the current input statement.
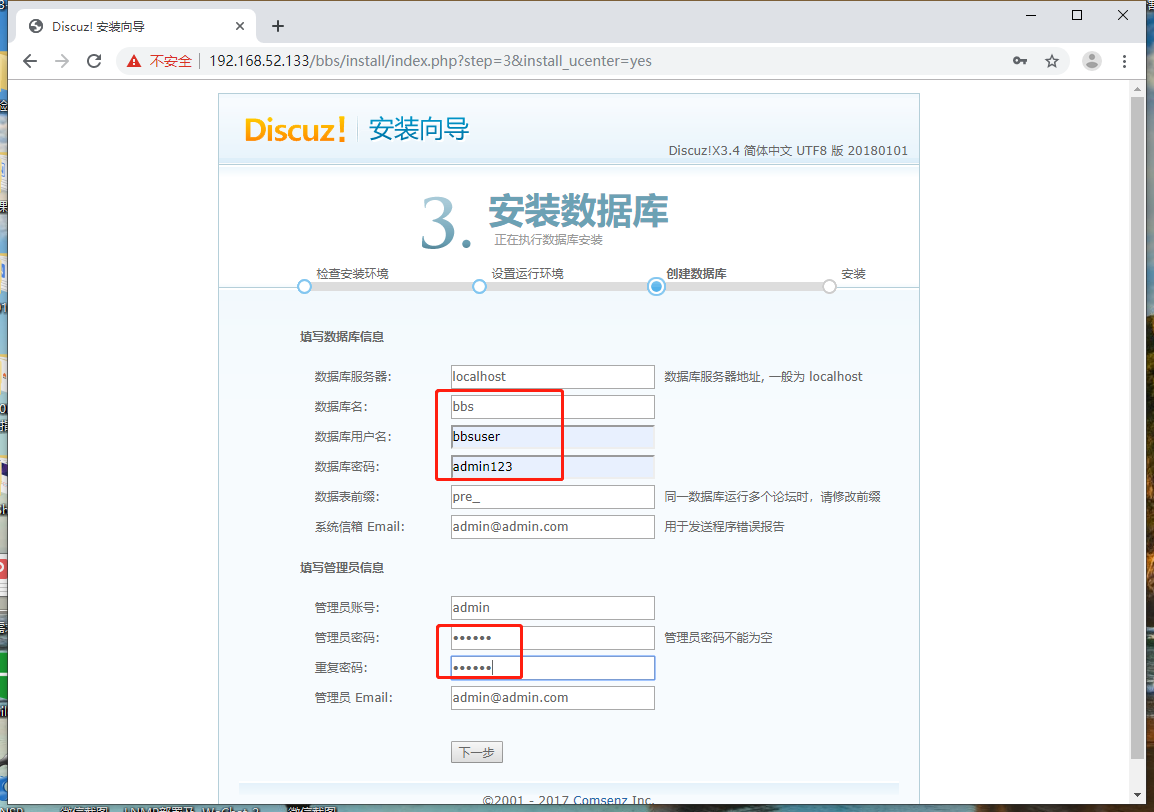
mysql> create database bbs; //創建bbs數據庫
Query OK, 1 row affected (0.01 sec)
mysql> grant all on bbs.* to 'bbsuser'@'%' identified by 'admin123';
//給bbs數據庫中的所有表格提升權限,同時創建管理數據庫的用戶"bbsuser",設置密碼。
"%"表示可以從所有終端訪問
Query OK, 0 rows affected, 1 warning (0.02 sec)
mysql> grant all on bbs.* to 'bbsuser'@'localhost' identified by 'admin123';
Query OK, 0 rows affected, 1 warning (0.00 sec)
mysql> flush privileges; //刷新數據庫
Query OK, 0 rows affected (0.01 sec)
mysql> quit //退出
Bye
[root@localhost html]#安裝Discuz論壇
1.將discuz壓縮包解壓到“/opt/”目錄下
[root@localhost html]# cd /mnt/tools/LNMP/
[root@localhost LNMP]# ls
Discuz_X3.4_SC_UTF8.zip  mysql-boost-5.7.20.tar.gz  nginx-1.12.2.tar.gz  php-7.1.10.tar.bz2  php-7.1.20.tar.gz
[root@localhost LNMP]# unzip Discuz_X3.4_SC_UTF8.zip -d /opt/     //解壓
............//省略過程
[root@localhost LNMP]#
2.將解壓目錄下的upload複製到html站點中,命名爲bbs
[root@localhost LNMP]# cd /opt/dir_SC_UTF8/
[root@localhost dir_SC_UTF8]# ls
readme  upload  utility
[root@localhost dir_SC_UTF8]# cp -r upload/ /usr/local/nginx/html/bbs
[root@localhost dir_SC_UTF8]#
3.進入bbs站點目錄,給相關目錄文件修改屬組和提權
[root@localhost dir_SC_UTF8]# cd /usr/local/nginx/html/bbs/
[root@localhost bbs]# chown -R root:nginx ./config/
[root@localhost bbs]# chown -R root:nginx ./data/
[root@localhost bbs]# chown -R root:nginx ./uc_client/
[root@localhost bbs]# chown -R root:nginx ./uc_server/
[root@localhost bbs]# chmod -R 777 ./config/
[root@localhost bbs]# chmod -R 777 ./data/
[root@localhost bbs]# chmod -R 777 ./uc_client/
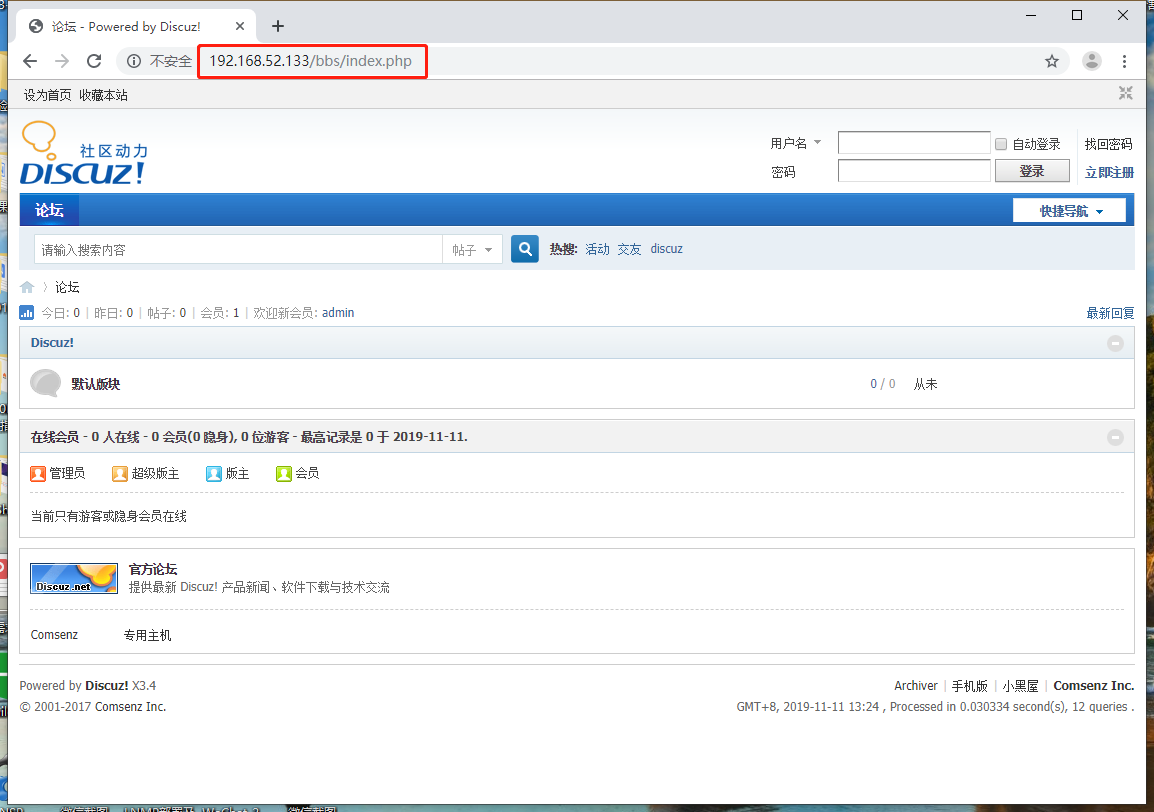
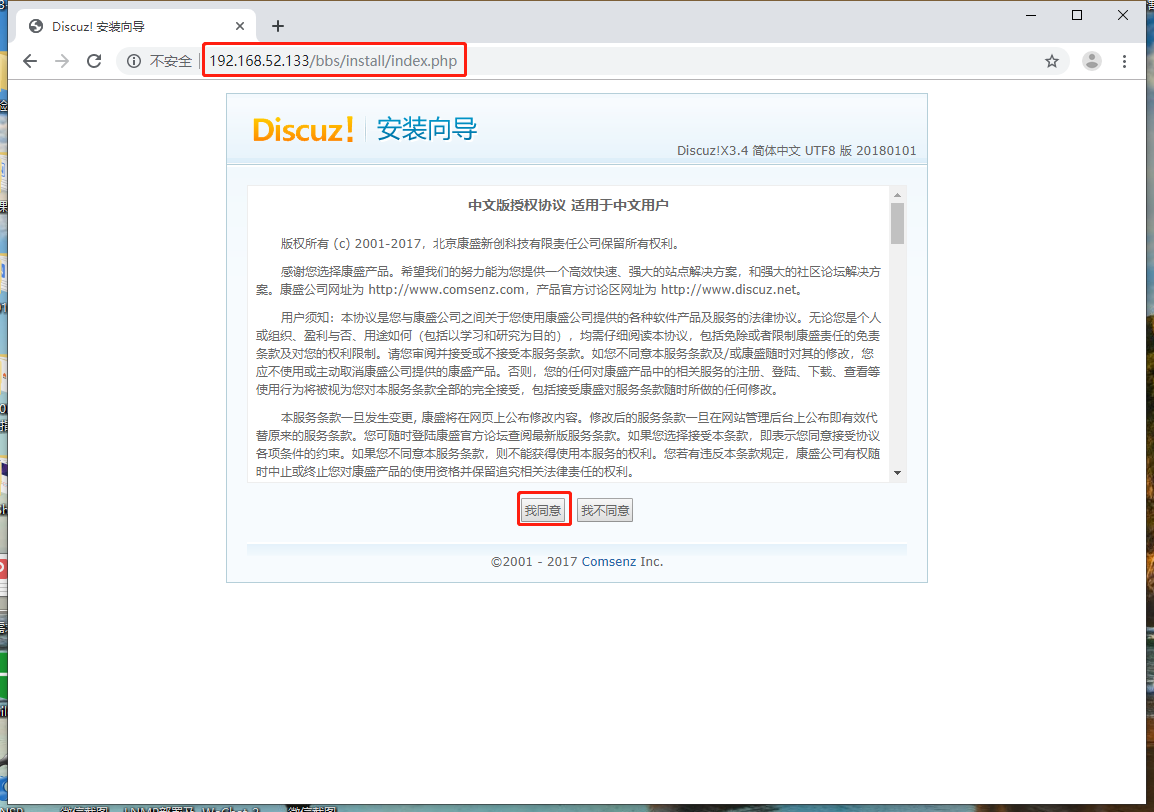
[root@localhost bbs]# chmod -R 777 ./uc_server/4.訪問192.168.52.133/bbs站點,安裝Discuz論壇
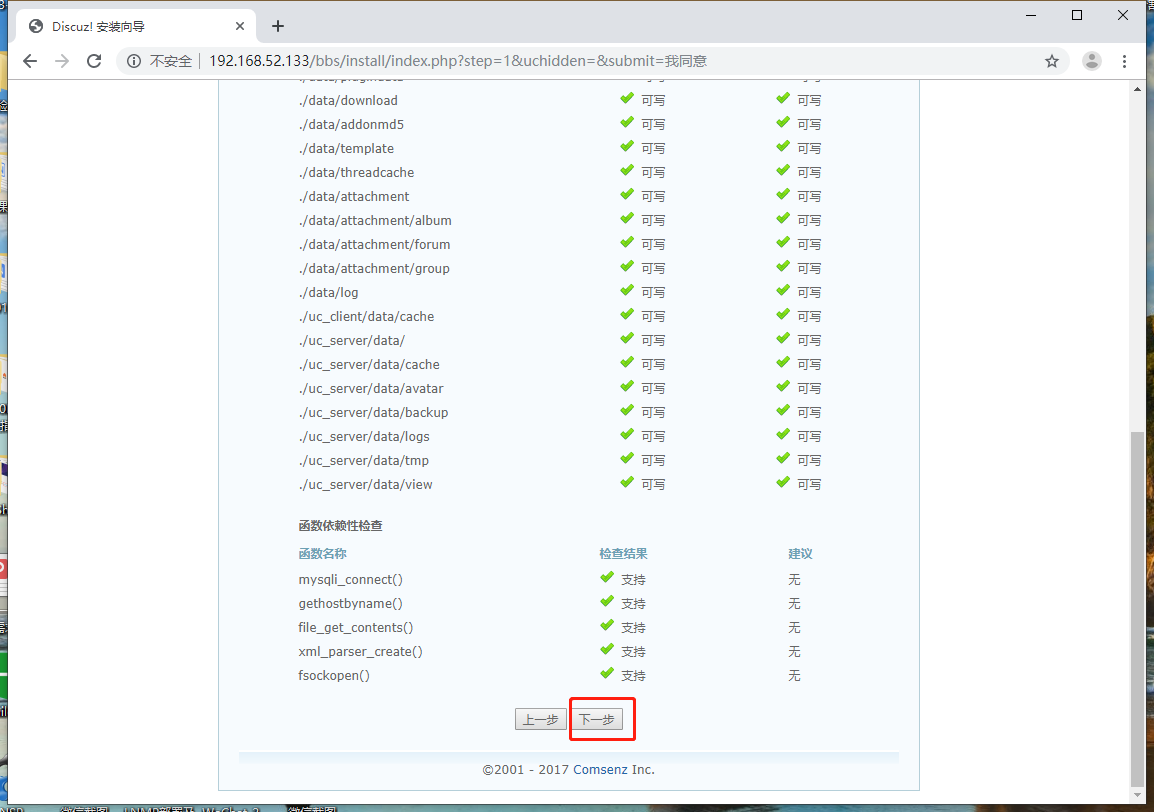
5.設置運行環境爲全新安裝

6.安裝數據庫
7.成功搭建論壇
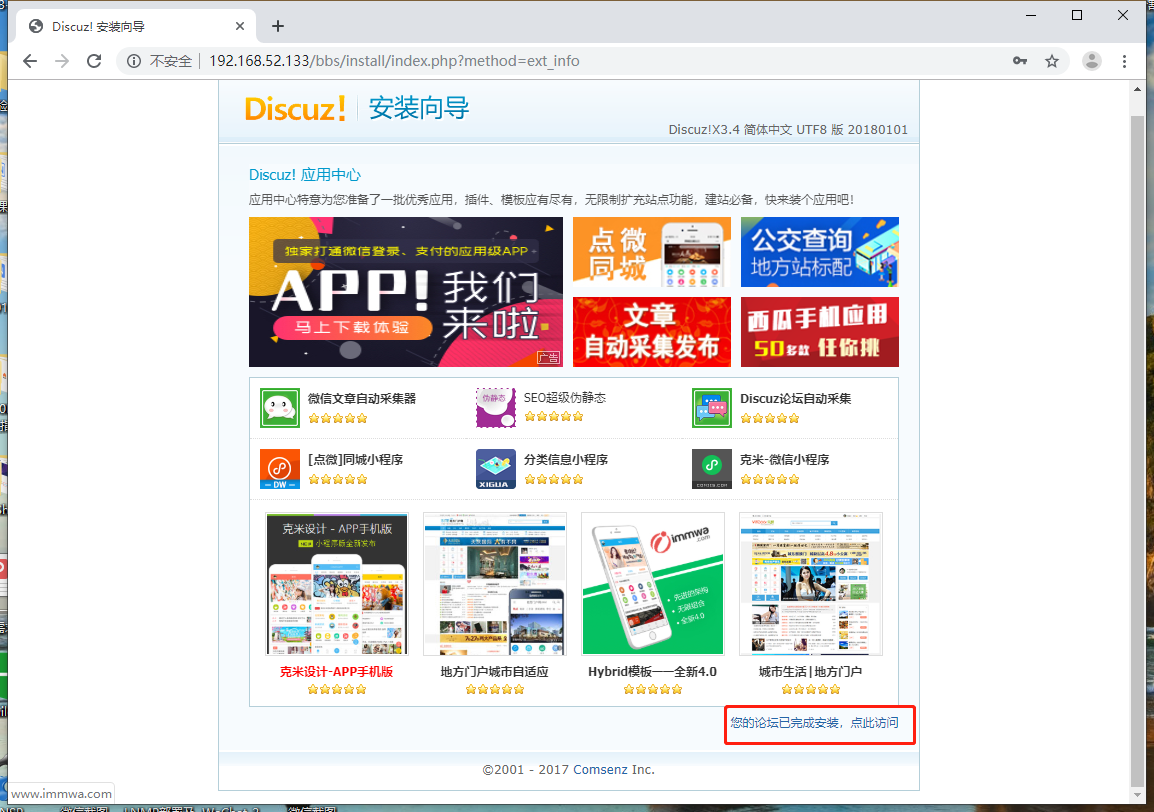
8.訪問論壇