HTTP是一種協議,它大致包含3個部分:HTTP協議,HTML語言,HTTPD服務
【HTTP協議】
版本:
http 0.9
http 1.0
http 1.1
http 2.0
報文類型:
request請求報文
response響應報文
事務:
一次請求和對應的響應
HTTP協議的首部:
通用首部
Connection:定義C/S之間關於請求、響應的有關選項
Connection:keep-alive
Cache-Control:緩存控制
請求首部
Client-IP
Host:請求的主機
Referer:指明瞭請求當前資源原始資源的URL
User-Agent:用戶代理
Accept首部:
Accept:服務端能夠發送的媒體類型
Accept-Charset:
Accept-Encoding:
Accept-Language:
條件式請求:
跟安全相關請求:
Authorization:
Cookie:
響應首部
Age:
Server:向客戶說明自己的程序名稱和版本
協商首部:
Vary:首部列表,服務器會根據列表中的內容挑一個最適用的版本發送給客戶端
跟安全相關:
WWW-Authentication:
Set-Cookie:
實體首部
Location:資源的新位置
Allow:允許對此資源使用的請求方法
內容相關的首部:
Content-Encoding:
Content-Language:
Content-Length:
Content-Location:
Content-Type:
緩存相關:
ETag
Expires
Last-Modified
擴展首部
【Web事務相關】
一次Web資源請求的具體過程(服務器角度):
建立連接
接收請求
處理請求
訪問資源
構建響應
發送響應
記錄日誌
連接的關鍵:
連接套接字:(client,cport<——>server,sport)
監聽套接字:80端口
Web服務器的I/O結構:
單進程模型:串行
多進程模型:每個進程響應一個用戶請求實現併發的效果
複用的I/O機制:一個進程生成多個線程,每個線程響應一個用戶請求
複用的I/O機制:多個線程,每個線程響應多個用戶
【HTML語言】
HTML語言的格式:
<html>
<head>
<title>xxx</title>
</head>
<body>
<h1>H1</h1>
<p></p>
<h2>H2</h2>
<p><a href="admin.html">ToGoogle</a></p>
</body>
</html>
【HTTPD服務的結構】
配置文件:
/etc/httpd/conf/httpd.conf
/etc/httpd/conf/*.conf
服務腳本:
/etc/rc.d/init.d/httpd
腳本配置文件:/etc/sysconfig/httpd
模塊目錄:
/etc/httpd/modules:鏈接文件
/usr/lib64/httpd/modules
主程序:
/usr/sbin/httpd:prefork
/usr/sbin/httpd.event:event
/usr/sbin/httpd.worker:worker
日誌文件目錄:
/var/log/httpd
access_log:訪問日誌
error_log:錯誤日誌
站點文檔根目錄:
/var/www/html/
=============================================================================
【HTTPD的配置】
1.安裝HTTPD服務
#yum -y install httpd
2.修改服務主配置文件
#vi /etc/httpd/conf/httpd.conf
2.1 修改持久連接:
KeepAlive {On|Off}
MaxKeepAliveRequests 100
KeepAliveTimeout 15
2.2 修改MPM參數:
<IfModule prefork.c>
StartServers 8
MinSpareServers 5
MaxSpareServers 20
ServerLimit 256
MaxClients 256
MaxRequestsPerChild 4000
</IfModule>
<IfModule worker.c>
StartServers 4
MaxClients 300
MinSpareThreads 25
MaxSpareThreads 75
ThreadsPerChild 25
MaxRequestsPerChild 0
</IfModule>
2.3 指定監聽地址和端口:
Listern [IP:]PORT
Listen 12.34.56.78:80
2.4 指定DSO機制裝載的模塊:
LoadModule Module_Name /path/to/Module_File
LoadModule auth_basic_module modules/mod_auth_basic.so
2.5 指定站點根目錄:
DocumentRoot "/path/to/somewhere"
DocumentRoot "/var/www/html"
2.6 站定路徑訪問控制:
2.6.1 基於本地文件系統路徑:
<Directory "/path/to/somewhere">
</Directory>
2.6.1.1 基於Directory中可用的訪問控制
<Directory />
Options Indexes FollowSymLinks
//Indexes: 當訪問的路徑下無默認的主頁面,將所有資源以列表形式呈現給用戶;危險,慎用。
//FollowSymlinks: 跳躍符號鏈接。
AllowOverride None
//AllowOverride:支持在每個頁面目錄下創建.htaccess用於實現對此目錄中資源訪問時的訪問控制功能。
</Directory>
2.6.2 基於URL訪問路徑做訪問控制:
<Location "/path/to/URL">
</Location>
2.6.3 基於基於IP做訪問控制:
Order allow,deny
Deny from 172.16.0.0/16
Allow from 192.168.0.0/24
2.6.4 基於用戶訪問控制:
2.6.4.1 基於用戶進行認證:
<Directory "/var/www/html/admin">
Options none
AllowOverride AuthConfig
AuthType Basic
AuthName "Admin Area."
#AuthBasicProvider file
AuthUserFile /etc/httpd/conf/.htpasswd
Require valid-user
</Directory>
2.6.4.2 提供認證文件:
htpasswd
-c: 如果此文件事先不存在,則創建;注意,只能在創建第一個用戶時使用;
-m:以md5的格式編碼存儲用戶的密碼信息
-D:刪除指定用戶
2.6.4.3 基於組進行認證:
<Directory "/var/www/html/admin">
Options none
AllowOverride AuthConfig
AuthType Basic
AuthName "Admin Area."
#AuthBasicProvider file
AuthUserFile /etc/httpd/conf/.htpasswd
AuthGroupFile /etc/httpd/conf/.htgroup
Require group GROUP_NAME
</Directory>
2.7 定義默認的主頁面:
DirectoryIndex index.html index.html.var
2.8 配置日誌功能:
ErrorLog logs/error_log
LogLevel warn
LogFormat "%h %l %u %t \"%r\" %>s %b" common
%h:客戶端地址
%l: 遠程登錄名,通常爲-
%u: 認證時輸入用戶名,沒有認證時爲-
%t: 服務器收到 用戶請求時的時間
%r:請求報名的起始行
%>s: 響應狀態碼
%b: 響應報文的長度,單位是字節
%{HEADER_NAME}i: 記錄指定首部對應的值
CustomLog logs/access_log combined
2.9 路徑別名:
Alias /URL/ "/path/to/somewhere/"
Alias /icons/ "/var/www/icons/"
2.10 設定默認字符集:
AddDefaultCharset UTF-8
2.11 虛擬主機:
2.11.1使用前提:
1.取消主服務器
#DecumentRoot
2.定義虛擬主機
NameVirtualHost IP:PORT
<VirtualHost IP:PORT>
ServerName
DocumentRoot
ServerAlias
ErrorLog
CustomLog
</VirtualHost>
2.11.2 配置文件語法檢查:
httpd -t
service httpd configtest
2.11.3 虛擬主機的分類:
2.11.3.1 基於端口:
Listen:8080
<VirtualHost 172.16.100.8:8080>
ServerName www.mageedu.com
DocumentRoot "/web/hostc"
</VirtualHost>
2.11.3.2 基於IP:
<VirtualHost 172.16.100.7:80>
ServerName www.mageedu.com
DocumentRoot "/web/hosta"
</VirtualHost>
2.11.3.3 基於主機名:
NameVirtualHost *:80
<VirtualHost 172.16.100.7:80>
ServerName www.mageedu.com
DocumentRoot "/web/hosta"
</VirtualHost>
<VirtualHost 172.16.100.7:8080>
ServerName www.londey.com
DocumentRoot "/web/hostb"
</VirtualHost>
2.12 https過程:
配置httpd工作於https:
2.12.1 安裝生成mod_ssl模塊
# yum install mod_ssl
2.12.2 爲服務端生成私鑰,併爲其提供證書
# mkdir /etc/httpd/ssl && cd /etc/httpd/ssl
# (umask 077; openssl genrsa -out httpd.key 1024)
# openssl req -new -key httpd.key -out httpd.csr
2.12.3 配置使用https的虛擬主機
SSLCertificateFile
SSLCertificateKeyFile
<VirtualHost IP:443>
DocumentRoot
ServerName
</VirtualHost>
2.12.4 重新裝載配置
2.12.5 測試
# openssl s_client -connect IP:PORT -CAfile /path/to/ca_certificate
2.** 以上修改可以只選擇自己需要的一部分,啓動服務即可。
3.修改網頁根目錄
#cd /var/www/html/
#vim index.html
this is host A
4.啓動服務
#service httpd start
=============================================================================
【虛擬主機的配置】
#vim /etc/httpd/conf/httpd.conf
前提:
Listen 80
Listen 8080 //偵聽端口
#DocumentRoot"/var/www/html" //註釋掉根目錄
1.基於IP:
<VirtualHost 192.168.100.1:80>
DocumentRoot /var/www/html/liaria
</VirtualHost>
2.基於端口:
<VirtualHost 192.168.100.1:80>
DocumentRoot /var/www/html/londey
</VirtualHost>
<VirtualHost 192.168.100.1:8080>
DocumentRoot /var/www/html/liaria
</VirtualHost>
3.基於主機名:
NameVirtualHost *:80
<VirtualHost *:80>
ServerName www.liaria.com
DocumentRoot "/var/www/html/liaria"
</VirtualHost>
<VirtualHost>
ServerName www.londey.com
DocumentRoot "/var/www/html/londey"
</VirtualHost>
--------------------------------------------------------------------------
【https的配置】
1.安裝mod_ssl模塊
#yum -y install mod_ssl
#cat /etc/httpd/conf.d/ssl.conf
2.服務器端生成私鑰,爲其提供證書
2.1 爲CA生成私鑰
#cd /etc/pki/CA
#(umask 077 ; openssl genrsa -out private/cakey.pem 2048)
2.2 爲自己創建自簽證書
#openssl req -new -x509 -key private/cakey.pem -out cacert.pem -days 1000
CNHAZZLiariaDevOpscaserver.liaria.com
2.3 創建序列號文件
#touch serial index.txt
#echo 01 > serial
3. 在httpd下創建文件,並生成私鑰,發送申請,並通過申請
#cd /etc/httpd/
#mkdir ssl
#cd ssl/
#(umask 077;openssl genrsa -out httpd.key 1024 )
#openssl req -new -key httpd.key -out httpd.csr
CNHAZZLiariaDevOpswww.liaria.com
#openssl ca -in httpd.csr -out httpd.crt -days 1000
4. 編輯httpd的配置文件
#cd /etc/httpd/conf.d/
#vi ssl.conf
SSLCertificateFile /etc/httpd/ssl/httpd.crt
SSLCertificateKeyFile /etc/httpd/ssl/httpd.key
DocumentRoot "/var/www/html/liaria"
ServerName www.liaria.com
5.配置使用https的虛擬主機
#vi /etc/httpd/conf/httpd.conf
<VirtualHost 192.168.100.1:80>
DocumentRoot /var/www/html/liaria
</VirtualHost>
6.重新裝載配置
#service httpd restart
7.測試
7.1 修改本機的hosts文件
C:\Windows\System32\drivers\etc\hosts
192.168.100.2 www.liaria.com
7.2 將證書裝到Windows中
/etc/pki/CA/cacert.pem
重命名爲cacert.crt
7.3 測試
https://www.liaria.com
--------------------------------------------------------------------------
【基於用戶的訪問控制】
1. 修改httpd主配置文件:
#vi /etc/httpd/conf/httpd.conf
<Directory "/var/www/html/liaria">
Options none
AllowOverride AuthConfig
AuthType Basic
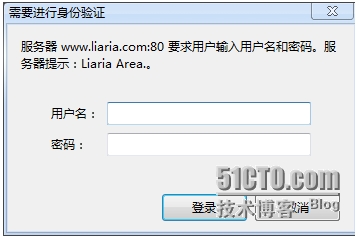
AuthName "Liaria Area."
AuthBasicProvider file
AuthUserFile /etc/httpd/conf/.htpasswd
Require user liaria
</Directory>
2. 給用戶liaria設置密碼
#htpasswd -c -m /etc/httpd/conf/.htpasswd liaria


