{**數據庫**}
1.安裝:
yum install mariadb-server.x86_64 -y安裝服務
systemctl start mariadb 開啓服務
systemctl stop firewalld.service 關閉火牆
netstat -antlpe | grep mysql
tcp 0 0 0.0.0.0:3306 0.0.0.0:* LISTEN 27 42812 2565/mysqld
vim /etc/my.cnf
[root@server-dns ~]# systemctl restart mariadb.service
[root@server-dns ~]# netstat -antlpe | grep mysql
[root@server-dns ~]# mysql
Welcome to the MariaDB monitor. Commands end with ; or \g.
Your MariaDB connection id is 2
Server version: 5.5.35-MariaDB MariaDB Server
Copyright (c) 2000, 2013, Oracle, Monty Program Ab and others.
Type 'help;' or '\h' for help. Type '\c' to clear the current input statement.
MariaDB [(none)]> quit;
Bye
mysql -uroot -pwestos 本機登陸數據庫
mysql_secure_installation 第一次安裝mysql通過此命令設置mysql
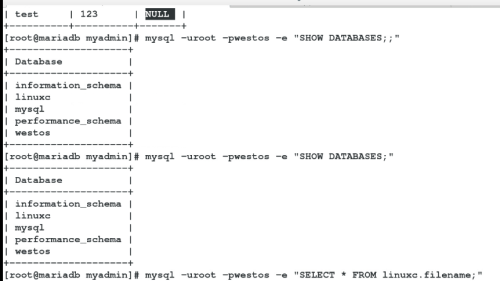
SHOW DATABASES; 顯示數據庫
USE mysql; 進入數據庫
SHOW tables; 顯示數據庫中的表
DESC user; 查看user表中的數據結構
SELECT host,user,passwd FROM user;查詢user表中的host,user,passwd字段
flush privileges 刷新數據庫信息
[root@server-dns ~]# mysql_secure_installation
/usr/bin/mysql_secure_installation: line 379: find_mysql_client: command not found
NOTE: RUNNING ALL PARTS OF THIS SCRIPT IS RECOMMENDED FOR ALL MariaDB
SERVERS IN PRODUCTION USE! PLEASE READ EACH STEP CAREFULLY!
In order to log into MariaDB to secure it, we'll need the current
password for the root user. If you've just installed MariaDB, and
you haven't set the root password yet, the password will be blank,
so you should just press enter here.
Enter current password for root (enter for none): **回車
OK, successfully used password, moving on...
Setting the root password ensures that nobody can log into the MariaDB
root user without the proper authorisation.
Set root password? [Y/n] **回車
New password: **輸入密碼
Re-enter new password: **確認密碼
Password updated successfully!
Reloading privilege tables..
... Success!
By default, a MariaDB installation has an anonymous user, allowing anyone
to log into MariaDB without having to have a user account created for
them. This is intended only for testing, and to make the installation
go a bit smoother. You should remove them before moving into a
production environment.
Remove anonymous users? [Y/n] **回車
... Success!
Normally, root should only be allowed to connect from 'localhost'. This
ensures that someone cannot guess at the root password from the network.
Disallow root login remotely? [Y/n] **回車
... Success!
By default, MariaDB comes with a database named 'test' that anyone can
access. This is also intended only for testing, and should be removed
before moving into a production environment.
Remove test database and access to it? [Y/n] **回車
- Dropping test database...
... Success!
- Removing privileges on test database...
... Success!
Reloading the privilege tables will ensure that all changes made so far
will take effect immediately.
Reload privilege tables now? [Y/n] **回車
... Success!
Cleaning up...
All done! If you've completed all of the above steps, your MariaDB
installation should now be secure.
Thanks for using MariaDB!
[root@server-dns ~]# systemctl restart mariadb.service **重啓動服務,設置成功
mysql -uroot -predhat **登陸
[root@server-dns ~]# mysql -uroot -predhat
Welcome to the MariaDB monitor. Commands end with ; or \g.
Your MariaDB connection id is 3
Server version: 5.5.35-MariaDB MariaDB Server
Copyright (c) 2000, 2013, Oracle, Monty Program Ab and others.
Type 'help;' or '\h' for help. Type '\c' to clear the current input statement.
MariaDB [(none)]> SHOW DATABASES;
+--------------------+
| Database |
+--------------------+
| information_schema |
| mysql |
| performance_schema |
+--------------------+
3 rows in set (0.00 sec)
MariaDB [(none)]> USE mysql;
Reading table information for completion of table and column names
You can turn off this feature to get a quicker startup with -A
MariaDB [mysql]> SELECT Host,User FROM user;
+-----------+------+
| Host | User |
+-----------+------+
| 127.0.0.1 | root |
| ::1 | root |
| localhost | root |
+-----------+------+
3 rows in set (0.00 sec)
create database logo; 創建logo數據庫
CREATE TABLE UTAB ( username varchar(10) not null,passwd varchar(50) not null,age varchar(8) not null ); 創建username,passwd,age字段
MariaDB [mysql]> CREATE DATABASE logo;
Query OK, 1 row affected (0.00 sec)
MariaDB [mysql]> SHOW DATABASES;
+--------------------+
| Database |
+--------------------+
| information_schema |
| logo |
| mysql |
| performance_schema |
+--------------------+
4 rows in set (0.00 sec)
MariaDB [mysql]> SHOW TABLES logo;
ERROR 1064 (42000): You have an error in your SQL syntax; check the manual that corresponds to your MariaDB server version for the right syntax to use near 'logo' at line 1
MariaDB [mysql]> USE logo;
Database changed
MariaDB [logo]> CREATE TABLE UTAB ( username varchar(10) not null,passwd varchar(50) not null,age varchar(8) not null );
Query OK, 0 rows affected (0.17 sec)
MariaDB [logo]> SHOW TABLES;
+----------------+
| Tables_in_logo |
+----------------+
| UTAB |
+----------------+
1 row in set (0.00 sec)
MariaDB [logo]> DESC UTAB;
+----------+-------------+------+-----+---------+-------+
| Field | Type | Null | Key | Default | Extra |
+----------+-------------+------+-----+---------+-------+
| username | varchar(10) | NO | | NULL | |
| passwd | varchar(50) | NO | | NULL | |
| age | varchar(8) | NO | | NULL | |
+----------+-------------+------+-----+---------+-------+
3 rows in set (0.00 sec)
MariaDB [logo]> SELECT * FROM UTAB;
Empty set (0.00 sec)
MariaDB [logo]> INSERT INTOUTAB ('lee','123','20');
ERROR 1064 (42000): You have an error in your SQL syntax; check the manual that corresponds to your MariaDB server version for the right syntax to use near ''lee','123','20')' at line 1
MariaDB [logo]> INSERT INTO UTAB VALUES ('lee','123','20');
Query OK, 1 row affected (0.07 sec)
MariaDB [logo]> SELECT * FROM UTAB;
+----------+--------+-----+
| username | passwd | age |
+----------+--------+-----+
| lee | 123 | 20 |
+----------+--------+-----+
1 row in set (0.00 sec)
MariaDB [logo]> INSERT INTO UTAB VALUES ('westos','123','');
Query OK, 1 row affected (0.07 sec)
MariaDB [logo]> SELECT * FROM UTAB;
+----------+--------+-----+
| username | passwd | age |
+----------+--------+-----+
| lee | 123 | 20 |
| westos | 123 | |
+----------+--------+-----+
2 rows in set (0.00 sec)
MariaDB [logo]> ALTER TABLE UTAB ADD AFTER password class varchar(8); 在UTAB表中插入class字段
MariaDB [logo]> UPDATE UTAB SET class='1'; 更新class值爲1
MariaDB [logo]> UPDATE UTAB SET class='2' WHERE username='westos';
更新class字段westos下的值爲2
MariaDB [logo]> DELETE FROM UTAB WHERE username='westos'; 刪除username中的westos
*.*表示數據庫所有表格
GREATE USER westos@'%'表示在任何數據庫都可建立(前提數據庫端口都開放)
GREATE USER westos@'localhost'表示本機可以創建
SELECT * FROM mysql.user; 需在root用戶下查詢
注意:授權必須在root用戶下進行操作;
修改密碼(密碼已知)
mysqladmin -uroot -predhat password westos 修改本地mysql root密碼
數據庫登陸密碼忘記,重置密碼:(密碼未知)
[root@server-dns ~]# systemctl stop mariadb
[root@server-dns ~]# mysqld_safe --skip-grant-tables &
[1] 6344
[root@server-dns ~]# 161201 07:33:32 mysqld_safe Logging to '/var/log/mariadb/mariadb.log'.
161201 07:33:32 mysqld_safe Starting mysqld daemon with databases from /var/lib/mysql
重新設定密碼
[root@server-dns ~]# mysql -uroot
Welcome to the MariaDB monitor. Commands end with ; or \g.
Your MariaDB connection id is 1
Server version: 5.5.35-MariaDB MariaDB Server
Copyright (c) 2000, 2013, Oracle, Monty Program Ab and others.
Type 'help;' or '\h' for help. Type '\c' to clear the current input statement.
MariaDB [(none)]> UPDATE mysql.user set Password=password ('redhat'); **設定新密碼(redhat)
Query OK, 0 rows affected (0.00 sec)
Rows matched: 3 Changed: 0 Warnings: 0
MariaDB [(none)]> quit;
Bye
[root@server-dns ~]# fg
mysqld_safe --skip-grant-tables
^Z
[1]+ Stopped mysqld_safe --skip-grant-tables
[root@server-dns ~]# killall -9 mysqld_safe
[1]+ Killed mysqld_safe --skip-grant-tables
[root@server-dns ~]# ps aux | grep mysql
mysql 6499 0.0 5.1 859056 96752 pts/0 Sl 07:33 0:00 /usr/libexec/mysqld --basedir=/usr --datadir=/var/lib/mysql --plugin-dir=/usr/lib64/mysql/plugin --user=mysql --skip-grant-tables --log-error=/var/log/mariadb/mariadb.log --pid-file=/var/run/mariadb/mariadb.pid --socket=/var/lib/mysql/mysql.sock
root 6657 0.0 0.0 112640 936 pts/0 R+ 07:39 0:00 grep --color=auto mysql
[root@server-dns ~]# kill -9 6499
[root@server-dns ~]# ps aux | grep mysql
root 6704 0.0 0.0 112640 936 pts/0 R+ 07:40 0:00 grep --color=auto mysql
[root@server-dns ~]# systemctl start mariadb
[root@server-dns ~]# mysql -uroot -predhat **登陸上即修改密碼成功
Welcome to the MariaDB monitor. Commands end with ; or \g.
Your MariaDB connection id is 2
Server version: 5.5.35-MariaDB MariaDB Server
Copyright (c) 2000, 2013, Oracle, Monty Program Ab and others.
Type 'help;' or '\h' for help. Type '\c' to clear the current input statement.
MariaDB [(none)]> quit
數據庫圖形管理:
yum install httpd -y
systemctl status firewalld.service
firewall-cmd --permanent --add-service=http
firewall-cmd --reload
systemctl start httpd
cd /var/www/html/
ls
vim index.html
lftp 172.25.254.250
yum install lftp -y
lftp 172.25.254.250
ls
tar -jxf phpMyAdmin-3.4.0-all-languages.tar.bz2 解壓php安裝包
mv phpMyAdmin-3.4.0-all-languages myadmin 重命名(名字任意)
yum install php -y 安裝php服務
systemctl restart httpd.service 重啓httpd
cd myadmin/
ls
rpm -qa | grep php 查看php版本
rpm -qa | grep mariadb 查看mariadb版本
cp -p config.sample.inc.php config.inc.php
vim config.inc.php
yum install php-mysql.x86_64 -y
systemctl restart httpd.service
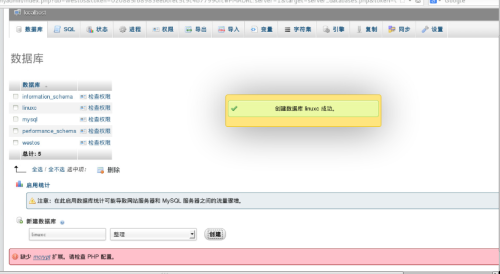
在瀏覽器中搜索172.25.254.117/myadmin
登陸用戶(root)密碼
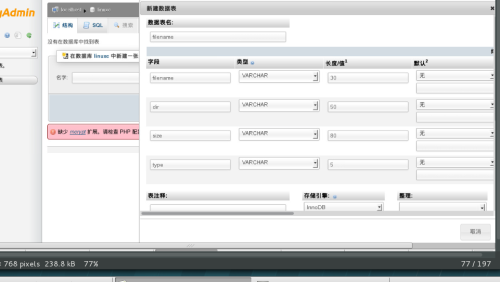
進行操作
收發郵件:
先配置dns
hostnamectl set-hostname maillinux.linux.com 服務器server
vim /etc/sysconfig/network-scripts/ifcfg-eth0
vim /etc/yum.repos.d/rhel_dvd.repo
reboot
yum install bind -y
vim /etc/named.conf
# Generated by NetworkManager
domain example.com
search example.com linux.com
nameserver 172.25.254.117
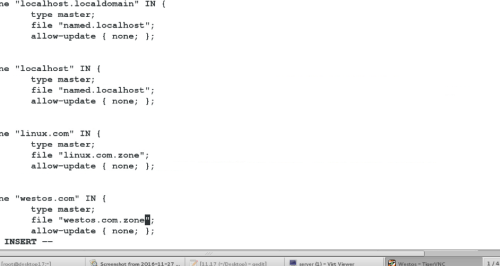
vim /etc/named.rfc1912.zones
cd /var/named/
ls
cp -p named.localhost westos.com.zone
vim westos.com.zone
cp -p westos.com.zone linux.com.zone
vim linux.com.zone
systemctl restart named
vim /etc/resolv.conf
systemctl stop firewalld.service
systemctl restart named
vim westos.com.zone
cd
systemctl restart named
dig -t mx westos.com
dig -t mx linux.com
1 hostnamectl set-hostname mailwestos.westos.com 服務器client
vim /etc/sysconfig/network-scripts/ifcfg-eth0
vim /etc/yum.repos.d/rhel_dvd.repo
reboot
vim /etc/resolv.conf
# Generated by NetworkManager
domain example.com
search example.com westos.com
nameserver 172.25.254.117
dig -t mx westos.com
dig -t mx linux.com
postconf -e "inet_interfaces=localhost" 更改
vim /etc/postfix/main.cf
#myhostname = host.domain.tld -->myhostname = host.domain.tld
#mydomain = domain.tld --> mydomain = westos.com
#myorigin = $mydomain --> myorigin = $mydomain
#inet_interfaces = all --> inet_interfaces = all
inet_interfaces = localhost --> #inet_interfaces = localhost
mydestination = $myhostname, localhost.$mydomain, localhost --> mydestination = $myhostname, $mydomain, localhost
systemctl restart postfix.service **重啓服務
postqueue -f 立即處理郵件
vim generic
postmap generic
ls
postconf -d | grep generic 查看默認設置
postconf -e "smtp_generic_maps = hash:/etc/postfix/generic" 修改選項
systemctl restart postfix.service


