


Spring MVC 3.1版本加了一個很有用的特性,Flash屬性,它能解決一個長久以來缺少解決的問題,一個POST/Redirect/GET模式問題。
正常的MVC Web應用程序在每次提交都會POST數據到服務器。一個正常的Controller (被註解 @Controller標記)從請求獲取數據和處理它 (保存或更新數據庫)。一旦操作成功,用戶就會被帶到(forward)一個操作成功的頁面。傳統上來說,這樣的POST/Forward/GET模式,有時候會導致多次提交問題. 例如用戶按F5刷新頁面,這時同樣的數據會再提交一次。
爲了解決這問題, POST/Redirect/GET 模式被用在MVC應用程序上. 一旦用戶表單被提交成功, 我們重定向(Redirect)請求到另一個成功頁面。這樣能夠令瀏覽器創建新的GET請求和加載新頁面。這樣用戶按下F5,是直接GET請求而不是再提交一次表單。

Image credit: Wikipedia

翻譯於 3年前
5人頂
雖然這一方法看起來很完美,並且解決了表單多次提交的問題,但是它又引入了一個獲取請求參數和屬性的難題. 通常當我們生成一次http重定向請求的時候,被存儲到請求數據會丟失,使得下一次GET請求不可能訪問到這次請求中的一些有用的信息.
Flash attributes 的到來就是爲了處理這一情況. Flash attributes 爲一個請求存儲意圖爲另外一個請求所使用的屬性提供了一條途徑. Flash attributes 在對請求的重定向生效之前被臨時存儲(通常是在session)中,並且在重定向之後被立即移除.

爲了這樣做, Flash 特性使用了兩個集合. FlashMap 被用來管理 flash attributes 而 FlashMapManager 則被用來存儲,獲取和管理 FlashMap 實體.
對於每一次請求一個 “input” flash map 會被創建,來存儲來自任何之前請求的 flash attribute 還有一個 “output” flash map 會被創建,來存儲任何我們存儲在這個請求中的,之後的請求參數.

翻譯於 3年前
3人頂
使用
要想在你的 Spring MVC 應用中使用 Flash attribute,要用 3.1 版本或以上。並且要在 spring-servlet.xml 文件中加入 mvc:annotation-driven。
<mvc:annotation-driven />
這些都完成之後,Flash attribute 就會自動設爲“開啓”,以供使用了。只需在你的 Spring controller 方法中加入RedirectAttributes redirectAttributes。
import org.springframework.web.servlet.mvc.support.RedirectAttributes;//...

	@RequestMapping(value="addcustomer", method=RequestMethod.POST)	public String addCustomer(@ModelAttribute("customer") Customer customer,			final RedirectAttributes redirectAttributes) {	//...
		redirectAttributes.addFlashAttribute("message", "Successfully added..");	//...

		return "redirect:some_other_request_name";
	}
addFlashAttribute 方法會自動向 output flash map 中添加給定的參數,並將它傳遞給後續的請求。
我們來看看一個使用 Flash attribute 來完成 POST/Redirect/GET 並傳遞一些信息的完整實例吧。
Flash Attribute 實例
下面的應用向用戶顯示一個表單。當用戶填完數據,並提交表單之後,頁面會重定向到另一個顯示成功信息的頁面。在這個重定向的新頁面中,會顯示用戶剛纔輸入的信息。

翻譯於 3年前
4人頂
第1步: 需要的 JAR 和項目結構
如果你用 Maven 來做依賴管理,用下面的 dependencies 來添加 Spring 3.1 MVC 的支持。
	<dependencies>
		<!-- Spring 3.1 MVC  -->
		<dependency>
			<groupId>org.springframework</groupId>
			<artifactId>spring-webmvc</artifactId>
			<version>3.1.2.RELEASE</version>
		</dependency>
		<!-- JSTL for c: tag -->
		<dependency>
			<groupId>jstl</groupId>
			<artifactId>jstl</artifactId>
			<version>1.2</version>
		</dependency>
	</dependencies>
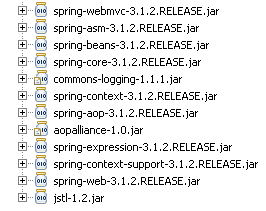
或者,你可以下載以下 JAR 文件,然後把它們放在 /WEB-INF/lib 文件夾下。
第2步: Spring 配置
要爲 web 項目添加 Spring 支持,需要在 web.xml 中添加 DispatcherServlet 。
web.xml
<?xml version="1.0" encoding="UTF-8"?><web-app xmlns:xsi="http://www.w3.org/2001/XMLSchema-instance"
	xmlns="http://java.sun.com/xml/ns/javaee" 	xmlns:web="http://java.sun.com/xml/ns/javaee/web-app_2_5.xsd"
	xsi:schemaLocation="http://java.sun.com/xml/ns/javaee

http://java.sun.com/xml/ns/javaee/web-app_2_5.xsd"

	id="WebApp_ID" version="2.5">

	<display-name>Spring MVC Flash attribute example</display-name>
	<servlet>
		<servlet-name>spring</servlet-name>
		<servlet-class>
			org.springframework.web.servlet.DispatcherServlet		</servlet-class>
		<load-on-startup>1</load-on-startup>
	</servlet>
	<servlet-mapping>    	<servlet-name>default</servlet-name>    	<url-pattern>/index.html</url-pattern>
	</servlet-mapping>
	<servlet-mapping>
		<servlet-name>spring</servlet-name>
		<url-pattern>*.html</url-pattern>
	</servlet-mapping></web-app>
然後,spring-servlet 使用 mvc:annotation-driven 來支持 mvc ,並且會掃描項目中的 context:component-scan 標籤。
spring-servlet.xml
<?xml  version="1.0" encoding="UTF-8"?><beans xmlns="http://www.springframework.org/schema/beans"
	xmlns:xsi="http://www.w3.org/2001/XMLSchema-instance"
	xmlns:context="http://www.springframework.org/schema/context"
	xmlns:mvc="http://www.springframework.org/schema/mvc"
	xsi:schemaLocation="http://www.springframework.org/schema/beans http://www.springframework.org/schema/beans/spring-beans.xsd http://www.springframework.org/schema/context  http://www.springframework.org/schema/context/spring-context.xsd http://www.springframework.org/schema/mvc  http://www.springframework.org/schema/mvc/spring-mvc.xsd">


	<bean id="jspViewResolver"
	class="org.springframework.web.servlet.view.InternalResourceViewResolver">
		<property name="viewClass"
			value="org.springframework.web.servlet.view.JstlView" />
		<property name="prefix" value="/WEB-INF/jsp/" />
		<property name="suffix" value=".jsp" />
	 </bean>

	<context:component-scan base-package="net.viralpatel.controller" />
	<mvc:annotation-driven /> </beans>
第3步: Spring Controller – RedirectAttributes
Controller 的代碼使用 Customer.java 對象作爲 bean 來保存客戶信息。
Customer.java
package net.viralpatel.spring;public class Customer { private String firstname; private String lastname; private int age; private String email; //getter, setter methods}CustomerController 類有3個方法。showForm 方法對應 URL /form ,用來顯示 Add New Customer 表單。addCustomer 方法對應 URL /addcustomer ,用來處理 POST 請求。
CustomerController.java
package net.viralpatel.controller;import net.viralpatel.spring.Customer;import org.springframework.stereotype.Controller;import org.springframework.web.bind.annotation.ModelAttribute;import org.springframework.web.bind.annotation.RequestMapping;import org.springframework.web.bind.annotation.RequestMethod;import org.springframework.web.servlet.mvc.support.RedirectAttributes;@Controllerpublic class CustomerController {

	@RequestMapping(value="showform", method=RequestMethod.GET)	public String showForm(@ModelAttribute("customer") Customer customer) {		return "add_customer";
	}
	@RequestMapping(value="addcustomer", method=RequestMethod.POST)	public String addCustomer(@ModelAttribute("customer") Customer customer,			final RedirectAttributes redirectAttributes) {

		redirectAttributes.addFlashAttribute("customer", customer);
		redirectAttributes.addFlashAttribute("message","Added successfully.");		return "redirect:showcustomer.html";
	}
	@RequestMapping(value="showcustomer", method=RequestMethod.GET)	public String showCustomer(@ModelAttribute("customer") Customer customer) {
		System.out.println("cust:" + customer.getFirstname());		return "show_customer";
	}
}
注意我們在 addCustomer 方法中是如何使用 redirectAttributes 參數來添加 flash attribute 的。並且,我們是用 addFlashAttribute 方法來設置新的參數爲 flash attribute。
翻譯於 3年前
4人頂
第4步: View 層
add customer.JSP 文件顯示一個 Add New Customer(添加新客戶)表單。
add_customer.jsp
<%@taglib uri="http://www.springframework.org/tags/form" prefix="form"%><html><body>
	<h1>Add New Customer</h1>
	<form:form action="addcustomer.html" method="post" commandName="customer">
	<table>
		<tr>
			<td><form:label path="firstname">Firstname</form:label></td>
			<td><form:input path="firstname" /> </td>
		</tr>
		<tr>
			<td><form:label path="lastname">Lastname</form:label></td>
			<td><form:input path="lastname" /> </td>
		</tr>
		<tr>
			<td><form:label path="age">Age</form:label></td>
			<td><form:input path="age" /> </td>
		</tr>
		<tr>
			<td><form:label path="email">Email</form:label>
			<td><form:input path="email" /> </td>
		</tr>
		<tr>
			<td colspan="2"><input type="submit" value="Add Customer" />
			</td>
		</tr>
	</table>
	</form:form></body></html>
show_customer.jsp 簡單地顯示客戶的名和姓,以及用 flash attributes 設置的成功信息。
show_customer.jsp
<%@taglib uri="http://www.springframework.org/tags/form" prefix="form"%><html><body><h1>${message}</h1>
	${customer.lastname}, ${customer.firstname} added successfully..</body></html>
Demo:
執行這個 web 項目即可。
URL: http://localhost:8080/SpringMVC_Flash_Attribute_Maven_example/form.html

本站所有代碼來源請查看:minglisoft.cn/technology