


部署步驟:
1. 添加相關的DNS記錄(針對內部移動功能lyncdiscoverinternal.gotit.com/外部移動功能lyncdiscover.autonavi.com);
2. 安裝 2011 年 11 月版的 Lync Server 2010 累積更新:
Stop-CsWindowsService
net stop w3svc
運行LyncServerUpdateInstaller.exe.
http://www.microsoft.com/en-us/download/details.aspx?id=11551
重啓服務器;
Stop-CsWindowsService
net start w3svc
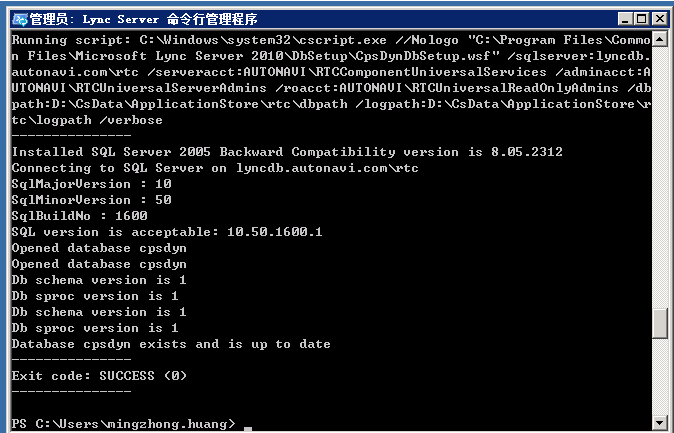
3. 通過執行以下操作之一將 LyncServerUpdateInstaller.exe 進行的更改應用於 SQL Server 數據庫:
如果未將 Enterprise Edition 後端服務器數據庫與任何其他數據庫(如存檔數據庫或監控數據庫)並置,請在命令行處鍵入以下命令:
Install-CsDatabase -Update -ConfiguredDatabases -SqlServerFqdn lyncdb.gotit.com
Or
如果已將 Enterprise Edition 後端服務器數據庫與任何其他數據庫(如存檔數據庫或監控數據庫)進行了並置,請在命令行處鍵入以下命令:
Install-CsDatabase -Update -ConfiguredDatabases -SqlServerFqdn lyncdb.gotit.com -ExcludeCollocatedStores
4. 重新啓動 Lync Server 服務。在命令行中鍵入:
Start-CsWindowsService
5. 設置內部/外部服務器端口以實現移動功能(池服務器)
設置內部服務器端口以實現移動功能
Set-CsWebServer –Identity lyncpool.autonavi.com –McxSipPrimaryListeningPort 5086
設置外部 Web 服務的端口。在命令行中鍵入:
Set-CsWebServer –Identity lyncpool.autonavi.com –McxSipExternalListeningPort 5087
發佈拓撲:
Enable-CsTopology -verbose
6. 安裝 Mobility Service 和自動發現服務
安裝 IIS 模塊
Import-Module ServerManager
Add-WindowsFeature Web-Server, Web-Dyn-Compression
如果使用的是 Internet Information Services (IIS) 7.0,則需要執行額外的步驟才能更改某些 ASP.NET 設置。如果使用的是 IIS 7.5,則安裝程序會爲您自動更改這些設置。
使用文本編輯器(如記事本)打開 applicationHost.config 文件,位置爲 C:\Windows\System32\inetsrv\config\applicationHost.config
7. 安裝 Mobility Service 和自動發現服務將 McxStandalone.msi 複製到 C:\ProgramData\Microsoft\Lync Server\Deployment\cache\4.0.7577.0\setup
啓動 Lync Server 命令行管理程序:依次單擊“開始”、“所有程序”和“Microsoft Lync Server 2010”,然後單擊“Lync Server 命令行管理程序”。運行如下命令: C:\Program Files\Microsoft Lync Server 2010\Deployment\Bootstrapper.exe
如果要將 Mobility Service 限制到內部企業網絡內,請在命令行處鍵入以下命令:
Set-CsMcxConfiguration -ExposedWebUrl Internal
8. 修改證書以實現移動功能
查明已爲服務器分配哪些證書並將這些證書用於哪些類型的使用情況。您在下一個步驟中需要使用此信息來分配更新後的證書。在命令行中鍵入:
Get-CsCertificate
如果爲每種使用情況分配一個單獨的證書(每個證書的 Thumbprint 值不同),則請不要對多種類型運行 Set-CsCertificate cmdlet,這一點很重要。在此情況下,請對每種使用情況單獨運行 Set-CsCertificate cmdlet:
Set-CsCertificate -Type Default -Thumbprint 91F54F82EDAEFF2672F44C1EAFA765AD0662D9CB
Set-CsCertificate -Type WebServicesInternal -Thumbprint 91F54F82EDAEFF2672F44C1EAFA765AD0662D9CB
Set-CsCertificate -Type WebServicesExternal -Thumbprint 91F54F82EDAEFF2672F44C1EAFA765AD0662D9CB
如果 Get-CsCertificate cmdlet 顯示了一個用於默認使用情況的證書、一個用於 WebServicesInternal 的證書和一個用於 WebServicesExternal 的證書,並且這些證書都具有相同的 Thumbprint 值,請在命令行中鍵入:
Set-CsCertificate -Type Default,WebServicesInternal,WebServicesExternal -Thumbprint <Certificate Thumbprint>
9. 驗證您的移動功能部署
在命令行中鍵入:
Test-CsMcxP2PIM -TargetFqdn <FQDN of Front End pool> -SenderSipAddress sip:<SIP address of test user 1> -SenderCredential <test user 1 credentials> -ReceiverSipAddress sip:<SIP address of test user 2> -ReceiverCredential <test user 2 credentials> -v
您可以在腳本中設置憑據並將這些憑據傳送給測試 cmdlet。例如:
$passwd1 = ConvertTo-SecureString "Password01" -AsPlainText -Force
$passwd2 = ConvertTo-SecureString "Password02" -AsPlainText -Force
$tuc1 = New-Object Management.Automation.PSCredential("contoso\UserName1", $passwd1)
$tuc2 = New-Object Management.Automation.PSCredential("contoso\UserName2", $passwd2)
Test-CsMcxP2PIM -TargetFqdn pool01.contoso.com -SenderSipAddress sip:[email protected] -SenderCredential $tuc1 -ReceiverSipAddress sip:[email protected] -ReceiverCredential $tuc2 -v